

Introduction
ChatCompose is a platform that allows you to create your own chatbots, design conversation scripts, and install your chatbot in the most popular channels to generate leads, automate customer support and improve customer experience.
How to use ChatCompose
First of all, you must register on the platform to obtain an account and access.
You can register here.
Content
1. How to set up a chatbot
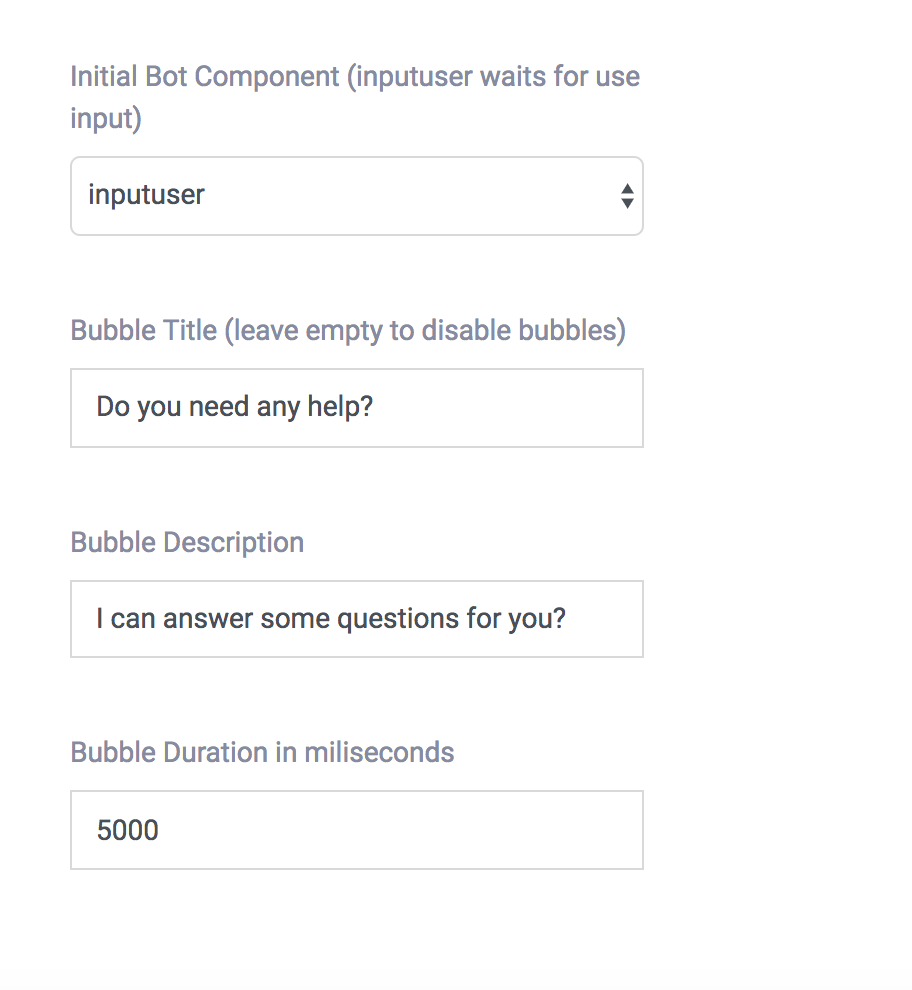
The first thing your chatbot will need is a name. To configure your chatbot, go to Settings > General and edit the default name of your bot.
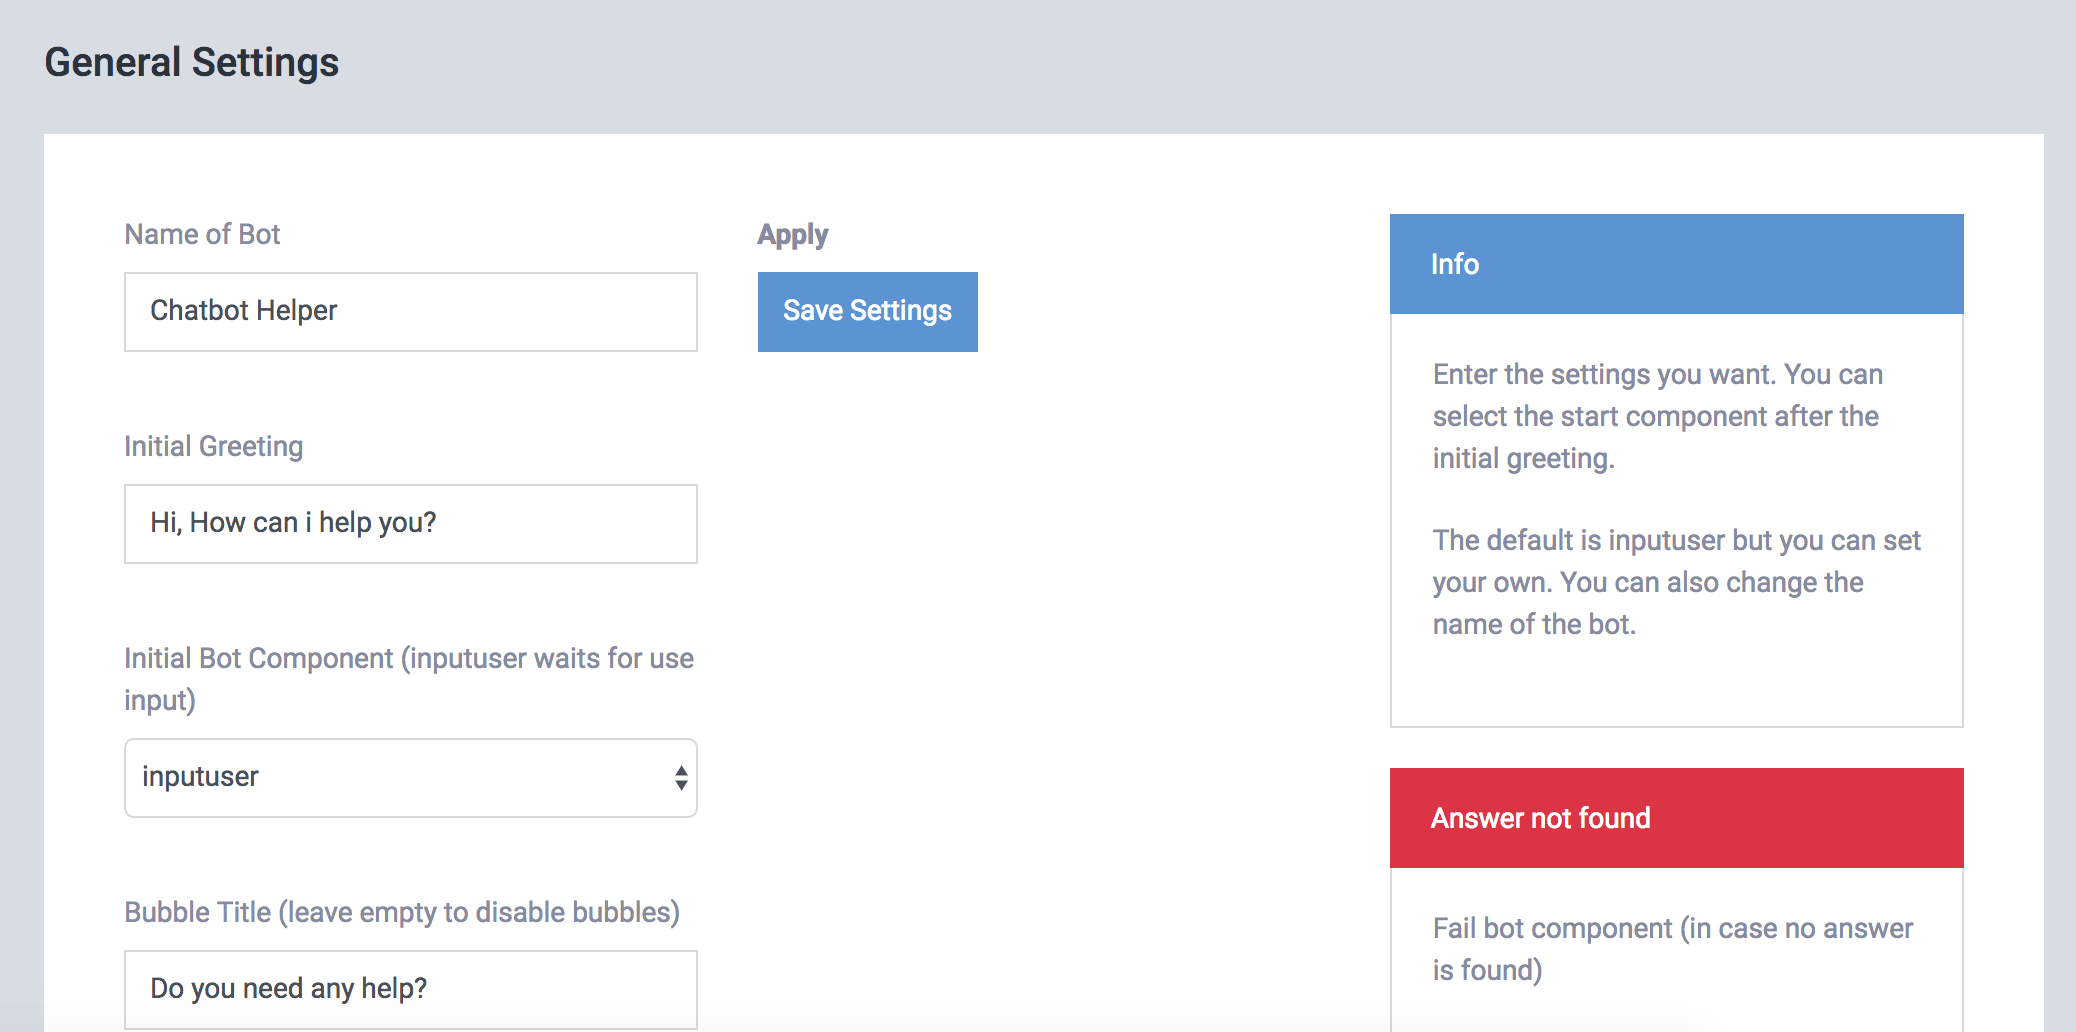
You can also change the notification message (bubble pop-up) to a personalized message for your site that can attract more clicks and interactions with your bot.
Customize your Chatbot
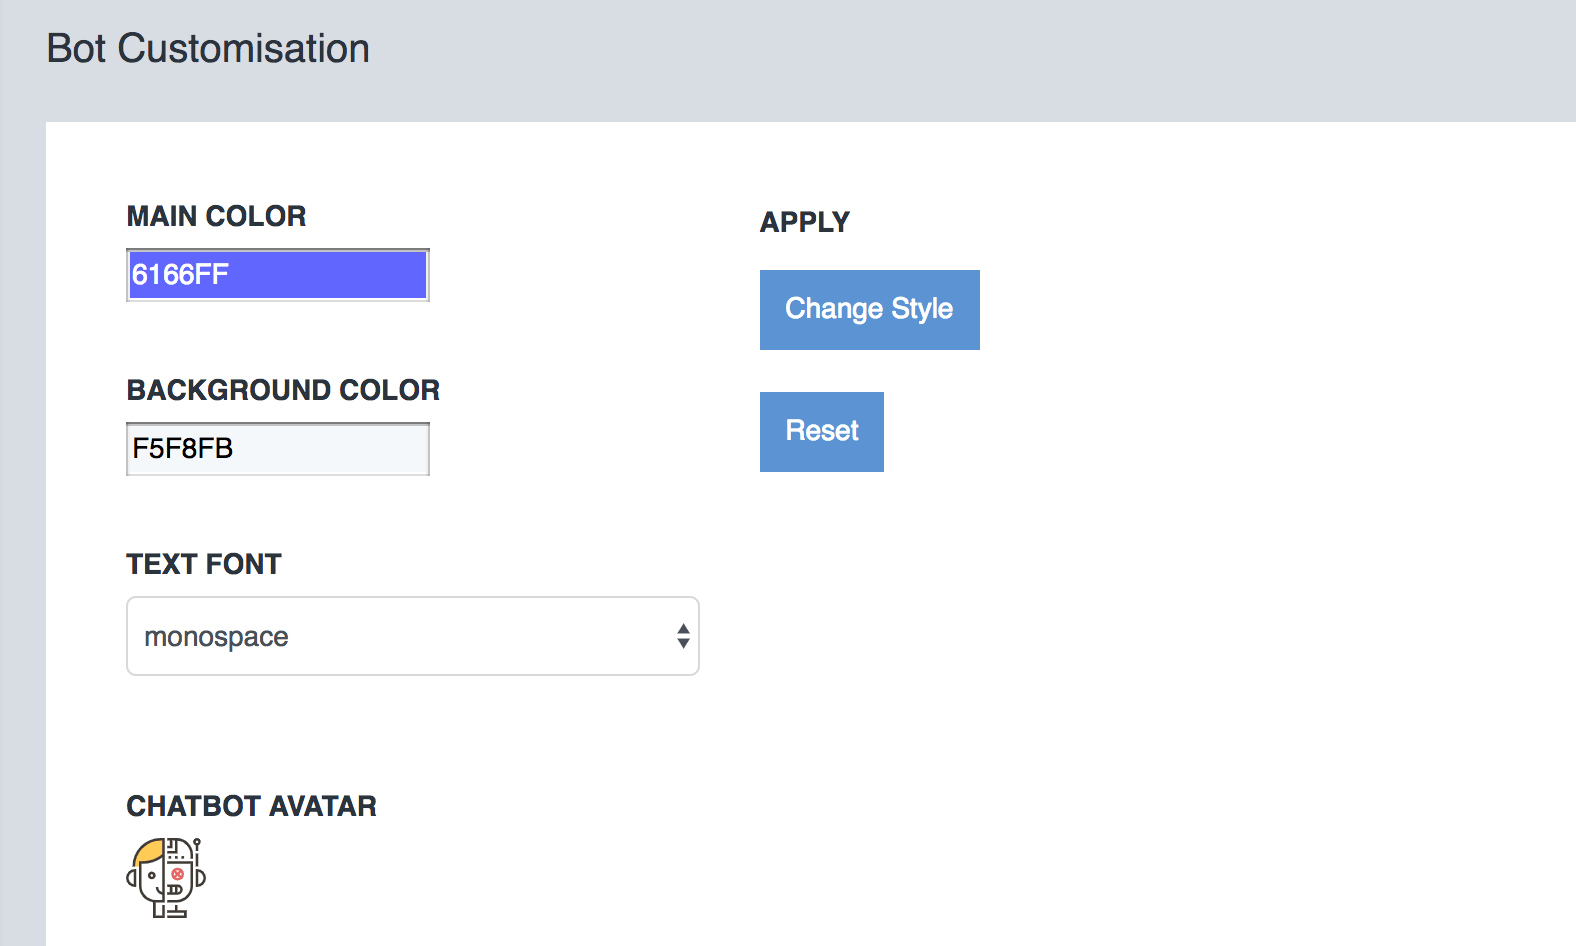
The next thing you want to do is customize the style by changing the color and image to your chatbot. For that you must access Settings > Customization.
You can edit and try different styles until you find the one that best fits your site.
Use Cases
In the ChatBots> Use Cases section, you can assign a predefined use to your bot. You have the following options:
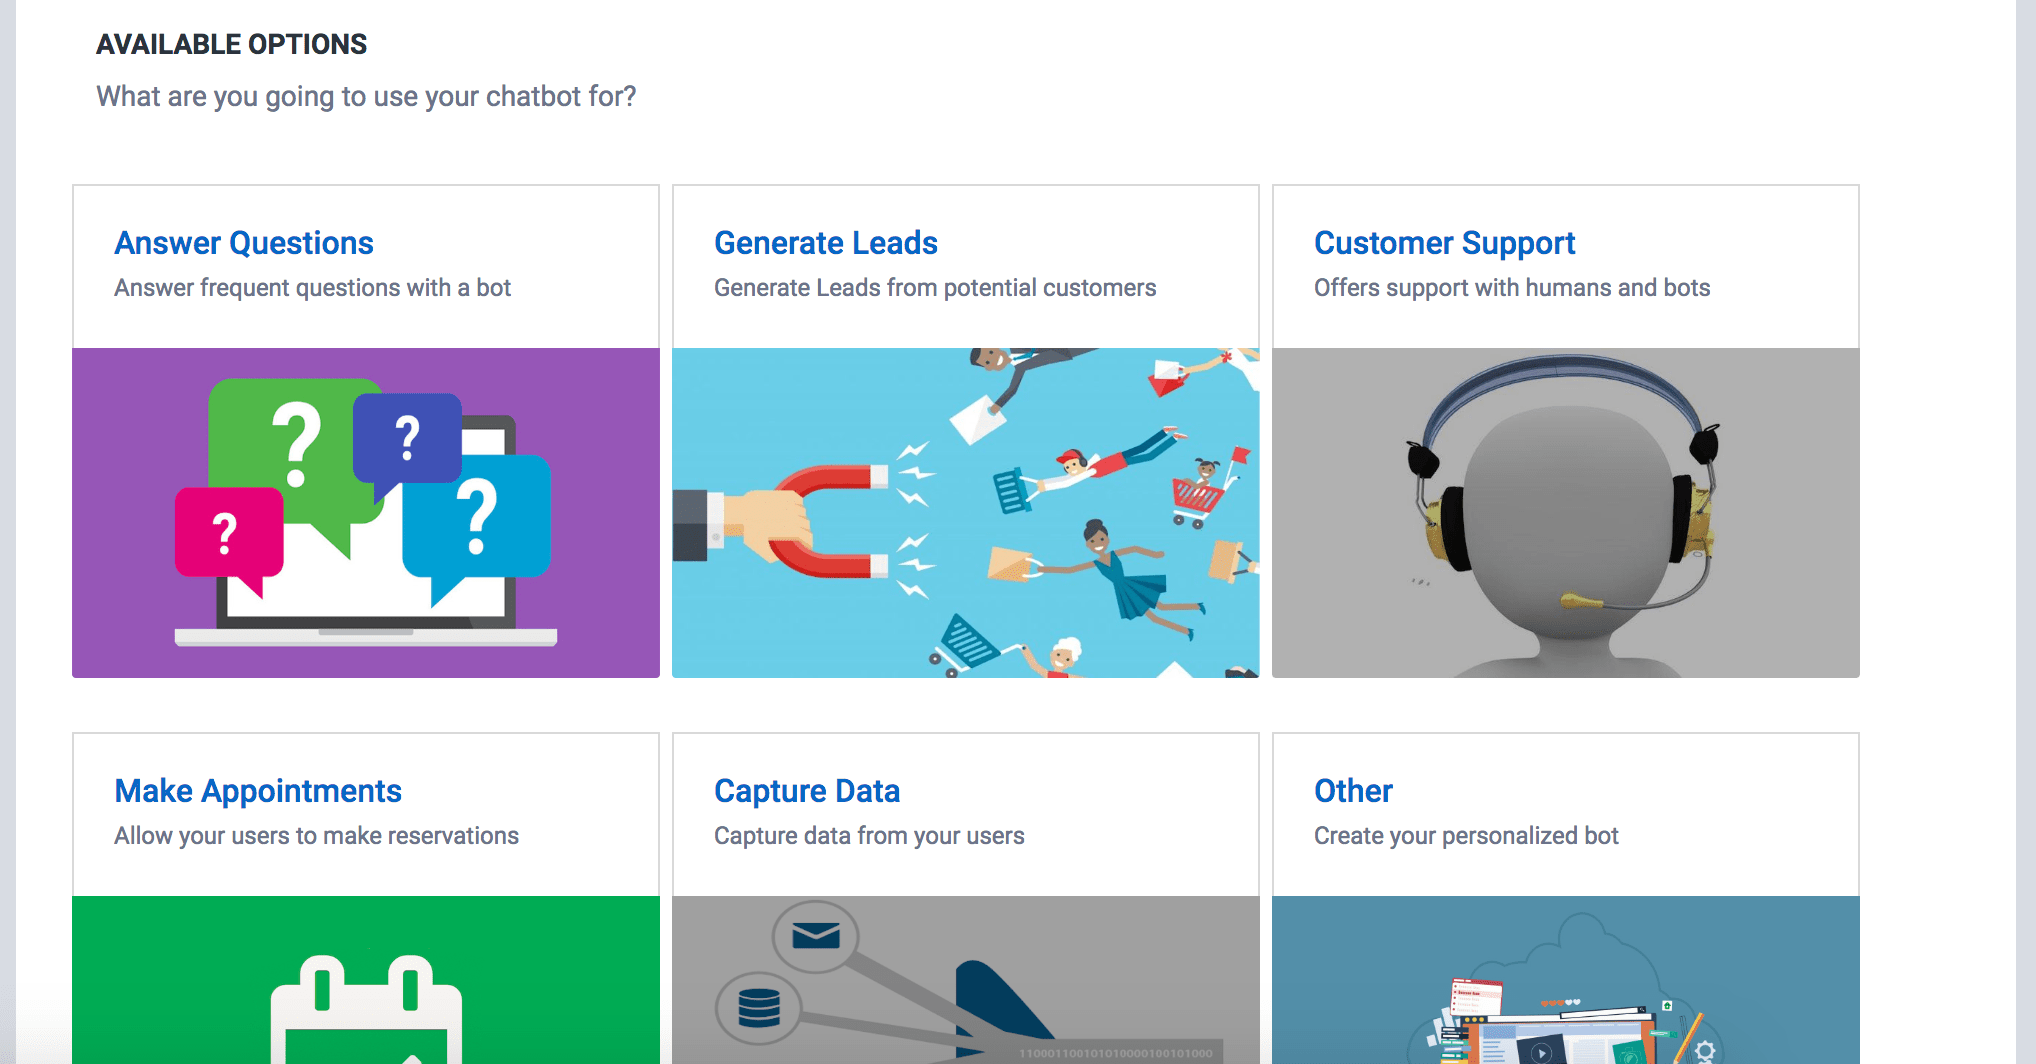
You can upload chatbots with a specific purpose and then install them on your preferred site, application or communication channel. Click on a use case, edit the text inside the components (boxes) and save.
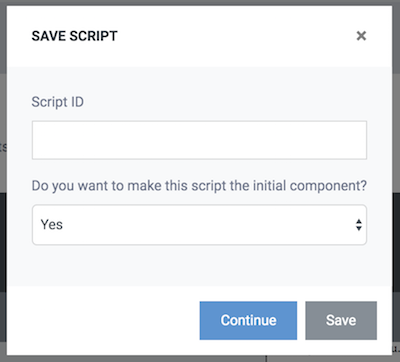
If you want this use to appear by default in your Bot, enter a unique name to that script and check "Yes" in Do you want to make this script the initial component ?.
2. How to add your answers
To train your chatbot with your answers you have three options.
- Use your own pairs of questions and answers
- Load a Subject
- Import your Questions and Answers
For more information read the guide to train your chatbot with answers.
3. How to create scripts
A script is a message / set of previously stored messages, or previously written sentences that guide the direction in a specific conversation.
You can create your own conversational scripts with our graphical interface. You only need to enter components and choose routes to design your script.
For more information read the guide to design conversational scripts.
4. How to install a chatbot
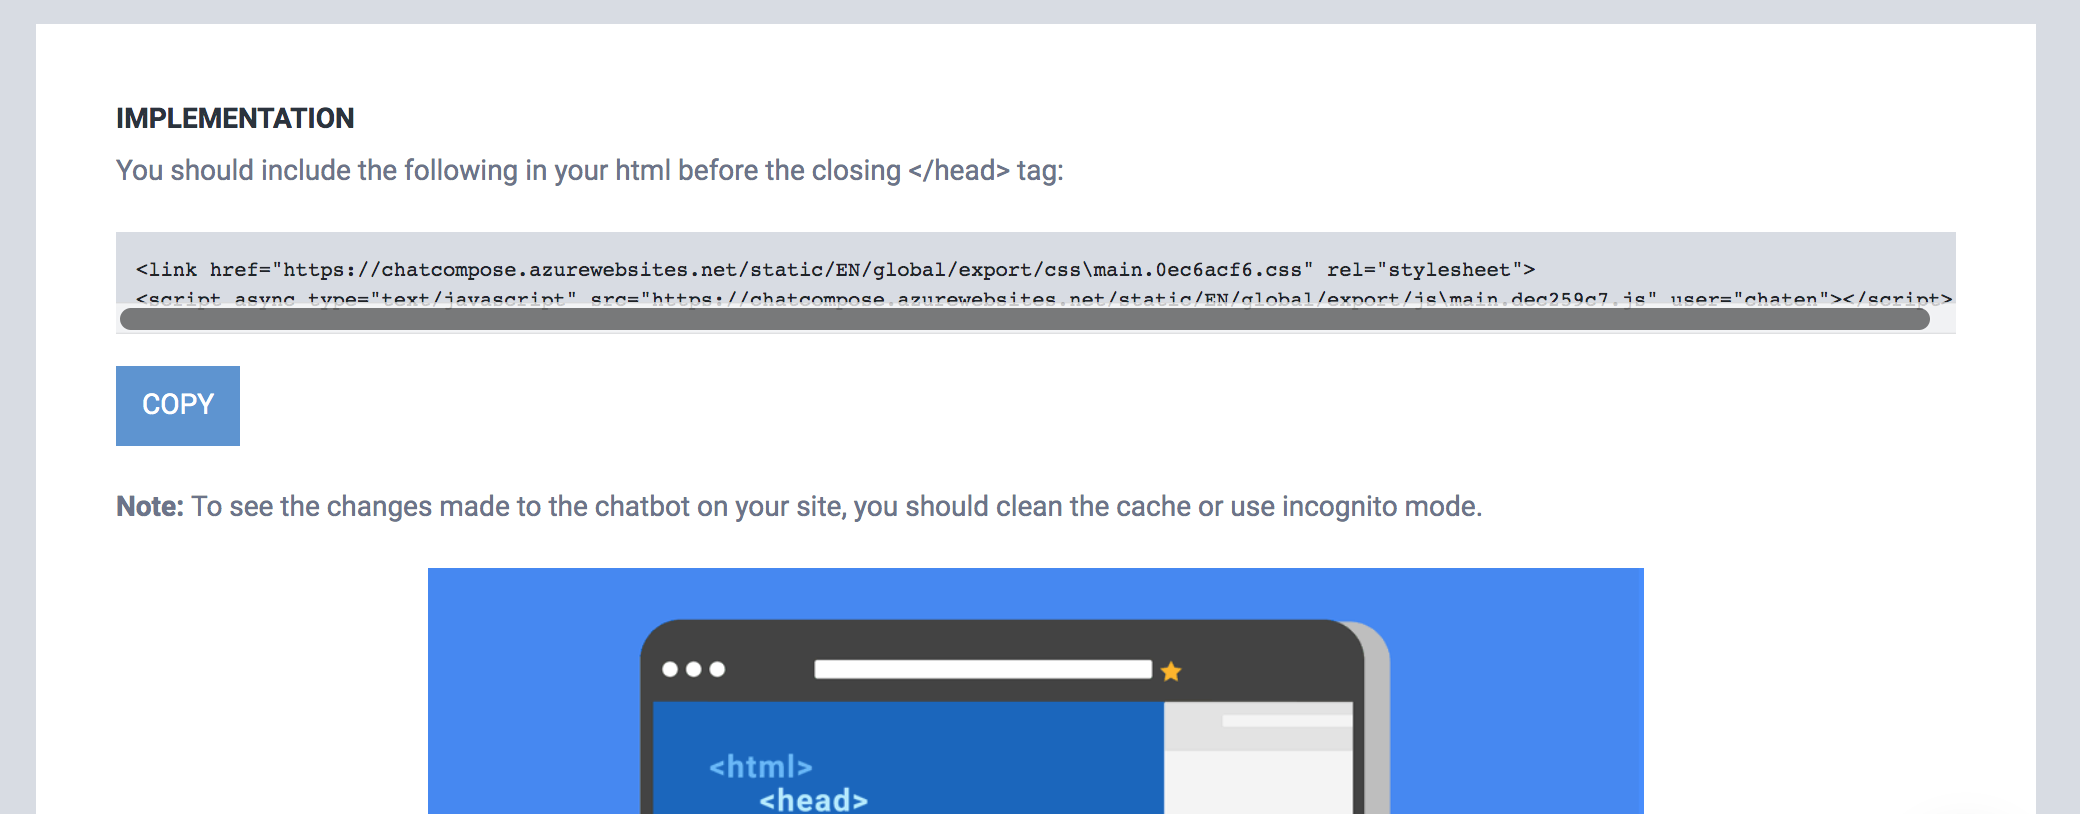
To install the chatbot your site you must insert some lines of code inside your site or CMS like Wordpress, Drupal or Joomla.
You can also install it on other systems depending on the ability you have to modify the template or template of the site.
You can check the code to paste in Install > Web.
You also have the option to download the plugins for:
5. Integrations
ChatCompose has the following integrations available. (Click on the link to see the integration guide)
- Slack
- Telegram
- Whatsapp (beta)
- Android/iOS
- Phone
- Desktop
- ChatCompose API (CRM, other)
6. Components
The interface allows you to show components during a conversation with your users. Some options are:
- Message : Displays a simple text message to the user
- Option : To show options selectable by the user.
- Form : To collect important data from your users.
- HTML : To show items designed by you.
- Media : Send photos, videos and files to your users.
- Payment : Allows you to create payments to be made for your users (with PayPal).
- Reservations : Show your availability for reservations.
- LiveChat : Talk to your users Live.
- External connection : Shows external service data.
- Transfer : Transfer the conversation to another service.
- Condition : Filter and evaluate user responses.
- Location : Send a Map Location.
- Web Service : Call web services to display text, image or links.
- Email (Premium Service) : Send emails with more instructions or more information.
- Call (Premium Service): Create a call between you and the user.
You can enter components using the script creation interface or create it individually from Components> Create Component. If you create a component individually, you will also need to create a unique identifier.
Then in the answers section you can enter that identifier to answer questions with components instead of text.
7. External connection
ChatCompose allows you to connect your chatbot to external data sources. To make the connection you need to open or have access to an API interface of that data.
The external connection works by calling this api to fetch the data that you request with some input parameters. You have two connection options, API get and API post.
For more information read the external api connection guide.
8. Leads and Contacts
ChatCompose allows you to capture or save important data using the form component. Using these components, you can make inquiries to your users and save this data in the Leads section.
Each time a user executes or terminates a form component, their data will be saved in a sheet format so that you can see it in the Leads section.
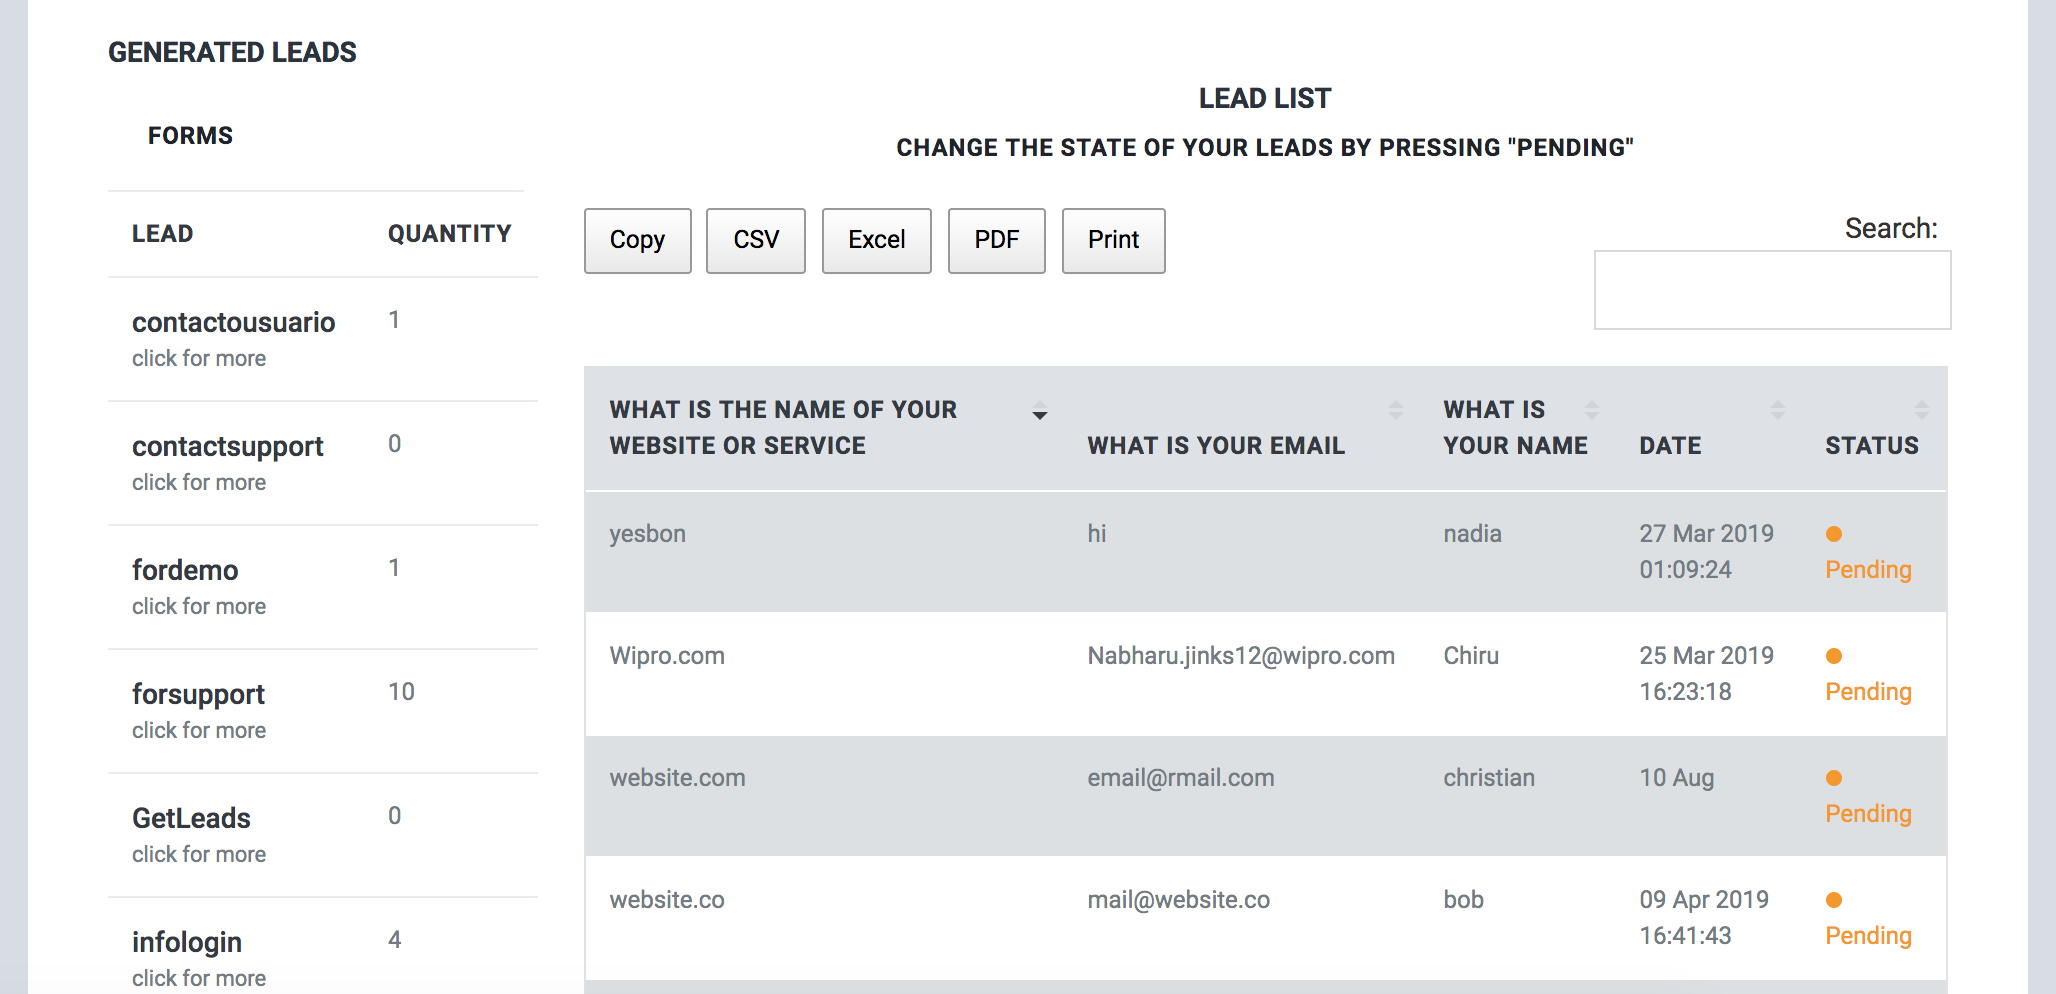
This data will appear in the Leads section with the name of the form.
You can use this component to save survey data, qualified leads, purchase orders and support or contact requests.
If your company is in education, you can also use this component to test and exam your students.
9. Reservations and Appointments
A reservation system through a chatbot is a fun and interactive way to allow your potential clients to book appointments or make reservations based on availability without leaving your website or Facebook page.
Customers can navigate through a tree of options for your services, answering questions according to their preferences to receive relevant recommendations and make reservations, all within a chatbot.
For more information read the guide for booking Reservations and Appointments with ChatCompose.
10. Live Chat
Live Chat is not only a good way for companies to communicate with their customers, there are many more advantages for the company to benefit from live chat. The sales team, for example, can see a large increase in leads and sales.
For more information read the guide for implementing Live Chat with ChatCompose.
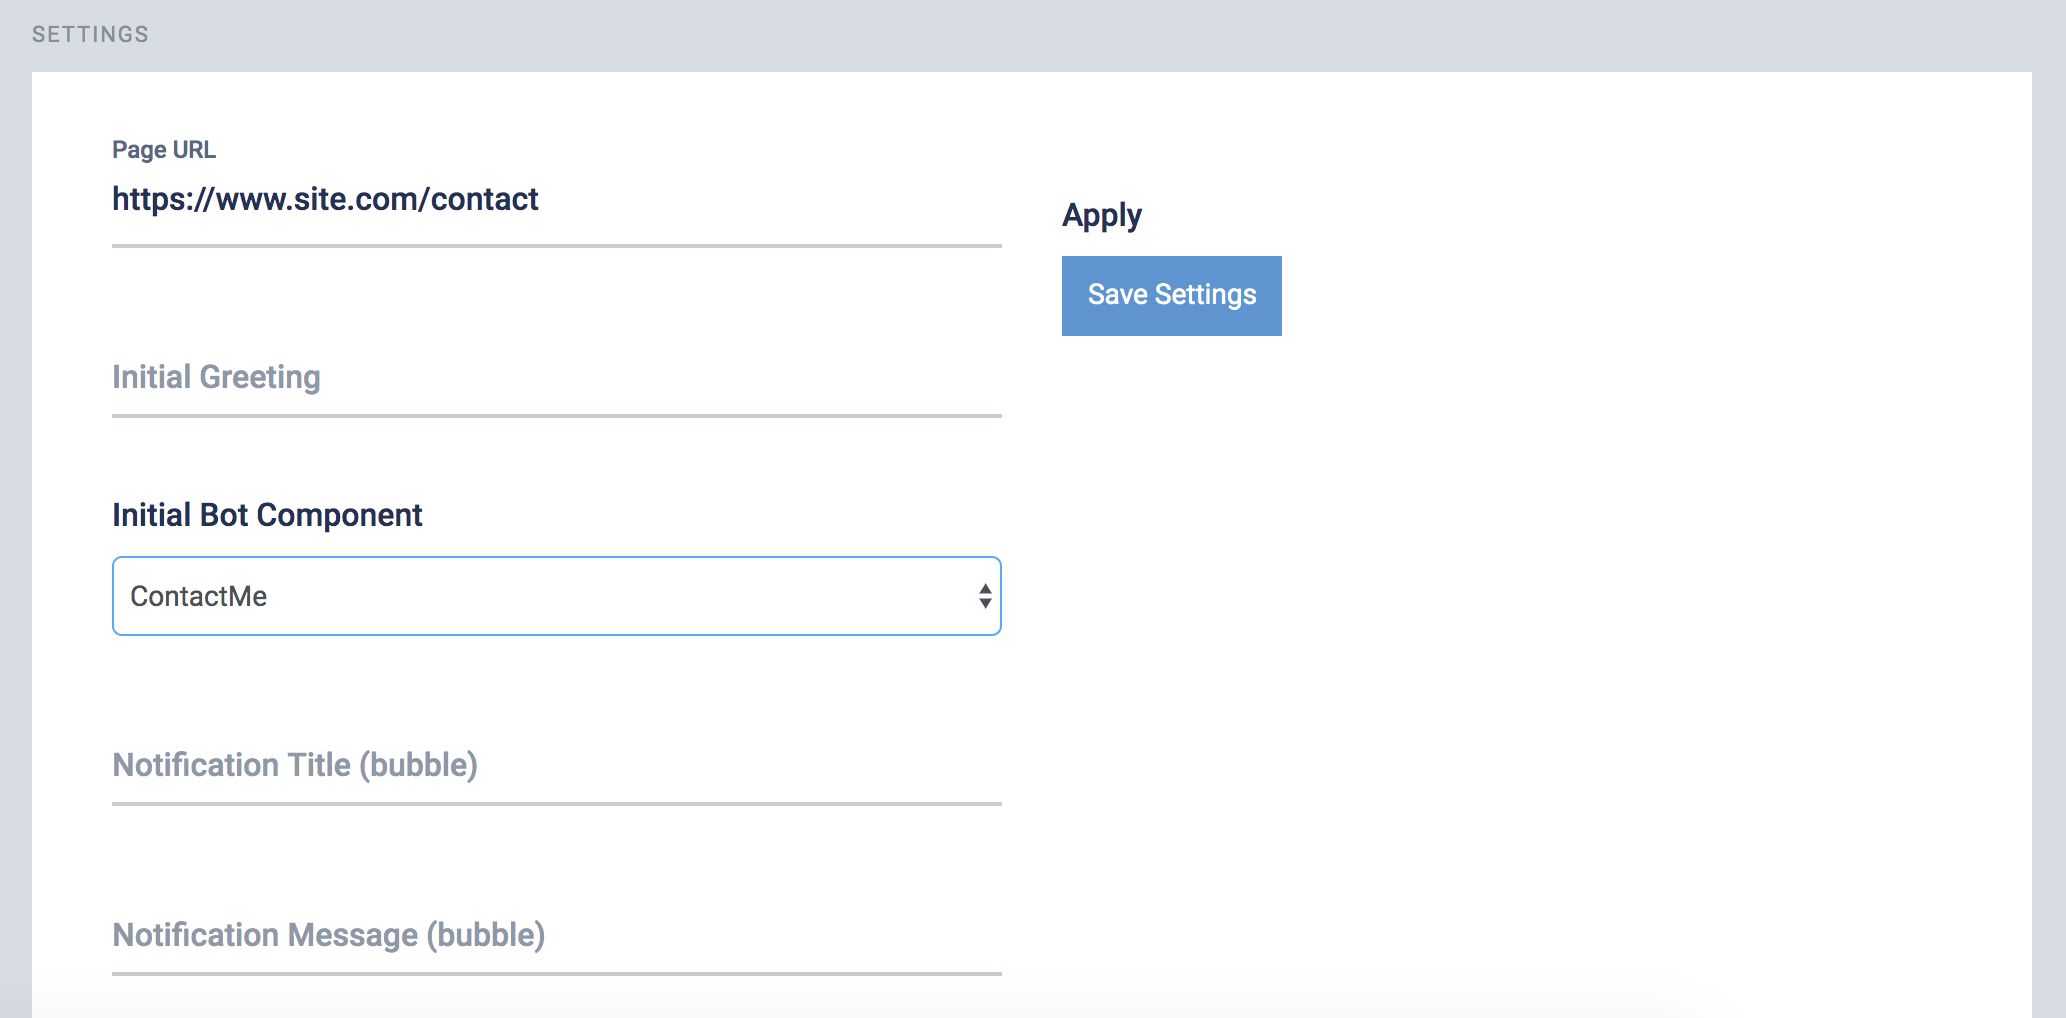
11. Page Configuration
You can create an individual configuration for your chatbot to appear on specific pages using this option.
If you need to give a different name to your bot, or load a specific script for a section of your site you can configure these options in Settings > Pages.
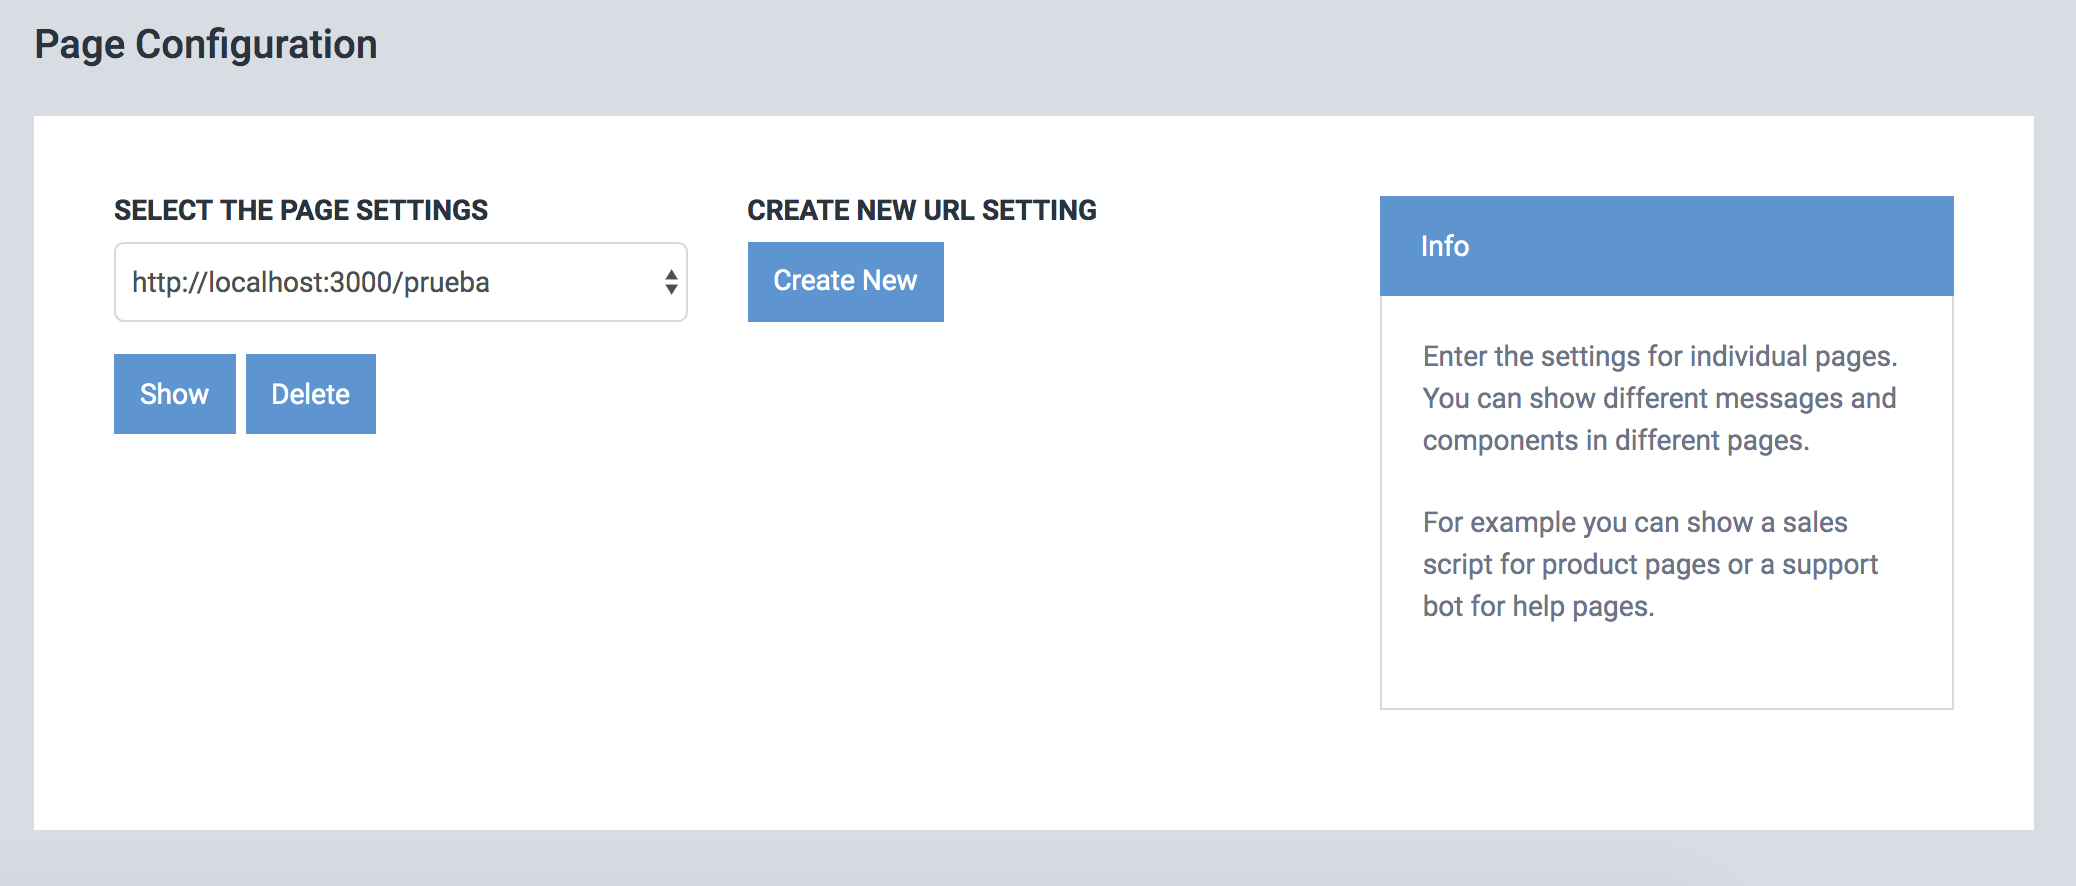
You only need to press "Create new" and complete the form to install it.
For example, if you want to load a simple contact script for the contact section of your site, create the script, and set it as an initial component for that url.
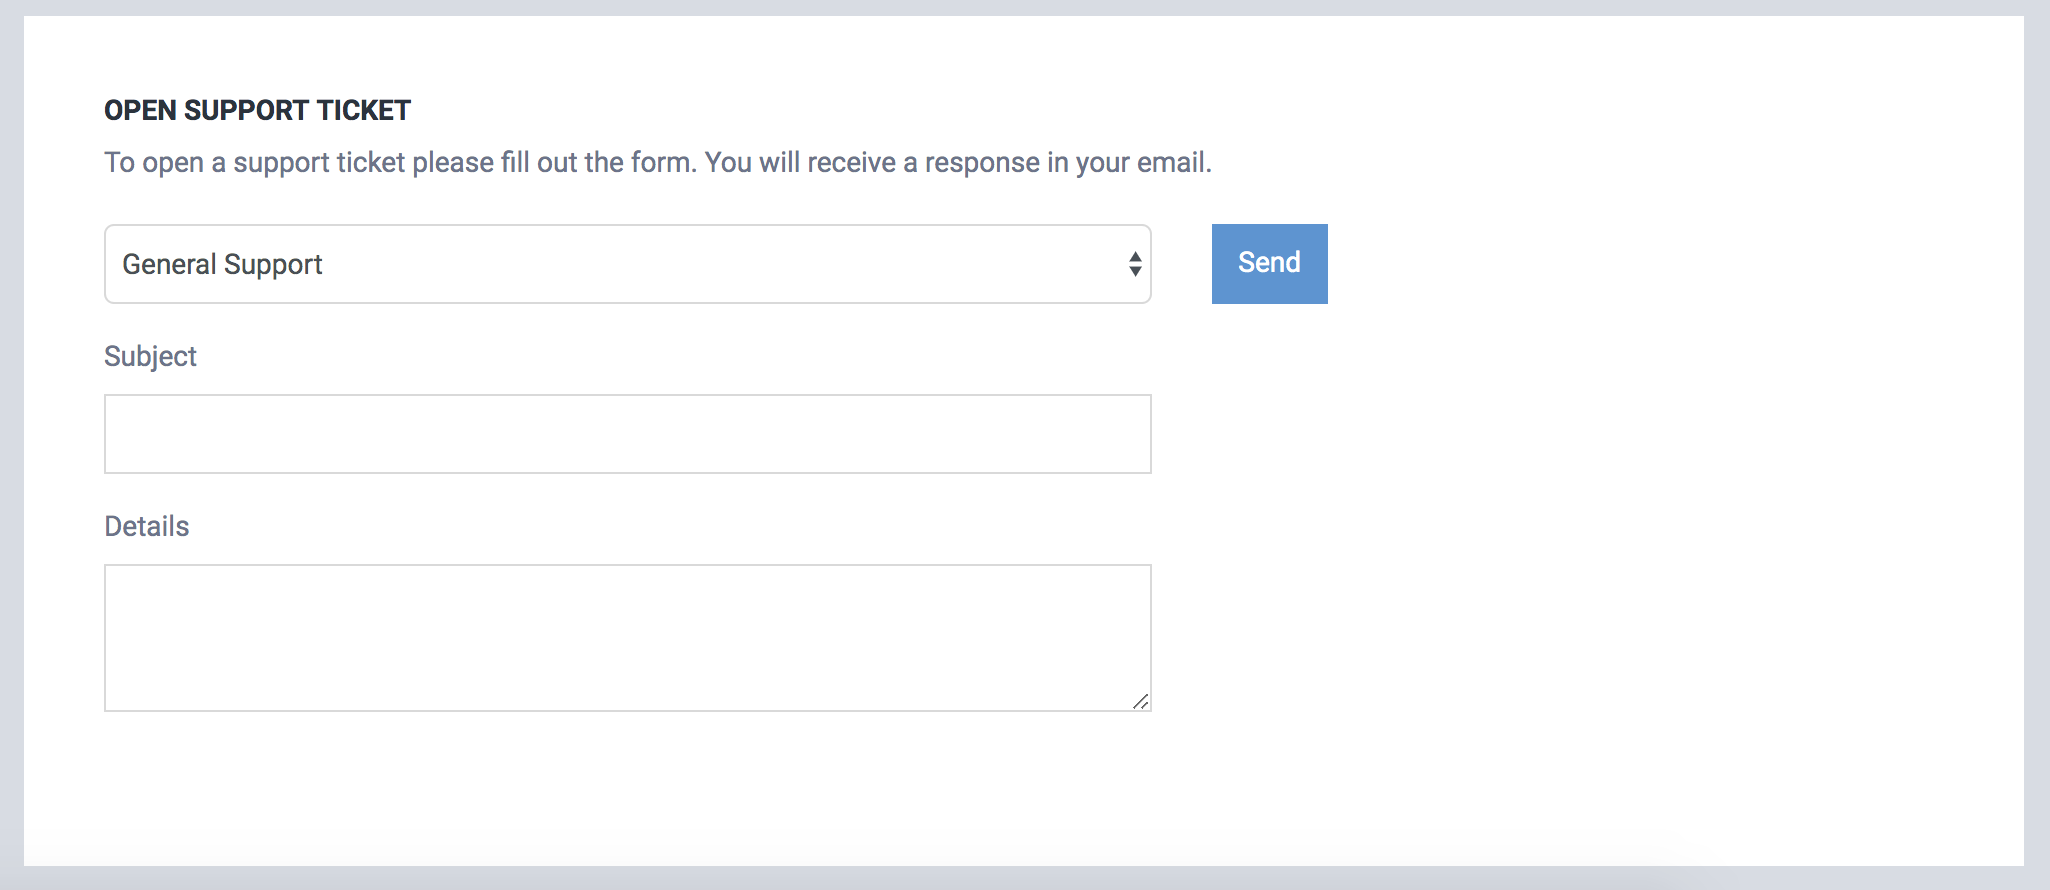
12. Support Ticket
You can create tickets to receive technical support or special orders in this section.
Fill in the necessary fields and we will respond to your account email.
13. How to use the panel
Each bot and ChatCompose account has its own panel and its own navigation bar.
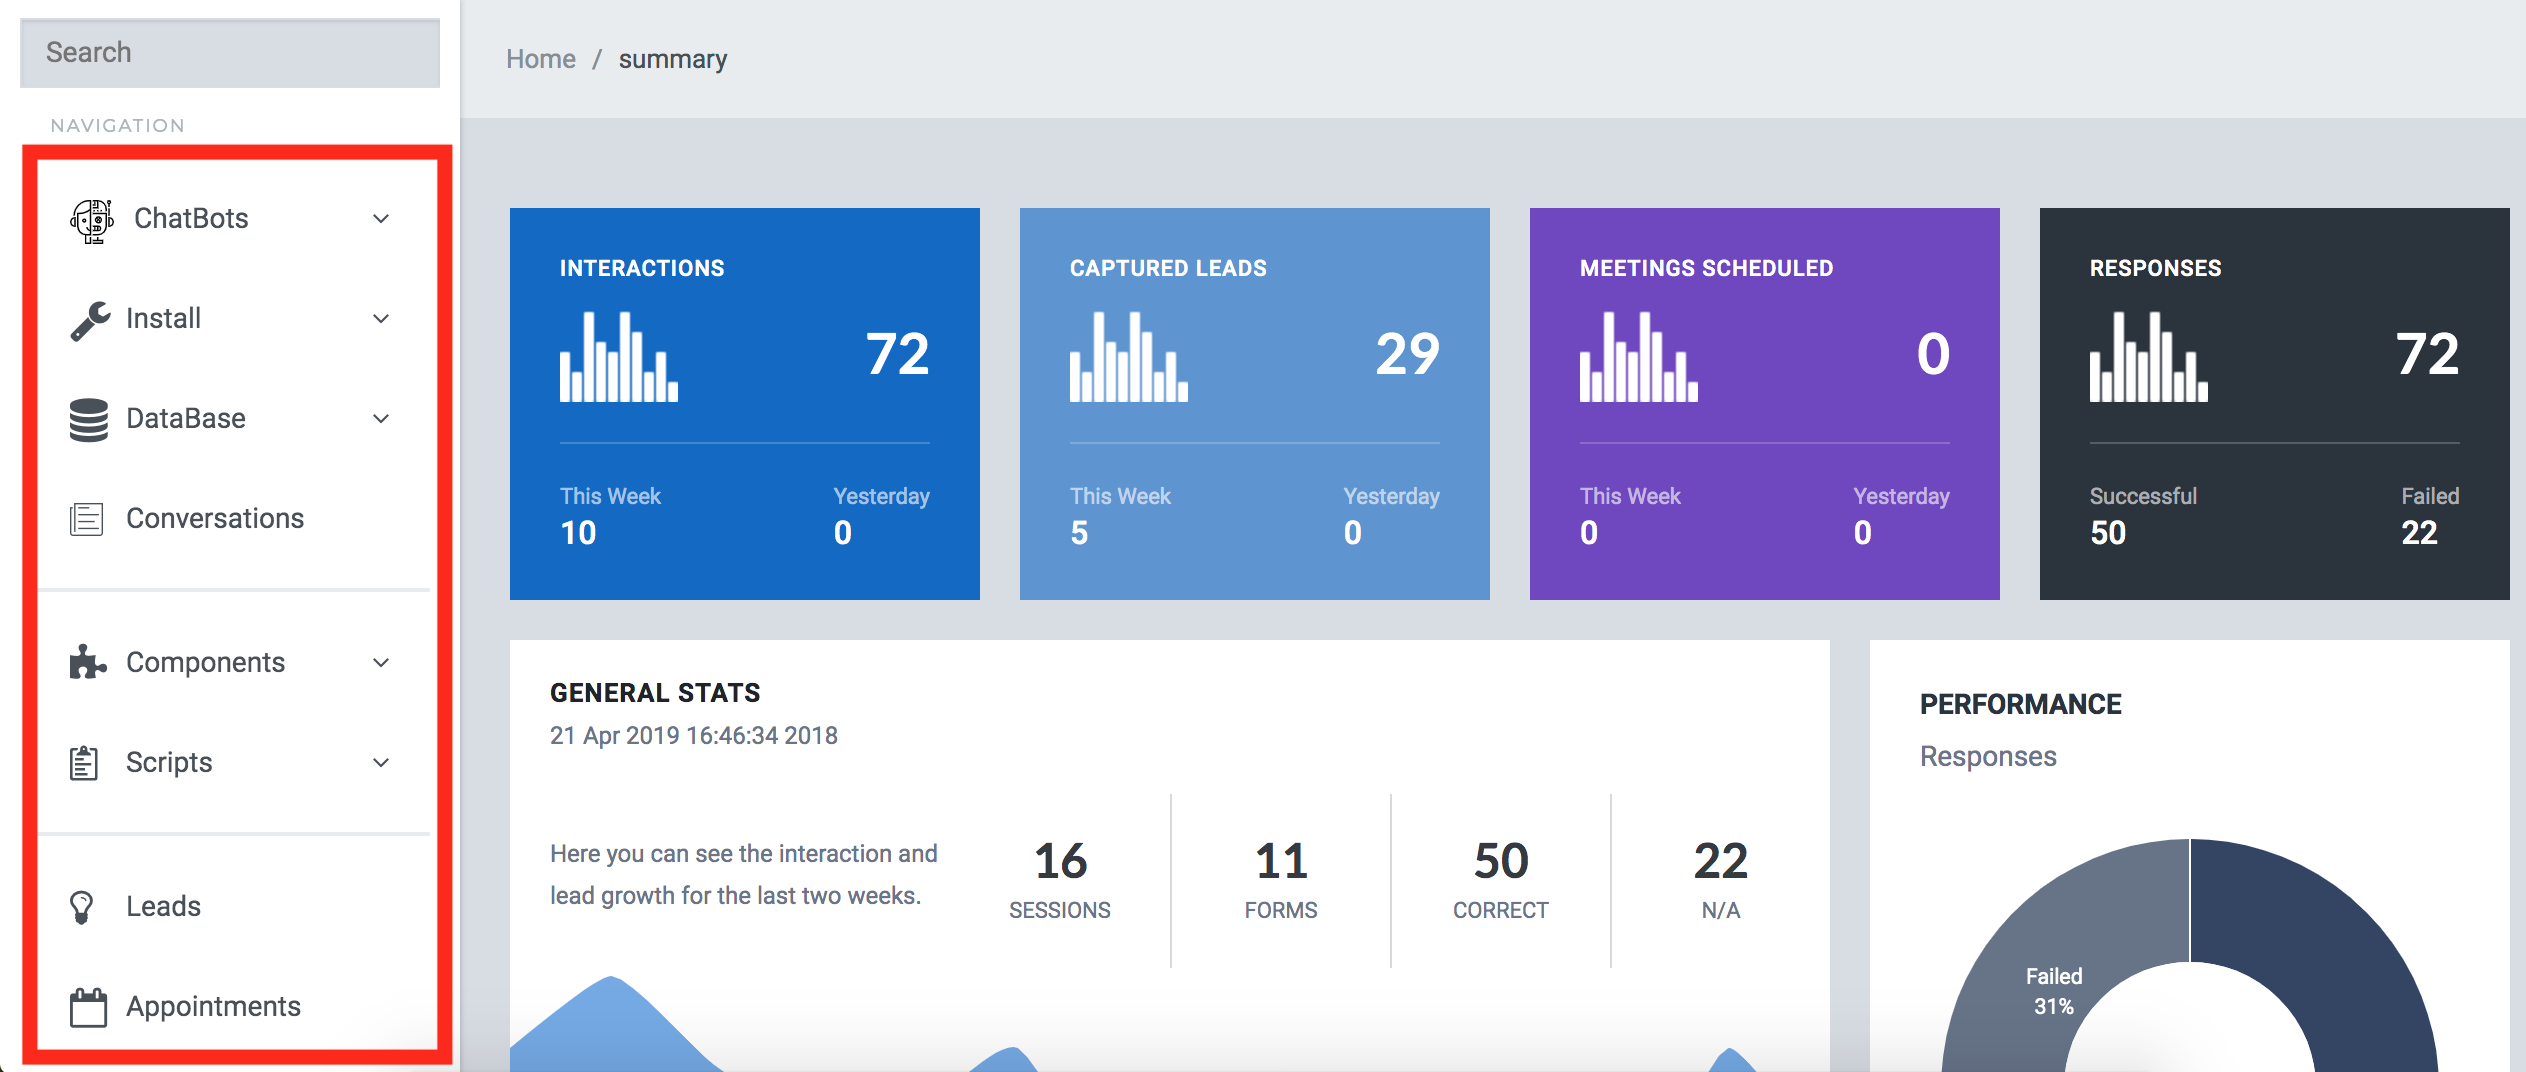
ChatBots
- Create New (create a new bot for your account)
- Use Cases (set a use for your current bot)
- Test Url (check how your bot will look)
My Bots (switch between your bots)
- default
- chatbot1
Install
- Web (web installation options for your bot)
- Integrations (available integrations for your current bot)
DataBase
- Responses (set the responses for your bot)
- Subjects(set a new response subject)
- CSV Import (import your responses from a csv)
Conversations (check your bot conversations)
Components
- Create Component (create a new component for your bot)
- External Connection (create a new API based connection)
Scripts
- Create Scripts (create a new conversational script)
- Load Scripts (load an existing script)
Leads (check the data generated by forms)
Appointments (set and check your appointment availability)
LiveChat
- Intervention (intervene a bot conversation)
- Live Support (Live chat of your bot)
Settings
- General (set general information for your bot)
- Pages (set web page configuration for your bot)
- Customisation (customize the style of your bot)
Support Ticket (open a support ticket)
Learn (learn how to use chatcompose section)

