Enable the booking system in your chatbot to schedule appointments, meetings and generate more leads automatically.
A reservation system by chatbot is a fun and interactive way to allow your potential customers to book appointments or make reservations based on availability without leaving your website or Facebook page.
Customers can navigate through a set of options for your services, answering questions according to their preferences to receive relevant recommendations and make reservations, all within a chatbot.
In this guide we show you how to enable the reservation component in your chatbot so you can start scheduling meetings and reservations with just a few clicks.
The reservation system is available for Business accounts, if you do not have one you can try the service 15 days for free.
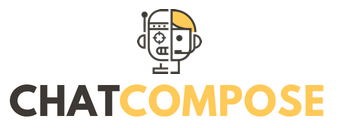
Once registered, access your account and navigate to the Appointments section.
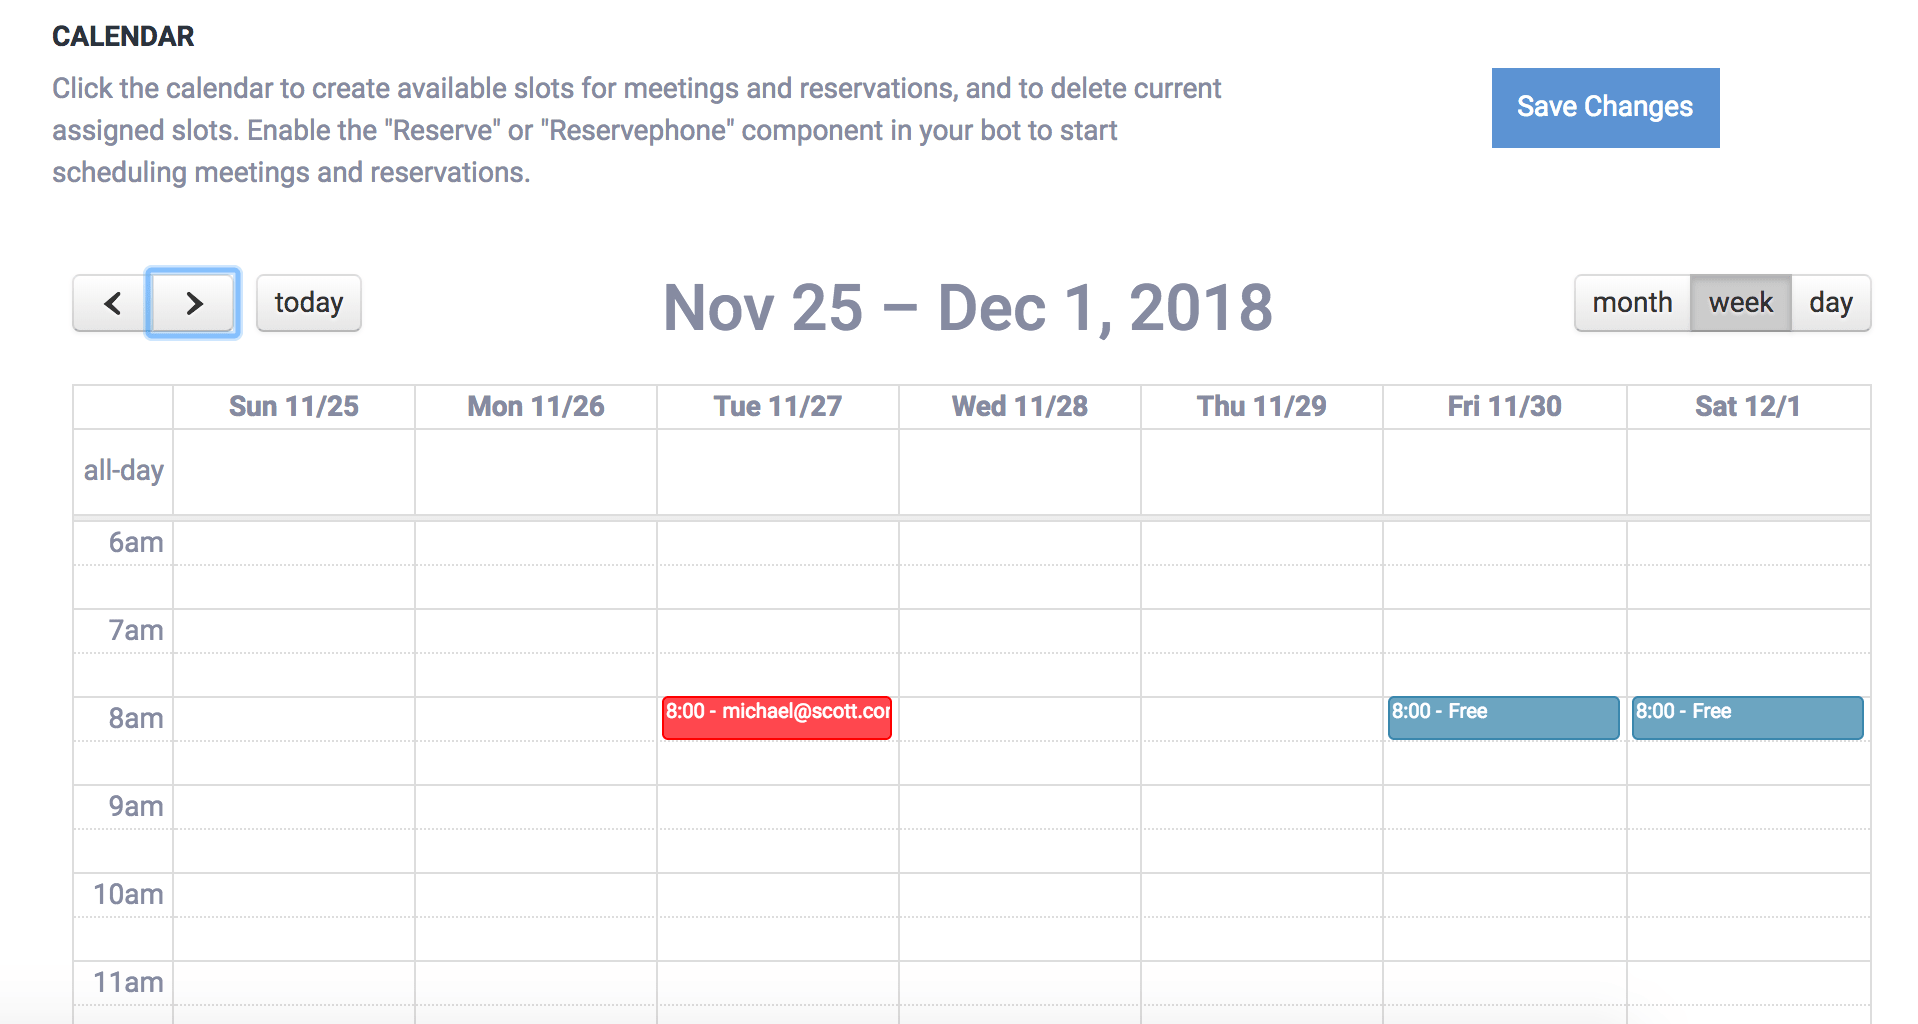
There you can see a calendar of events where you can select and set your available hours in case they are appointment slots, or otherwise the availability of your service.
To open the availability of a schedule, just click on the time slot. By default the appointments are assigned half an hour at a time, but if you want you can create appointments of longer duration simply drag the click for the desired time.
To delete reservations or slots of available schedules simply click on the event.
Once you finish making your changes, click on "Save Calendar" to update your calendar.
ChatCompose works with components, and the reservation system is one of them.
To enable the reservation system within your bot, you must use the "Reserve" component, to make reservations using the user's email and "Reservephone" in case you want your users to make reservations with their phone number.
You can assign the "Reserve" component to appear at the beginning of the conversation with the chatbot in Settings> General or on a specific page in Settings> Pages. Remember to select "Reserve" from the list as the initial component.
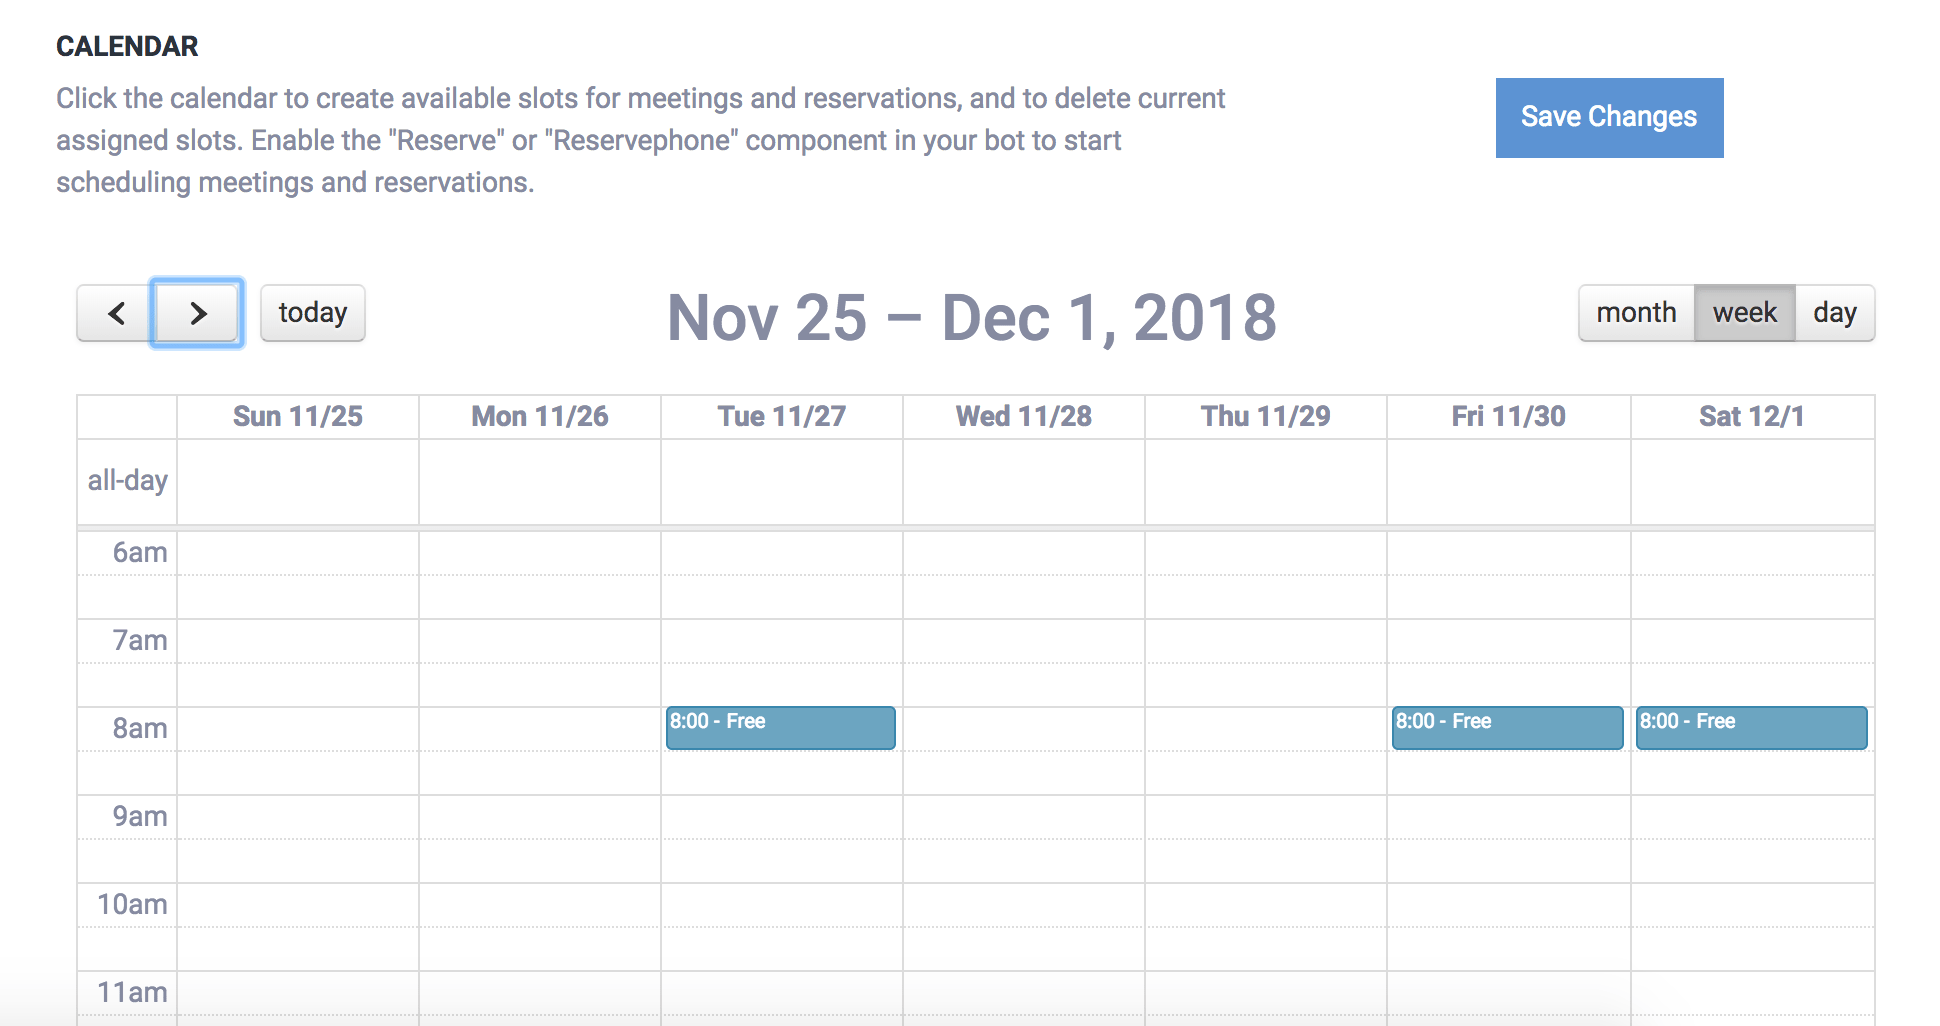
You can also assign the component to make reservations in the Database section. There you can put it in response to a specific question or command, for example "I would like to make a reservation".
If you already know how to make scripts with components, you can also assign the reservation system as part of a more elaborate script.
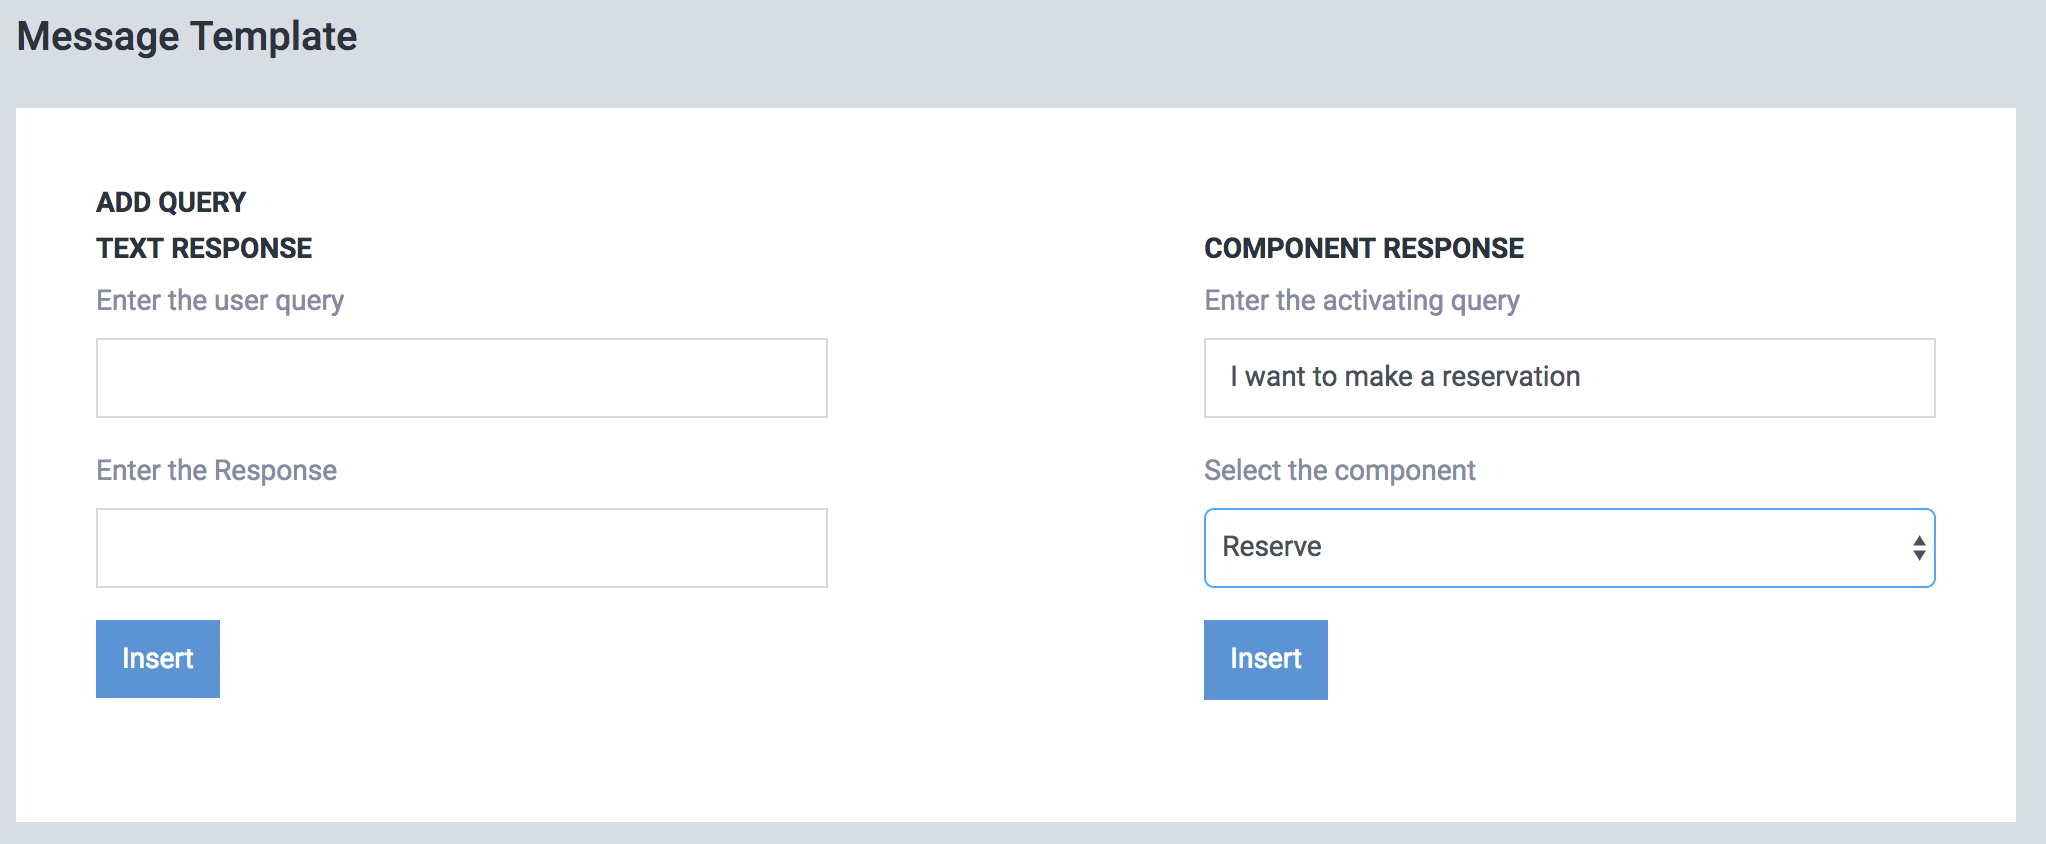
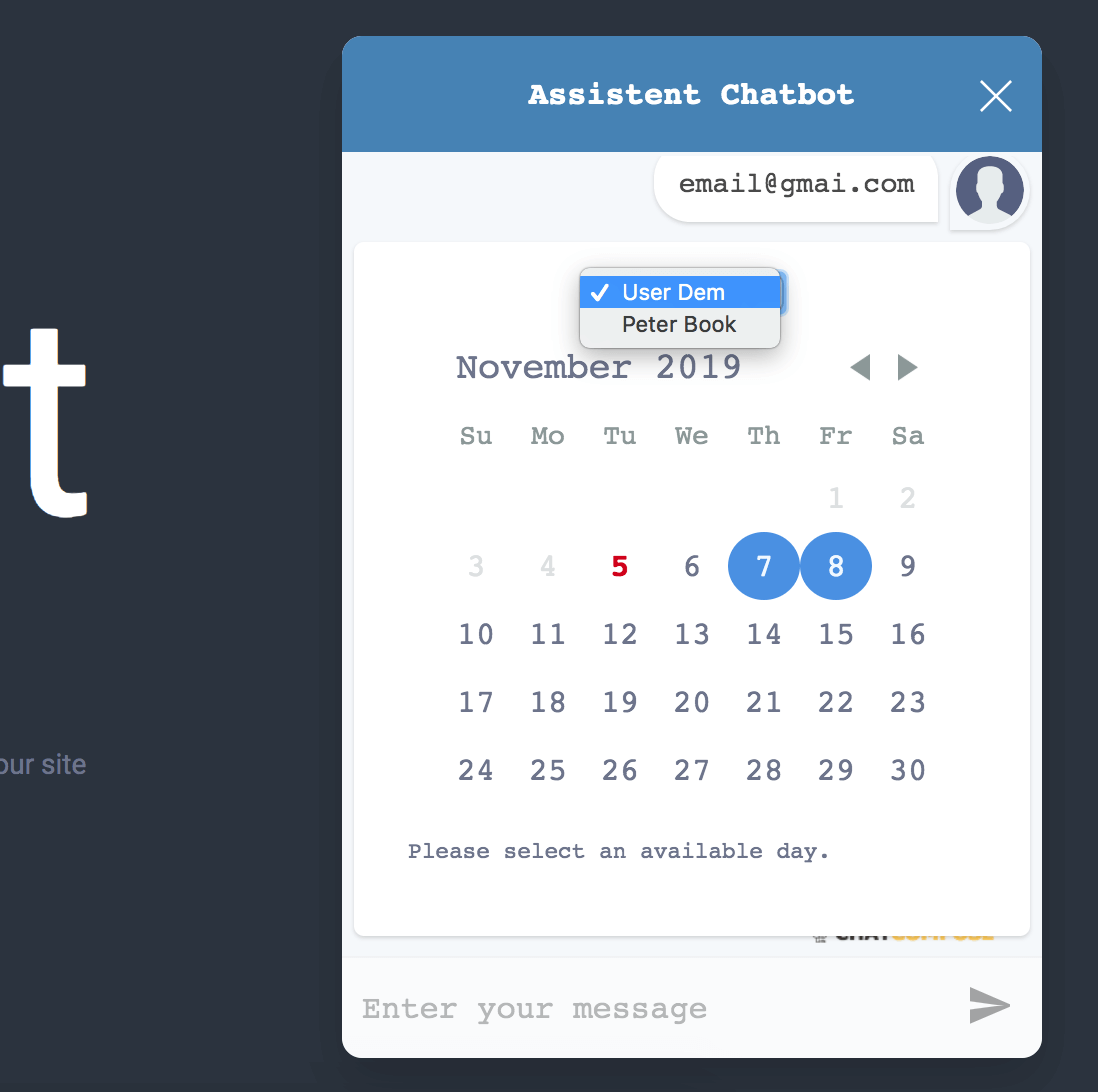
The users of the chatbot, when entering in the Reserve component will see the days that are available and the hours. They can select the day that best suits them (and where there is availability) and make the reservation.
Once a user has made a reservation, you will receive a notification email with the time, name and email/phone of the person who made the reservation.
You will also see it reflected in the reservation system of your panel.
You can use the "Reserve" component inside a script for all the available integrations in ChatCompose, such as Web, Desktop, Messaging Apps (WhatsApp, Telegram, Line, Facebook etc.) and Phone.
You can also configure automatic calls to book reservations my making phone calls.
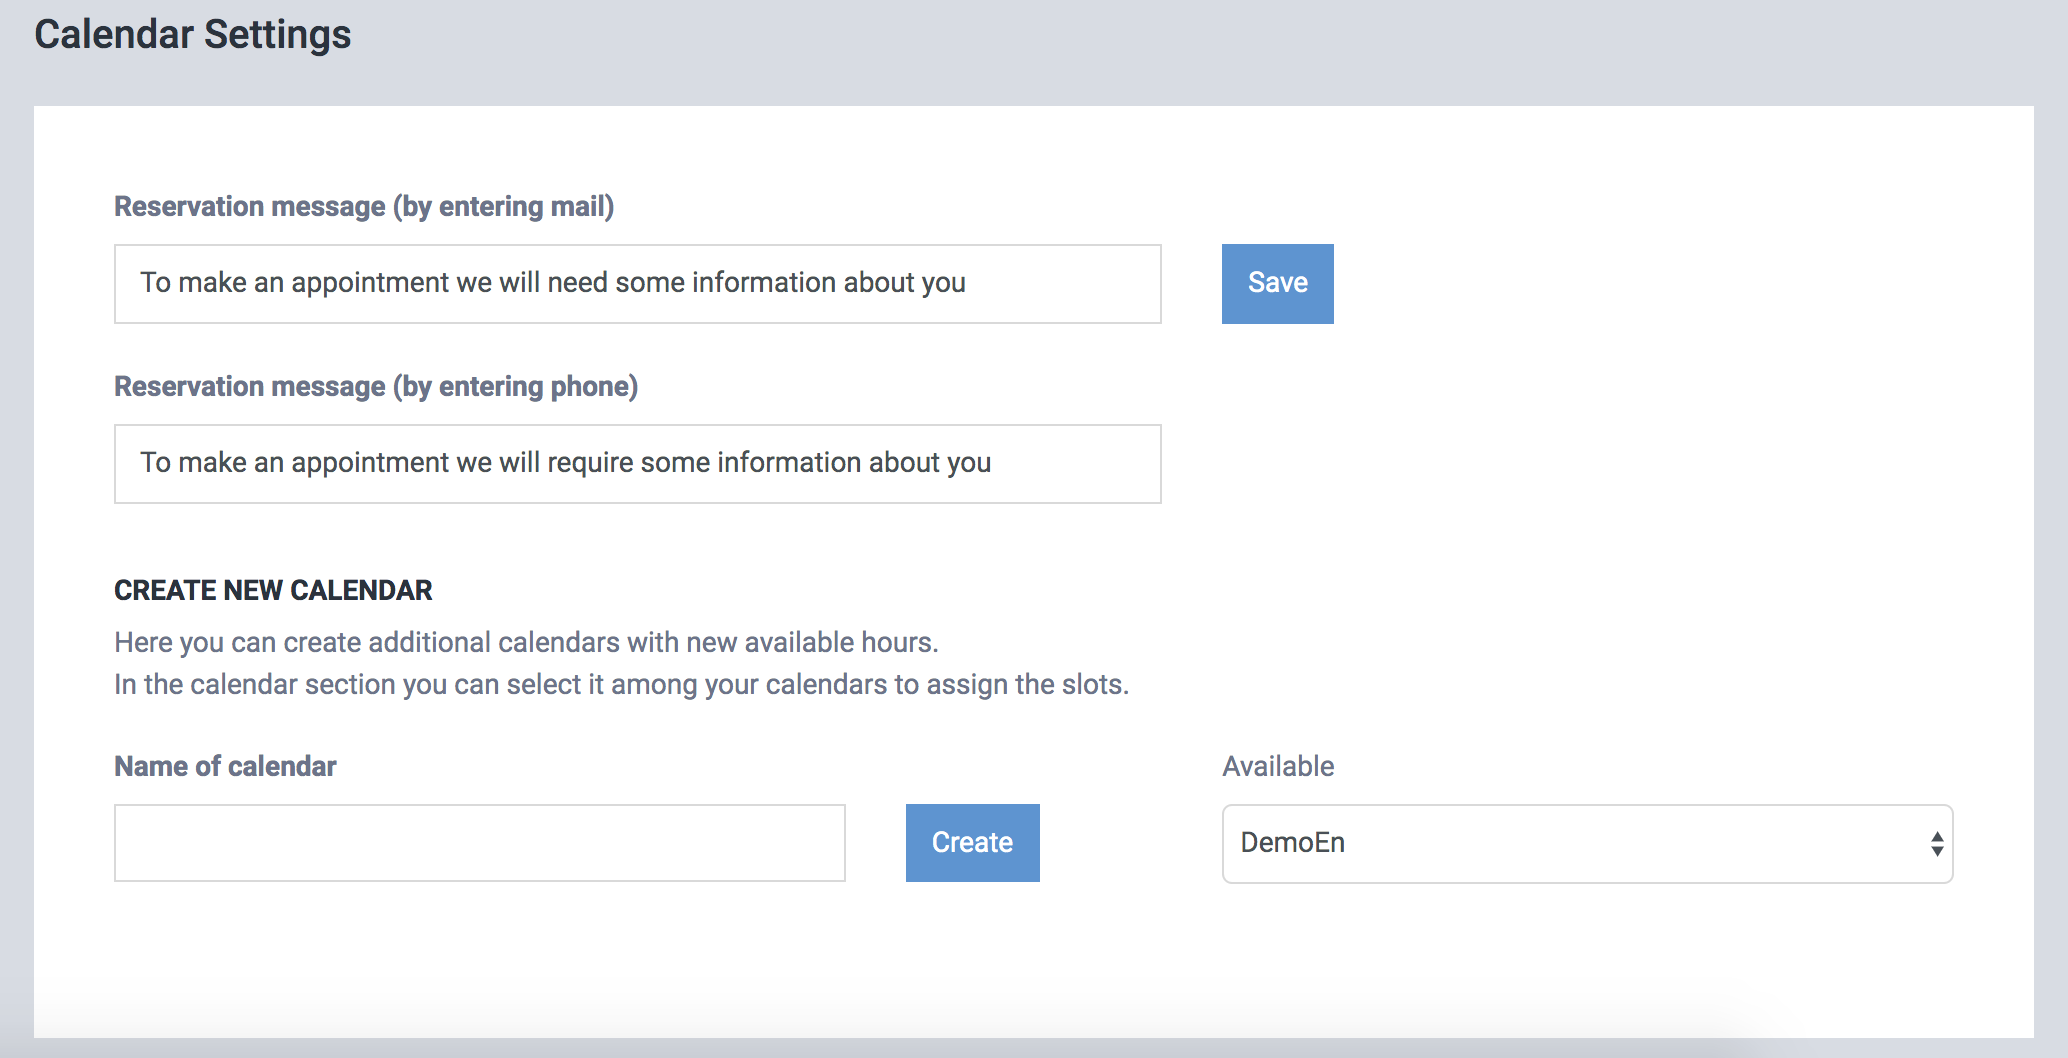
You can have special configurations for your calendar. For example you can set the messages to make reservations and create additional calendars so that your users have more choices.
For example, you can use more than one calendar to show the availability of more than one person (in case of appointments), table (in the case of a restaurant) or room (in the case of a hotel).
After saving the settings the new calendar will appear in the the calendar section
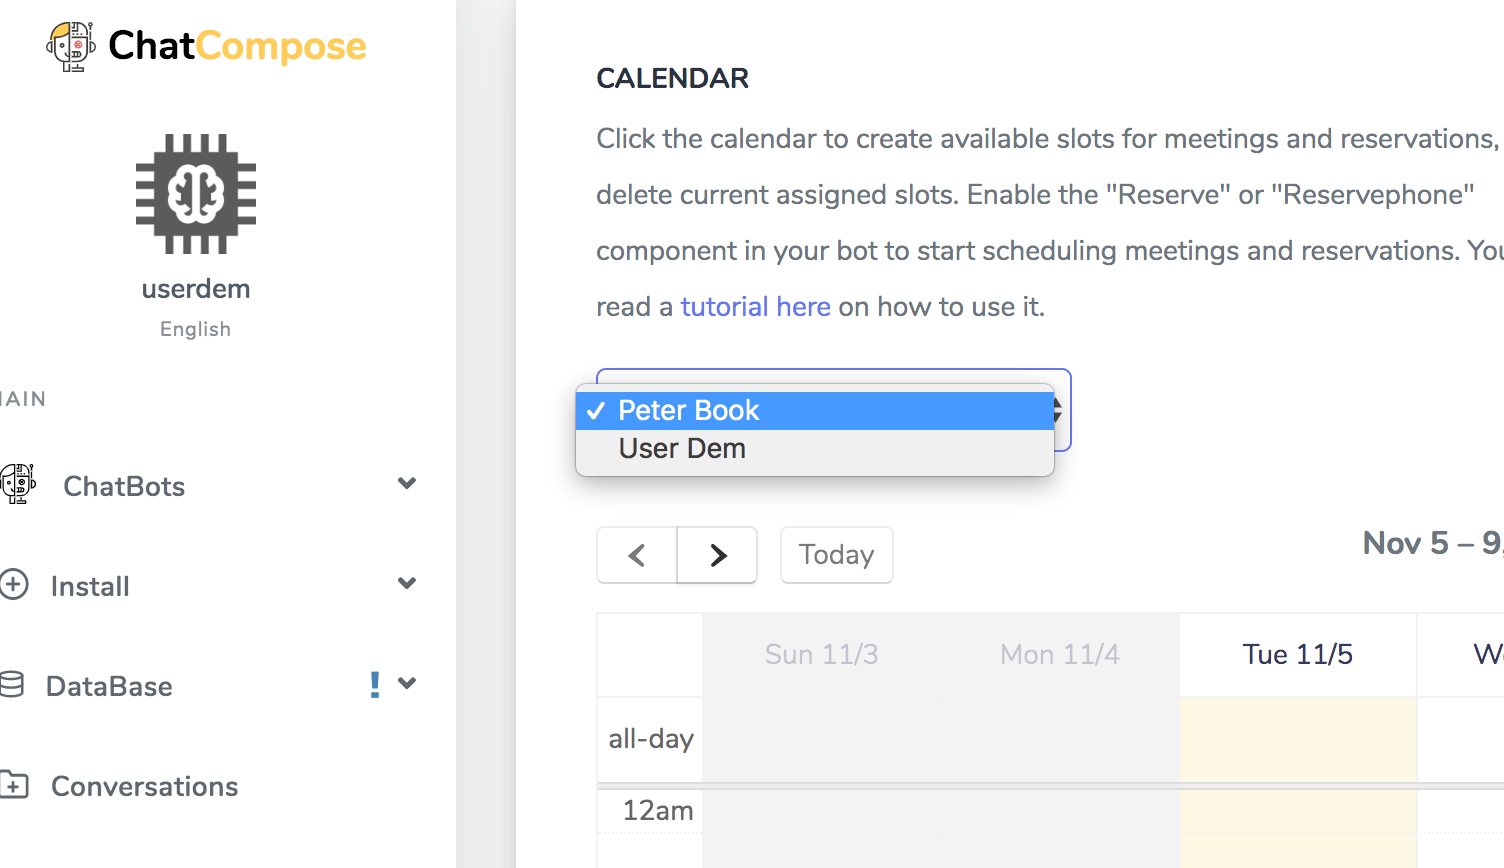
Here you can toggle between the calendars to assign the new available slots.
The chatbot user will also be able to toggle between the calendars to select the preferred date.
The settings section will also offer a url so you can integrate the calendar with other services (eg Google Calendar, Outlook Calendar).
If your integration url does not appear immediately, refresh the page.
To integrate with Google Calendar, access Settings> Add Calendar> From Url. Enter the url provided and the integration will be set.