Chatbots are artificial intelligence agents with which we can interact through a text or voice interface.
These interactions can be simple, such as asking a bot about the weather, or more complex, such as having a bot make a booking for an appointment.
Chatbots are one of the most exciting and most demanded topics in technology.
Gartner predicts that by 2020, 85% of companies will have their own chatbot. If you want to learn this emerging technology quickly, place a chatbot on your own website or earn money by creating chatbots for clients.
This is a practical introduction on how to build a chatbot with Chat Compose. Here, you will learn how to plan, build, test, analyze and implement your first chatbot.
Leveraging the artificial intelligence capabilities of ChatCompose, you can design your own chatbot without the need to write code. You will also be able to quickly implement it on different channels and messaging applications.
First of all, you must register on the platform to obtain an account and access any data.
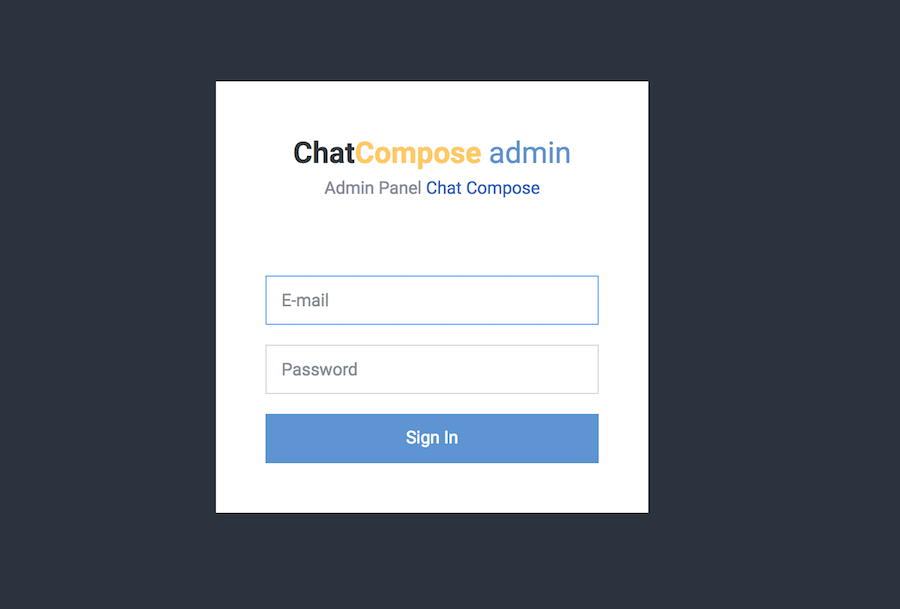
You can register here.
You will be sent an email confirming the creation of your account and the URL where you can access your chatbot. After that, you can log in to your account and start configuring your bot.
On your first login, a small online tutorial will show up. You can skip it but we recommend you go through it.
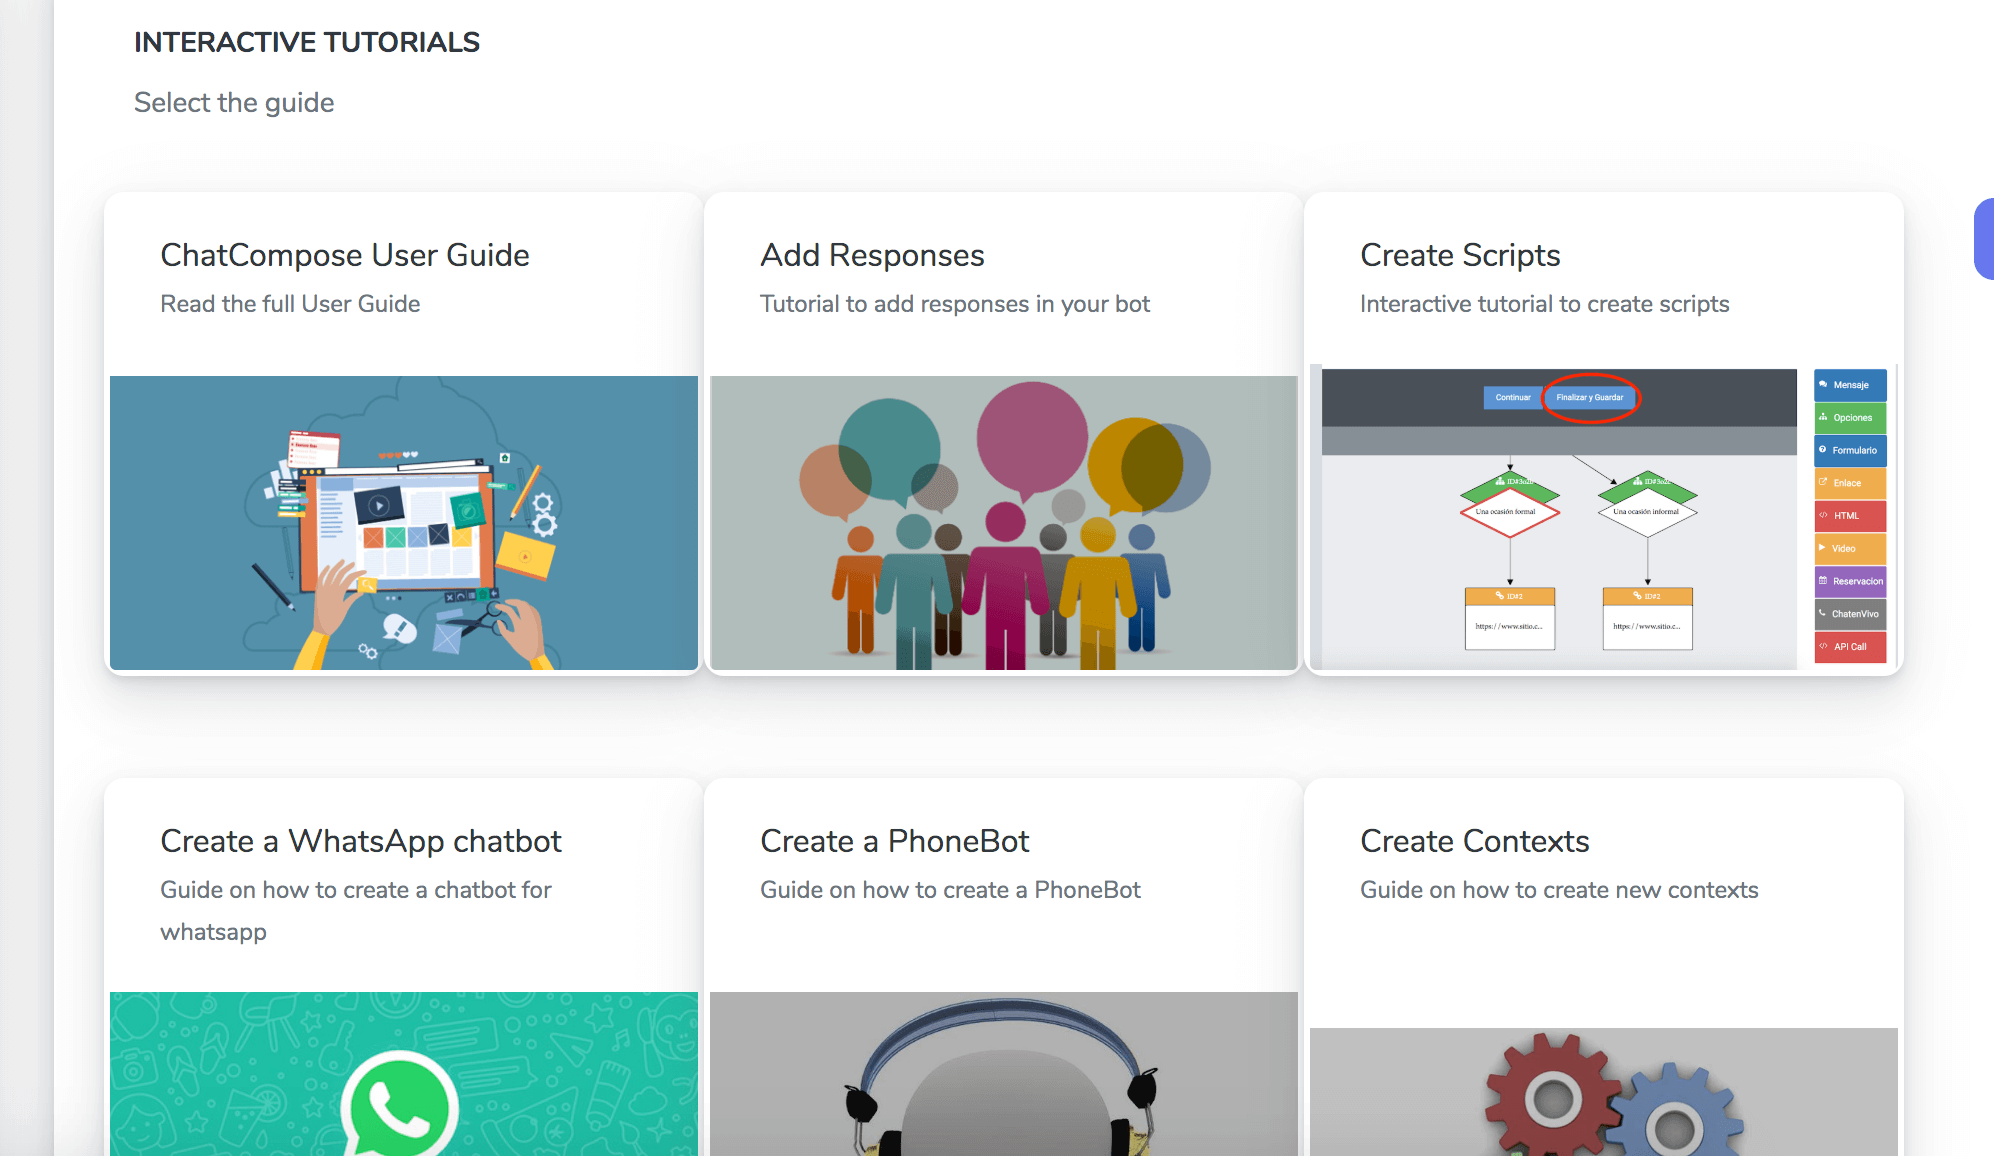
The tutorial will show you some resources on the Learn Section so you can learn more on how to create and install chatbots on the available channels.
Once you have checked some of the articles on the learn section, Go to ChatBots>Use Cases.
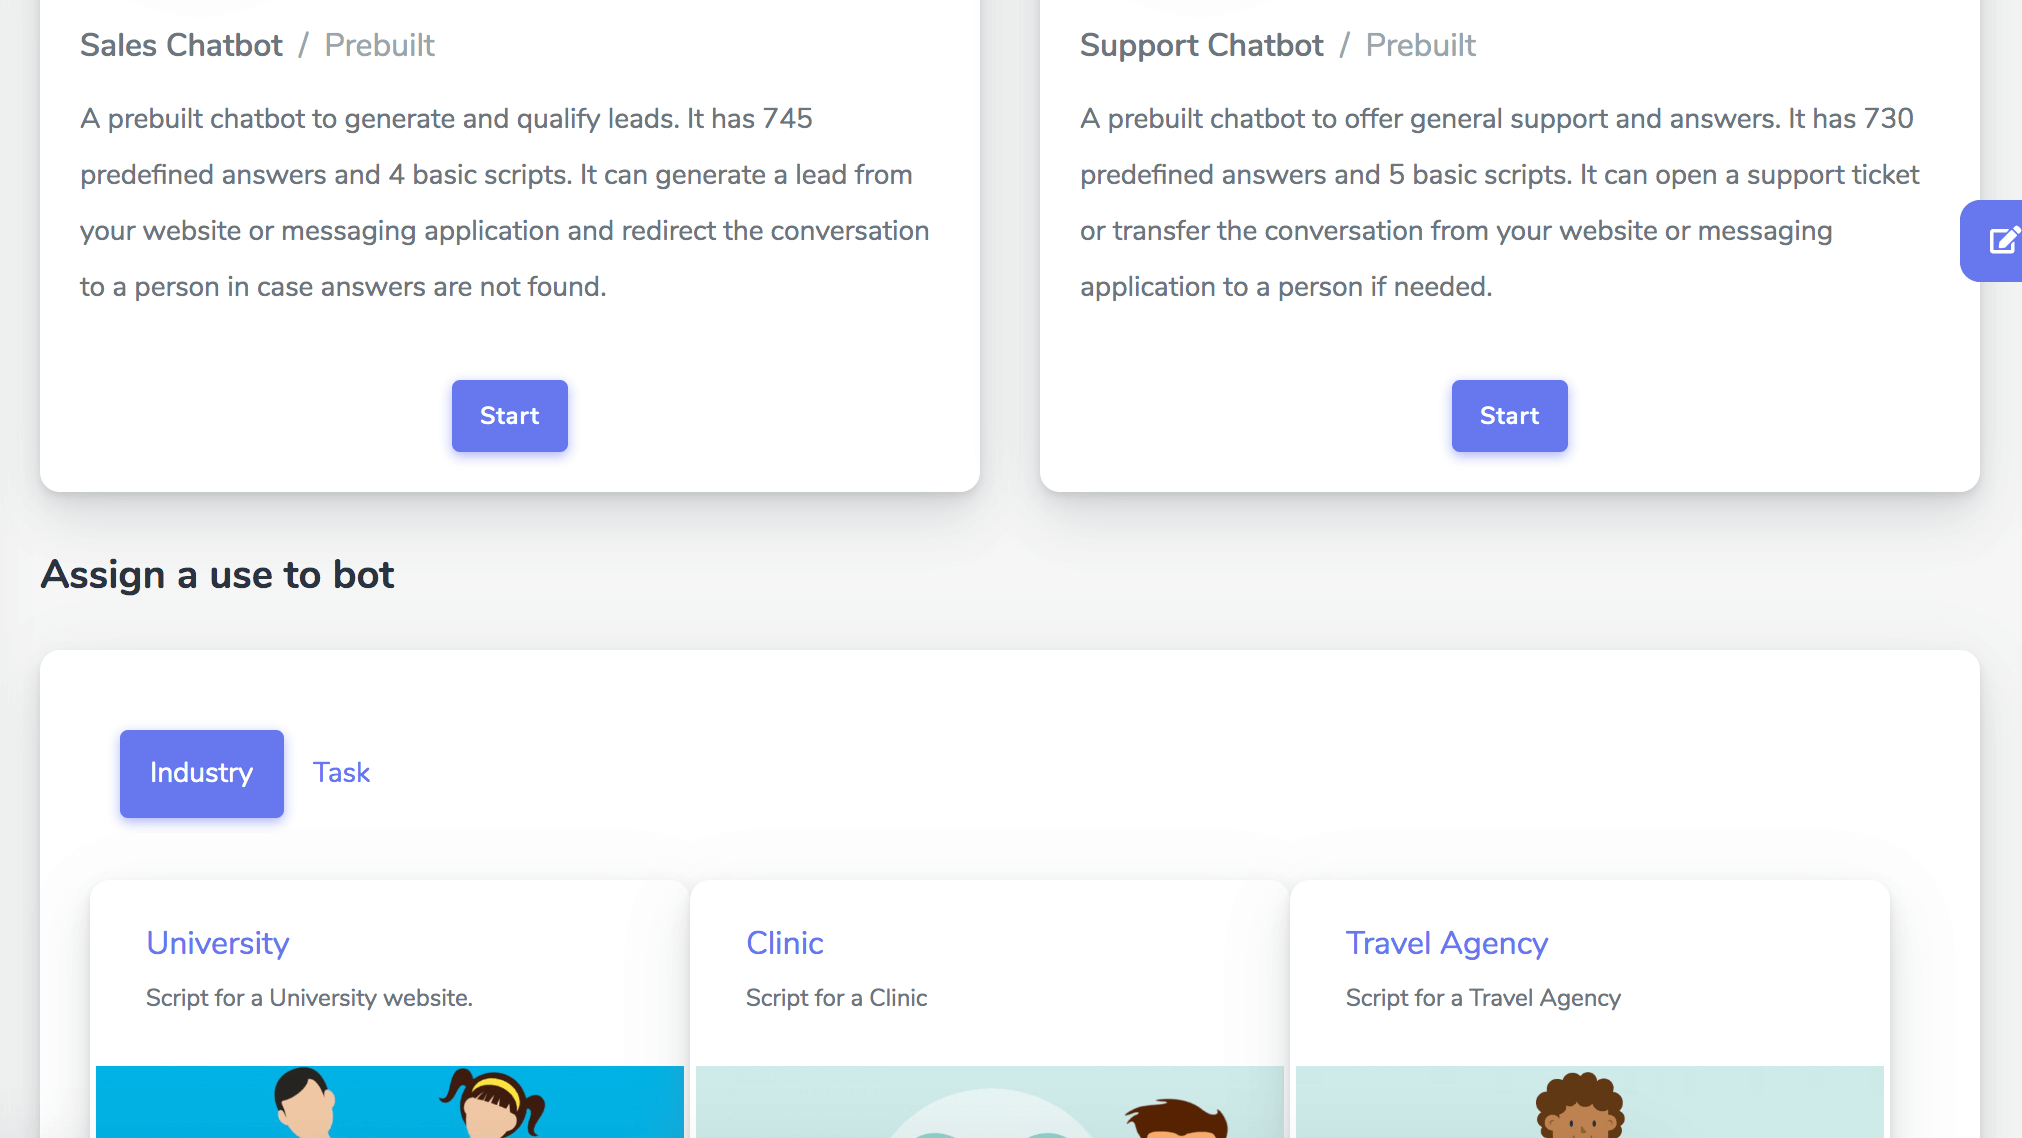
Here you can install some general purpose prebuilt chatbots for Sales or Support.
You can also check the available industries and tasks for a chatbot. Click on your industry or task to configure your chatbot for that particular purpose.
You have 15 available industries and tasks. Click on the one that you are interested in.
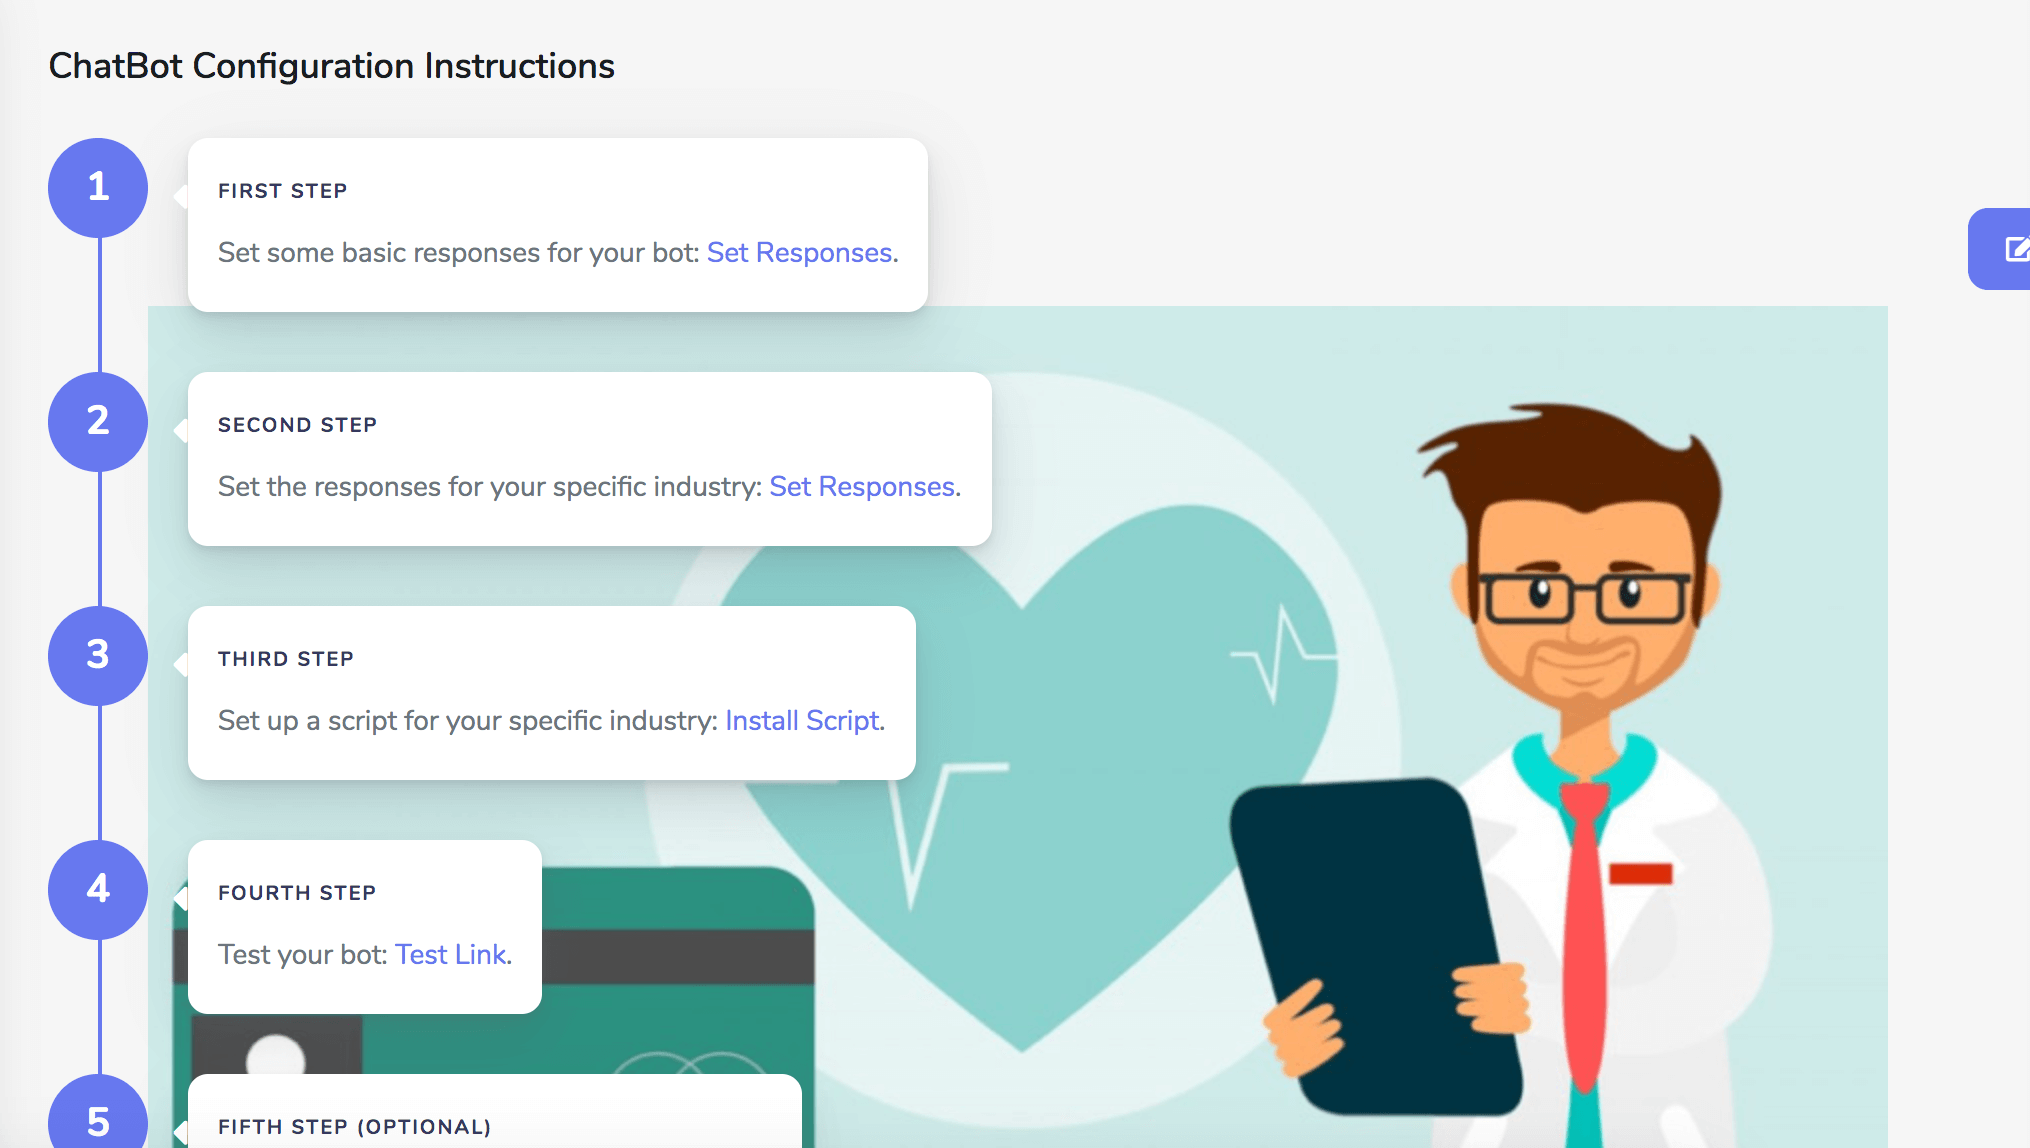
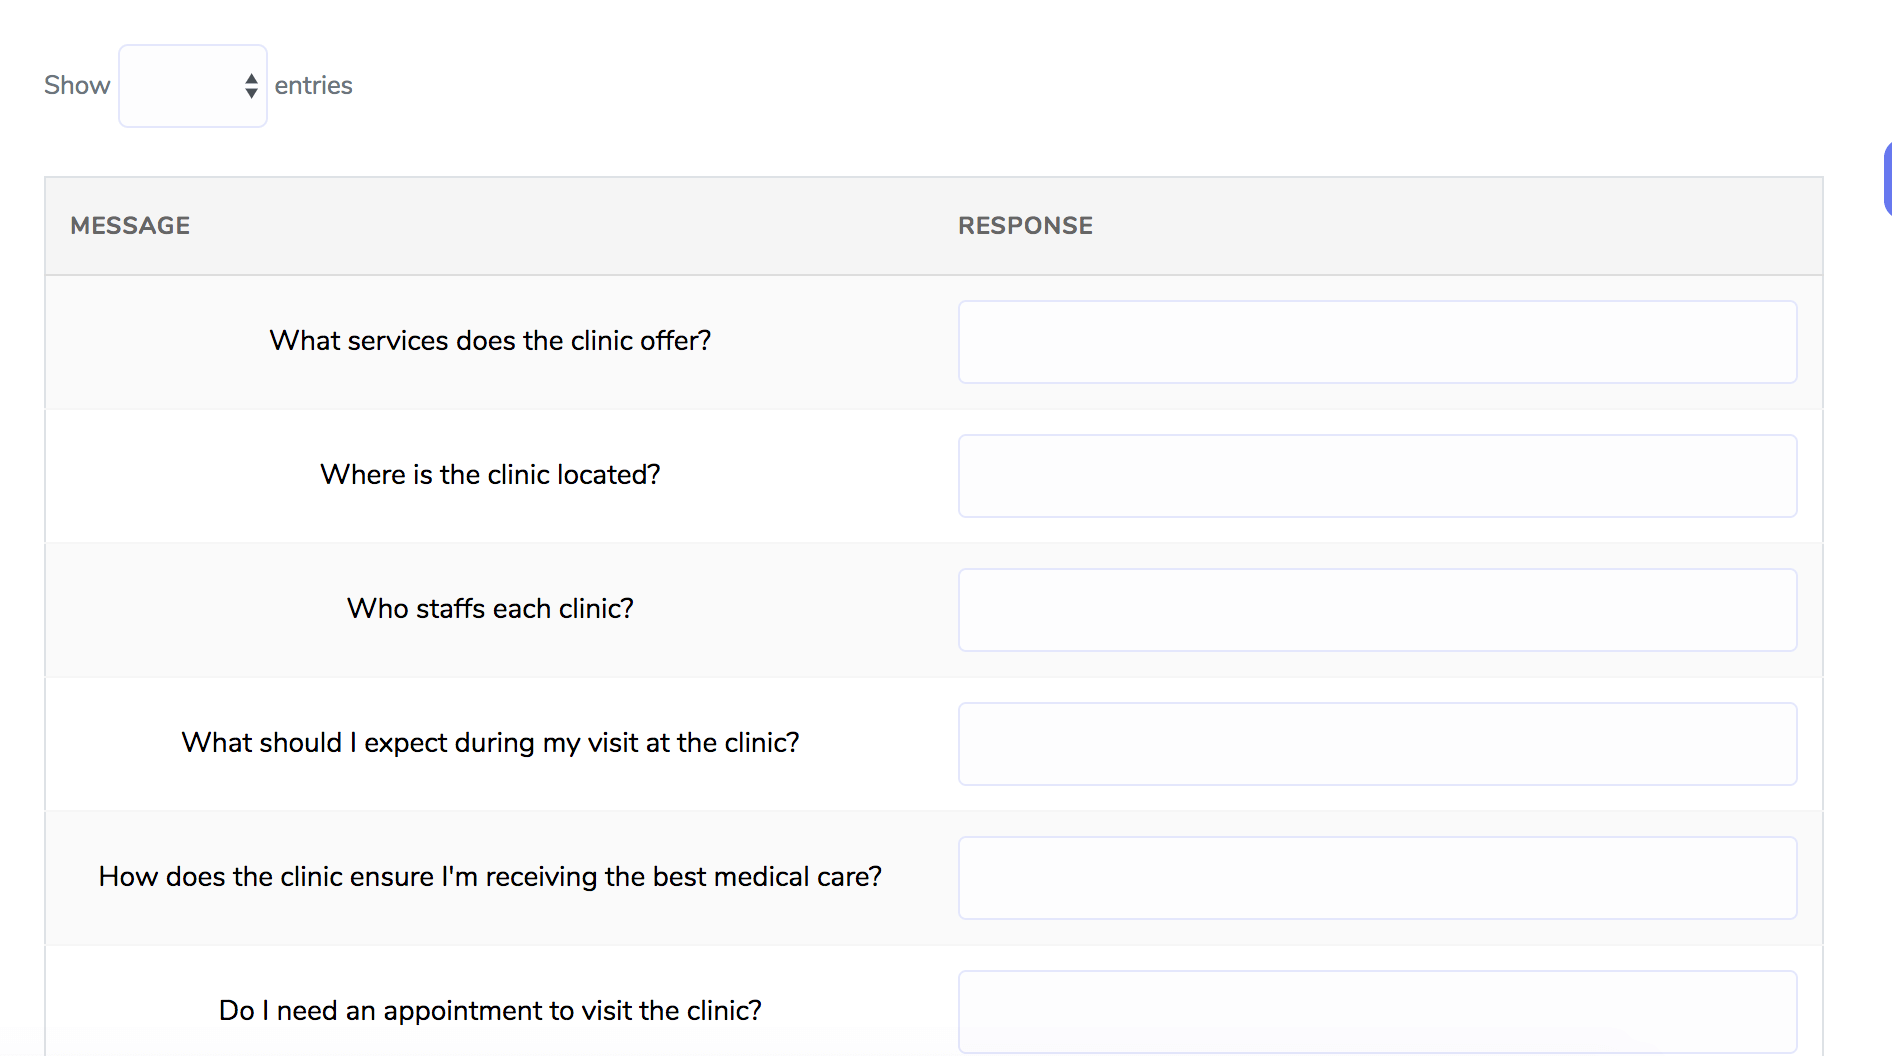
After you click on a Industry, you will be able to set up some basic responses for your bot, and some responses based on your particular industry.
All you need to do is fill the answers for the predefined questions to train your chatbot with some answers.
You can also install a welcome script for your chatbot. This script will capture leads, filter or qualify your visitors or users depending on the answers or options they choose.
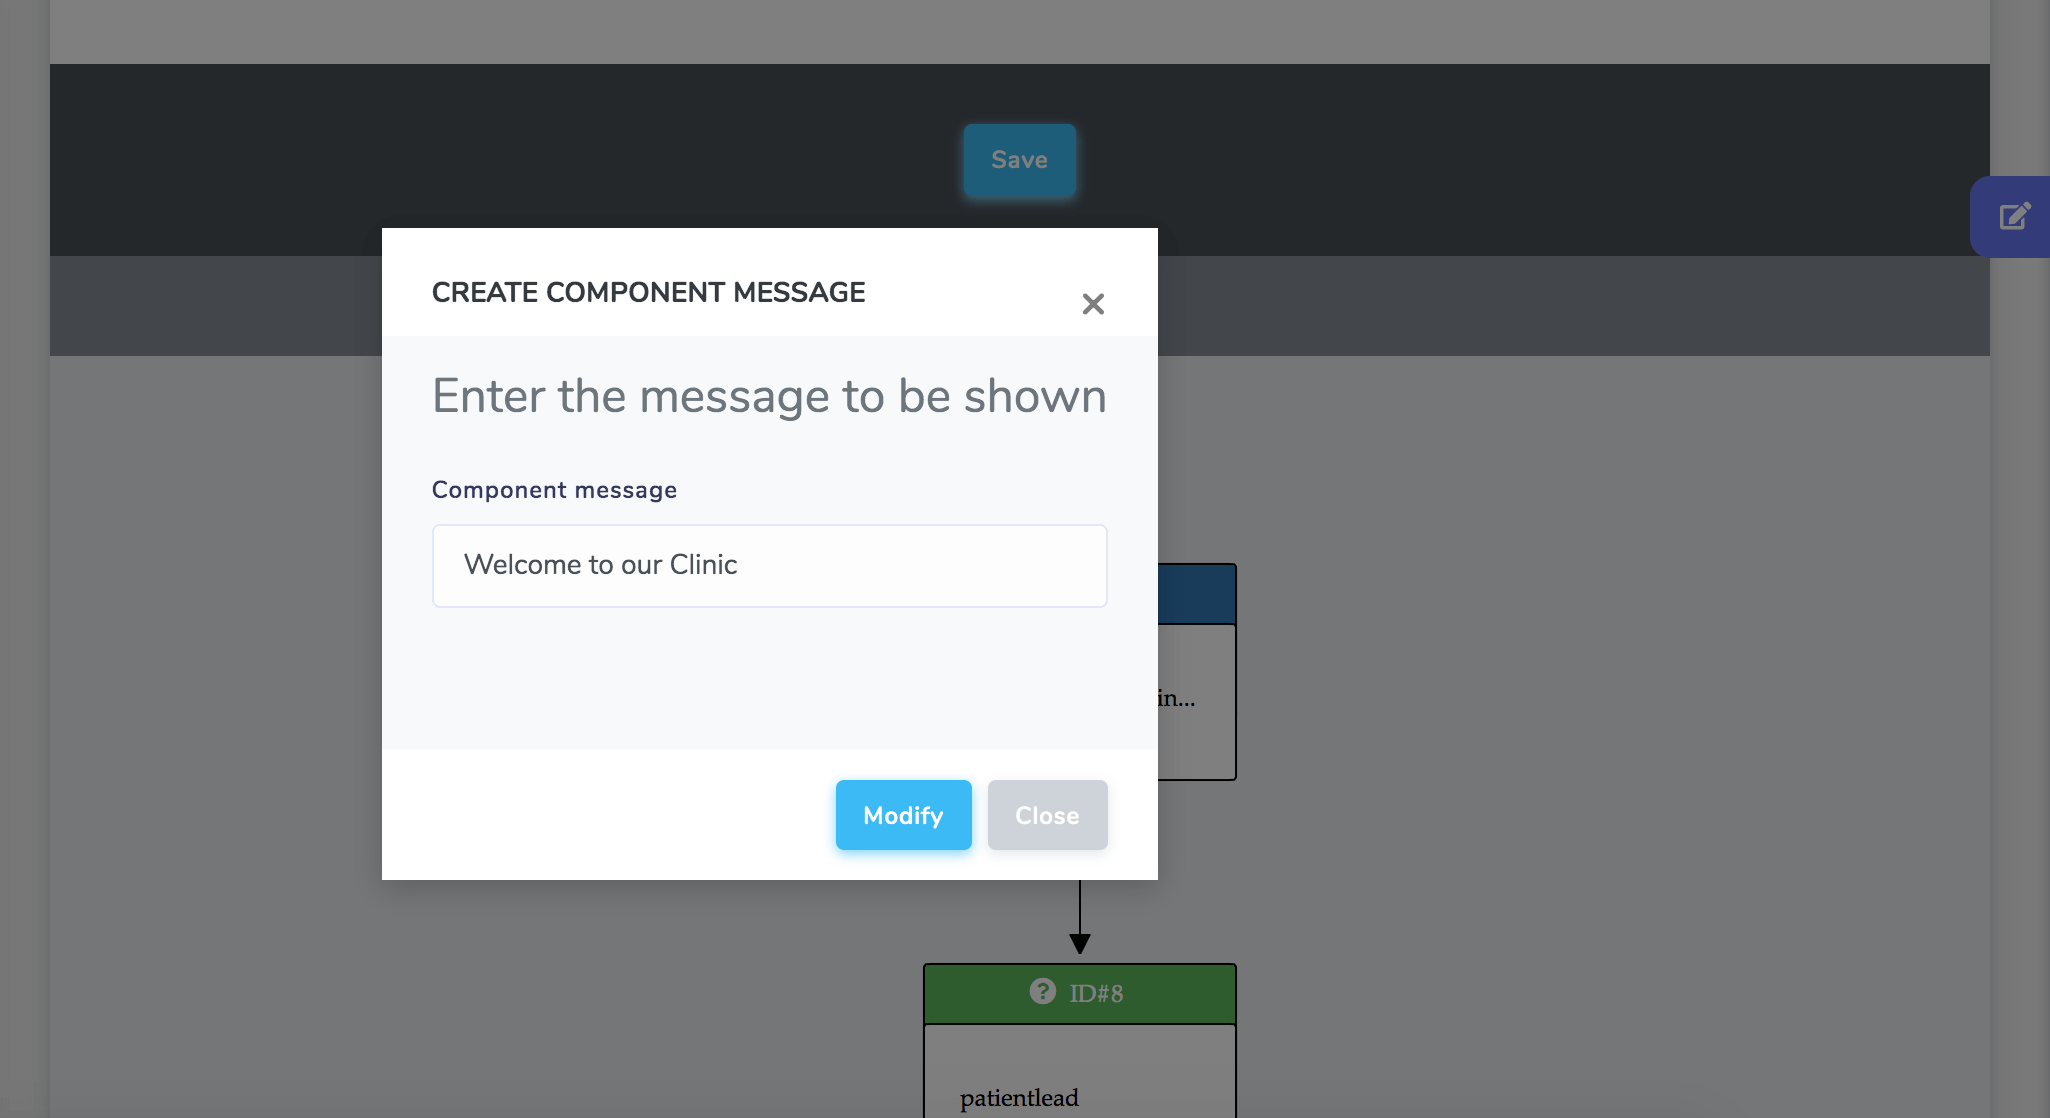
To install the script, click on Install Script, on your particular industry. You will be taken to the script editor. The script editor will allow you to edit the content of the script (messages, questions, options etc.). Just click on the boxes to edit the content of the messages and options.
After you are done editing the script, press Save. You will have to enter the name (or ID) of the script and choose whether you want your script for the start of the conversation or not.
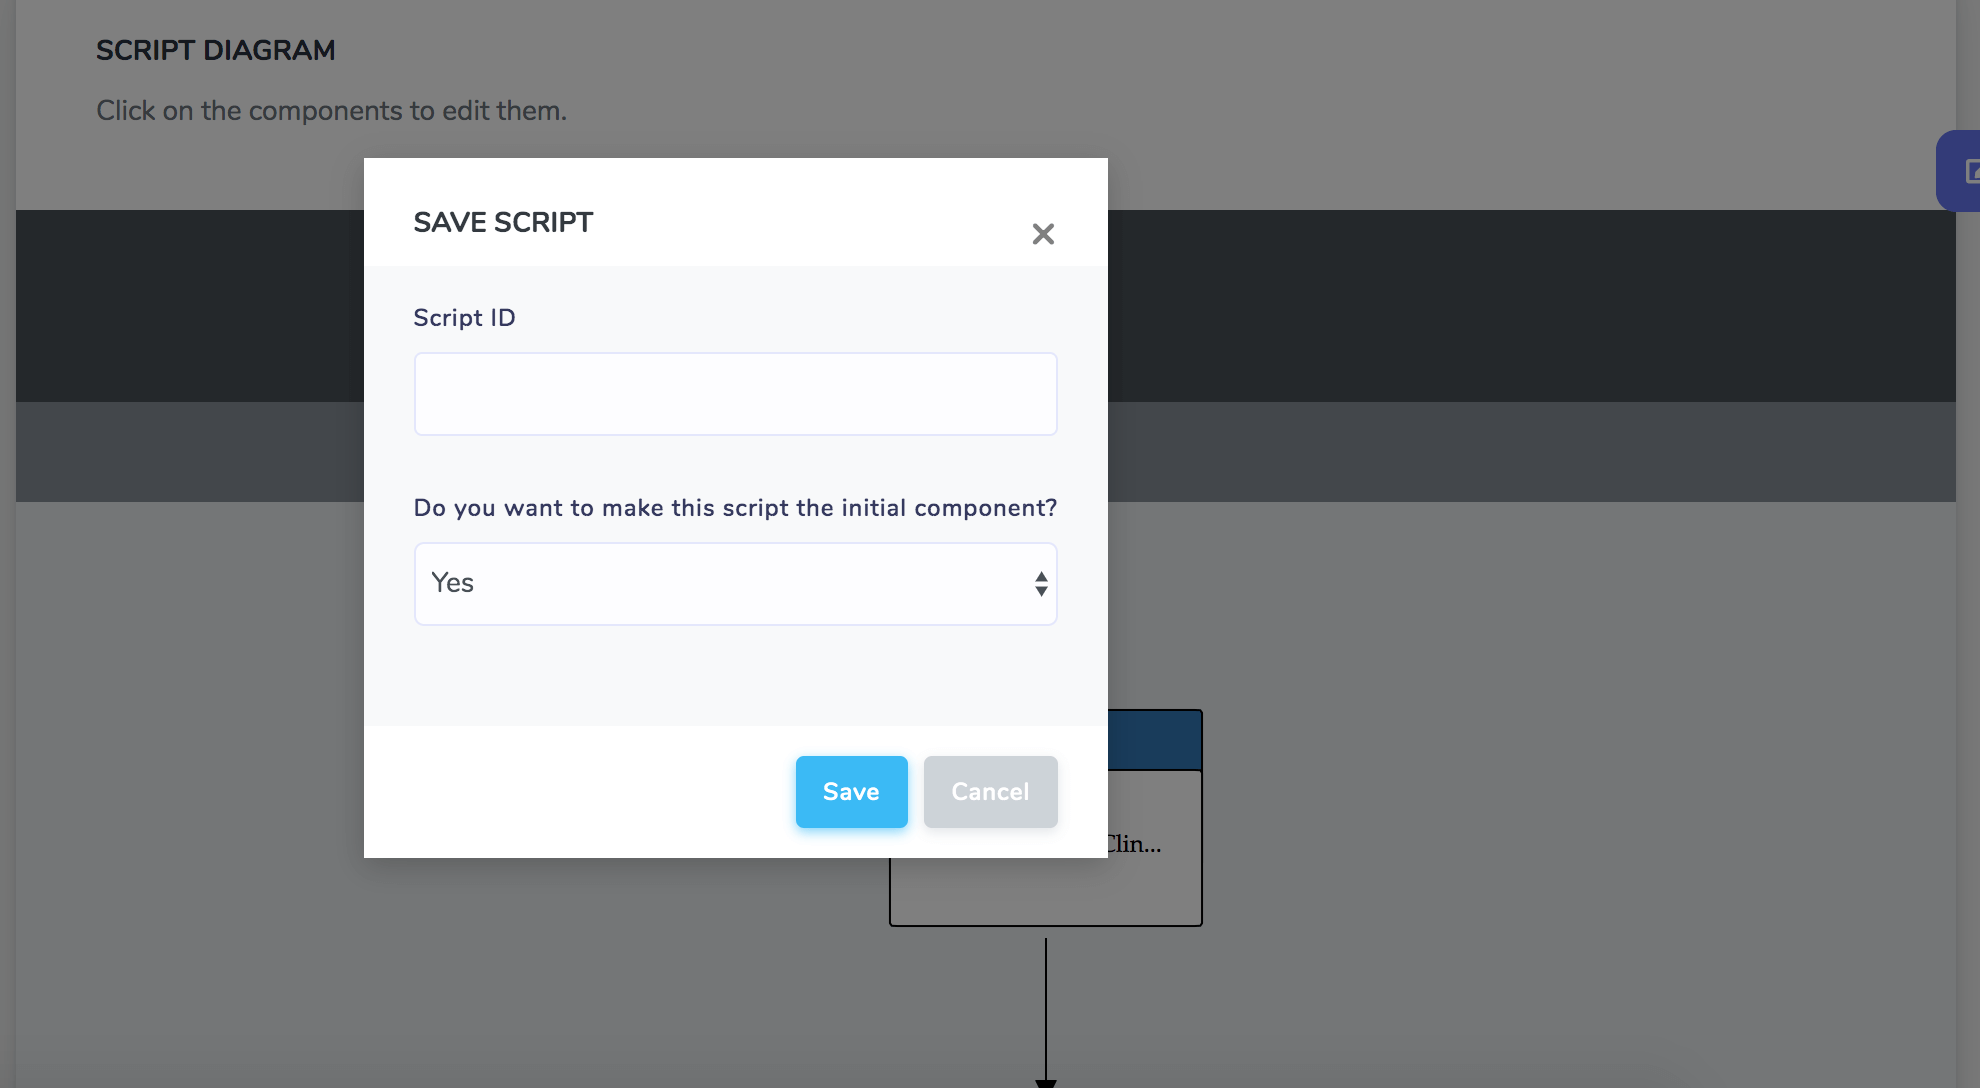
Choose Yes if you want your script to load on the start of any conversation.
In case you only want the chatbot to perform a specific task, select the Task tab in Chatbot>Use Cases.
You will be able to install and configure scripts for specific tasks.
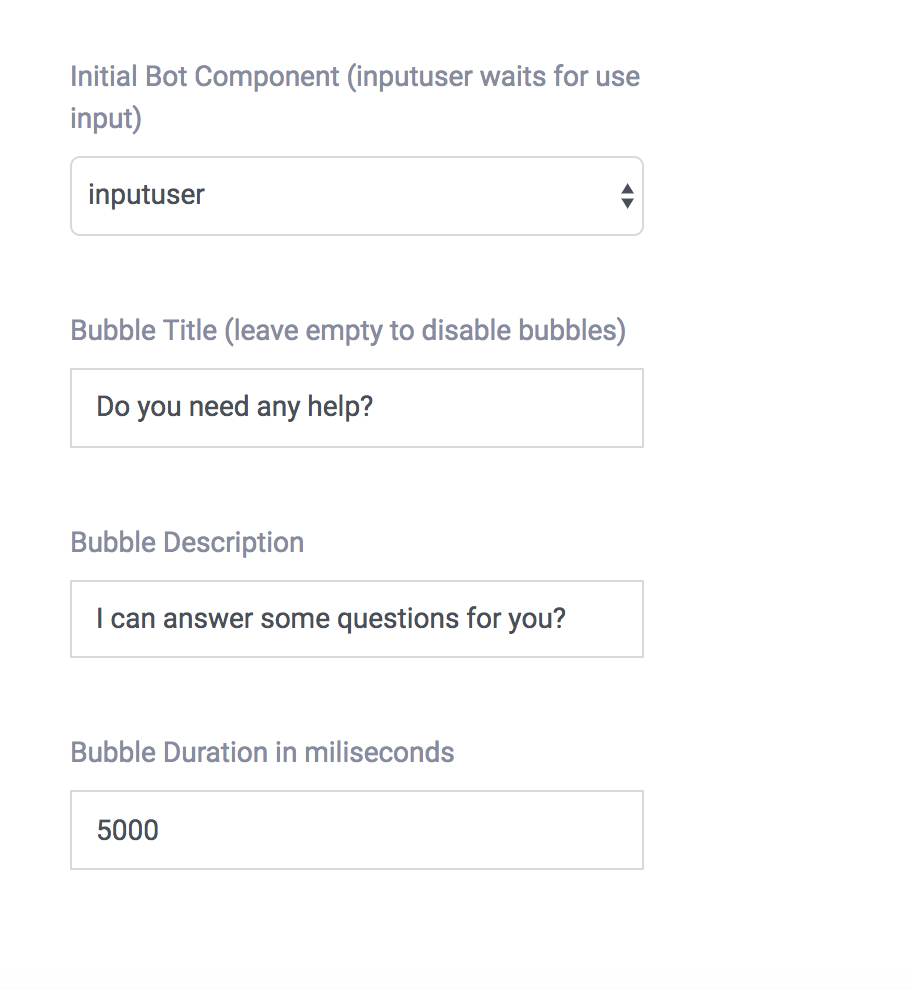
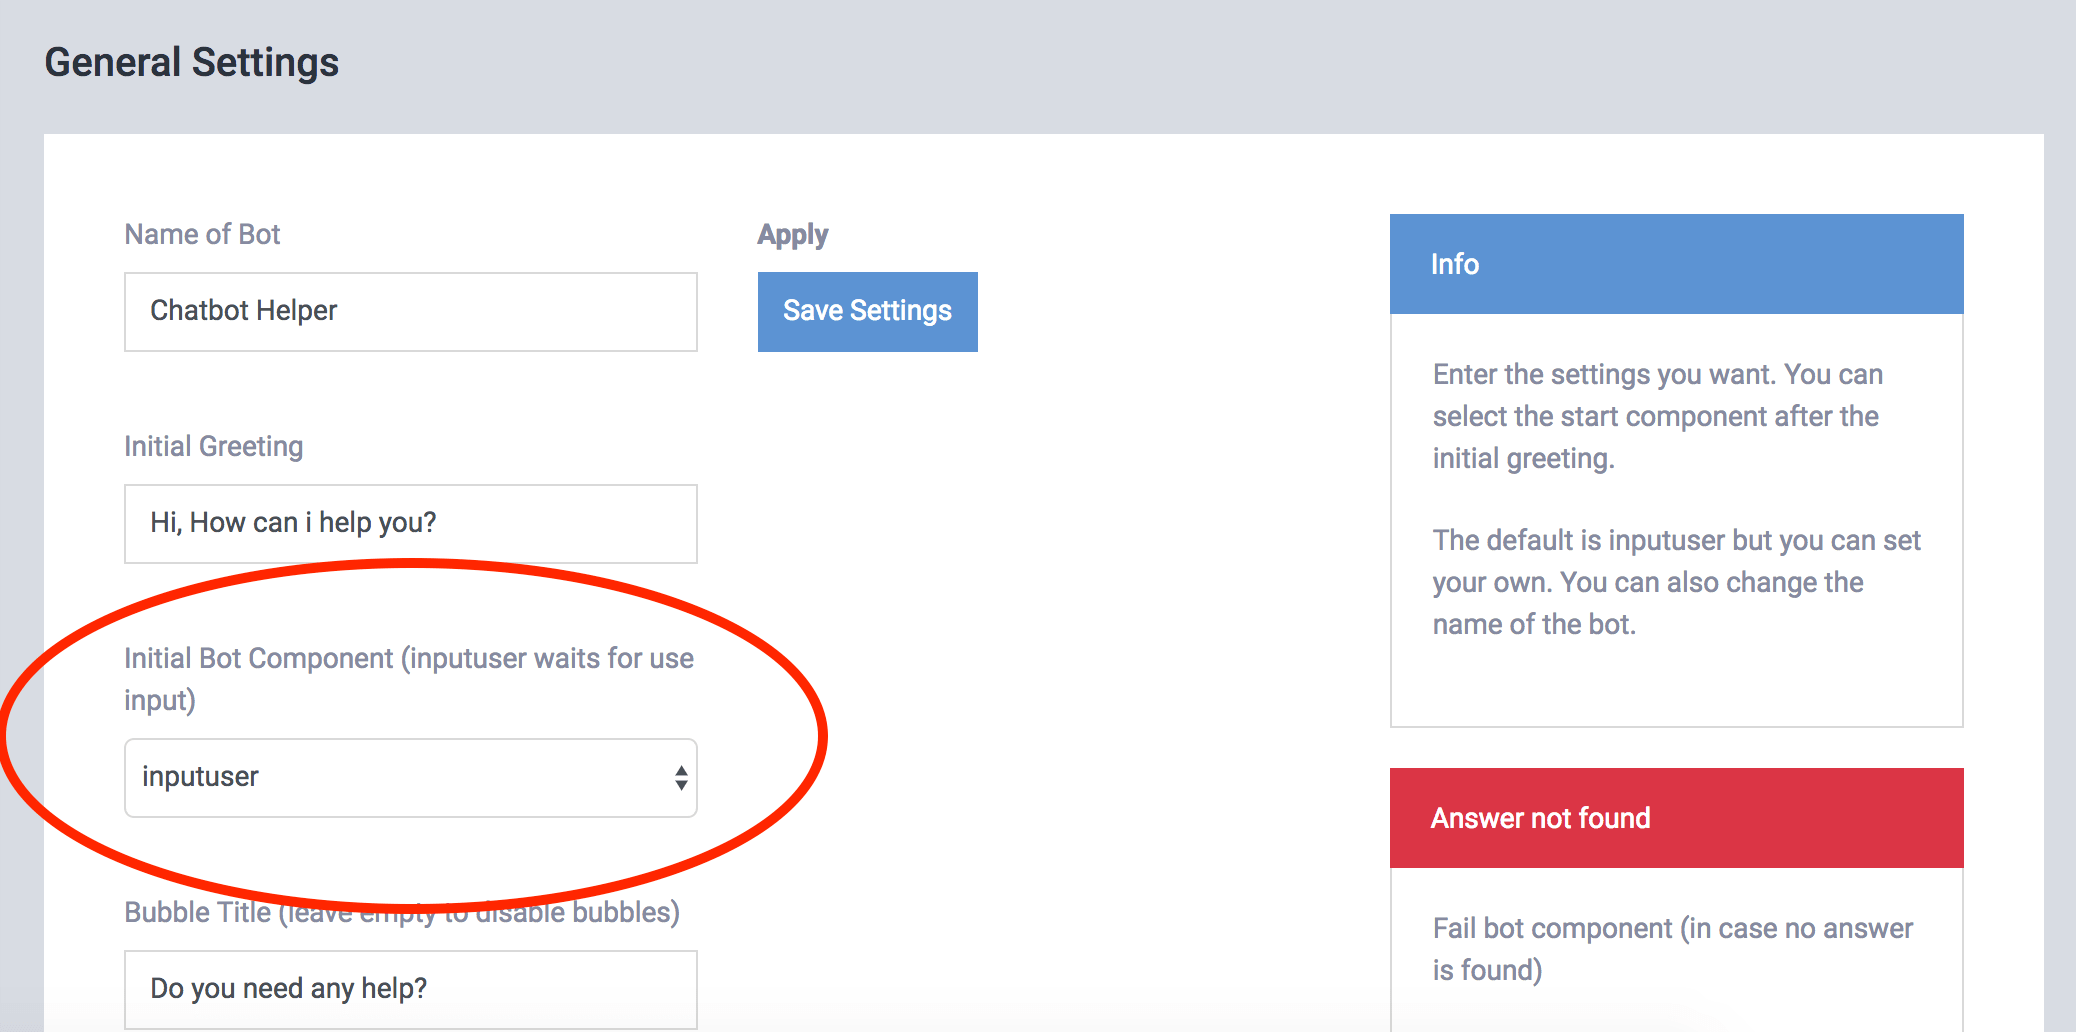
The first thing your chatbot will need is a name. To configure your chatbot, go to Settings> General and edit the default name of your bot, which should be "Chatbot Assistant".
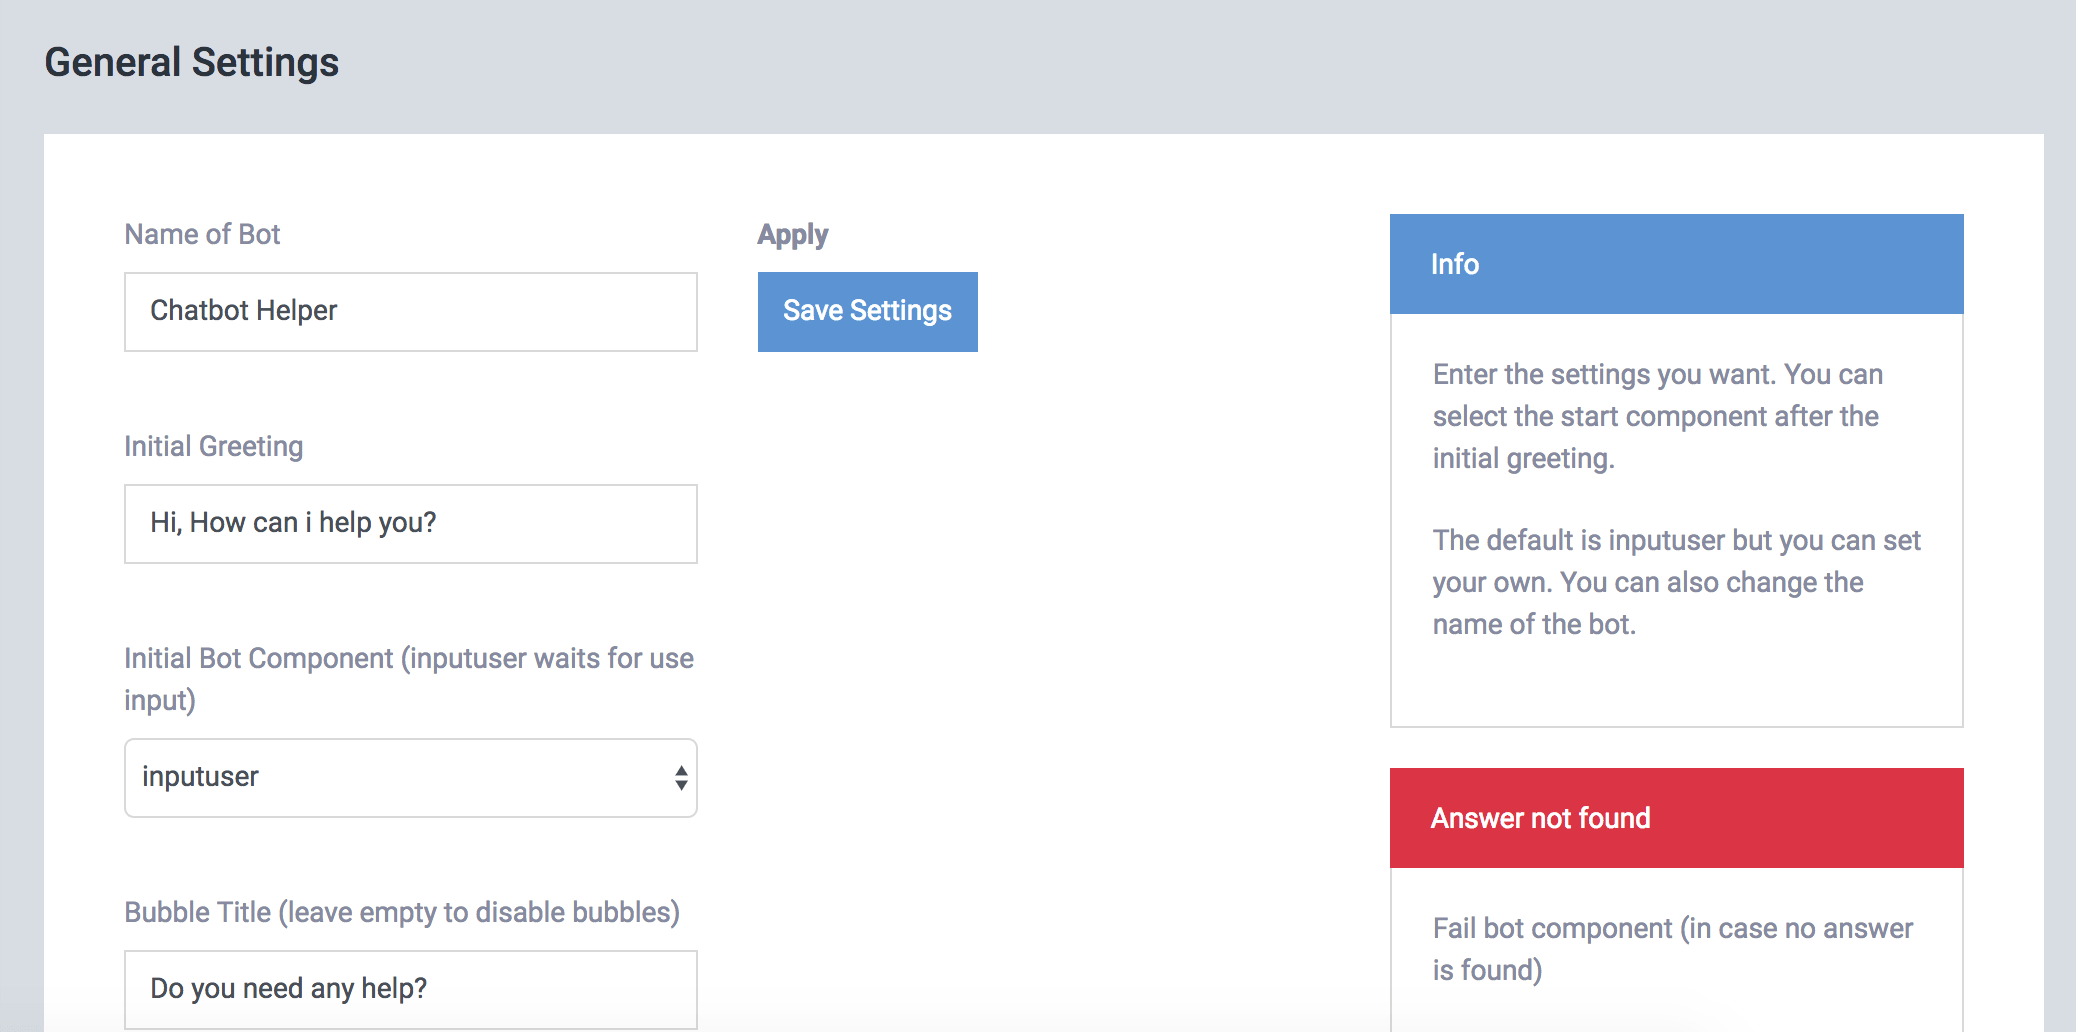
You can also change the notification message (bubble) to a personalized message for your site that can attract more clicks and interactions with your bot.
Choose a title and a small description for your notification.
The next thing you want to do is customize the style by changing the color and image to your chatbot. Go to Settings> Customisation.
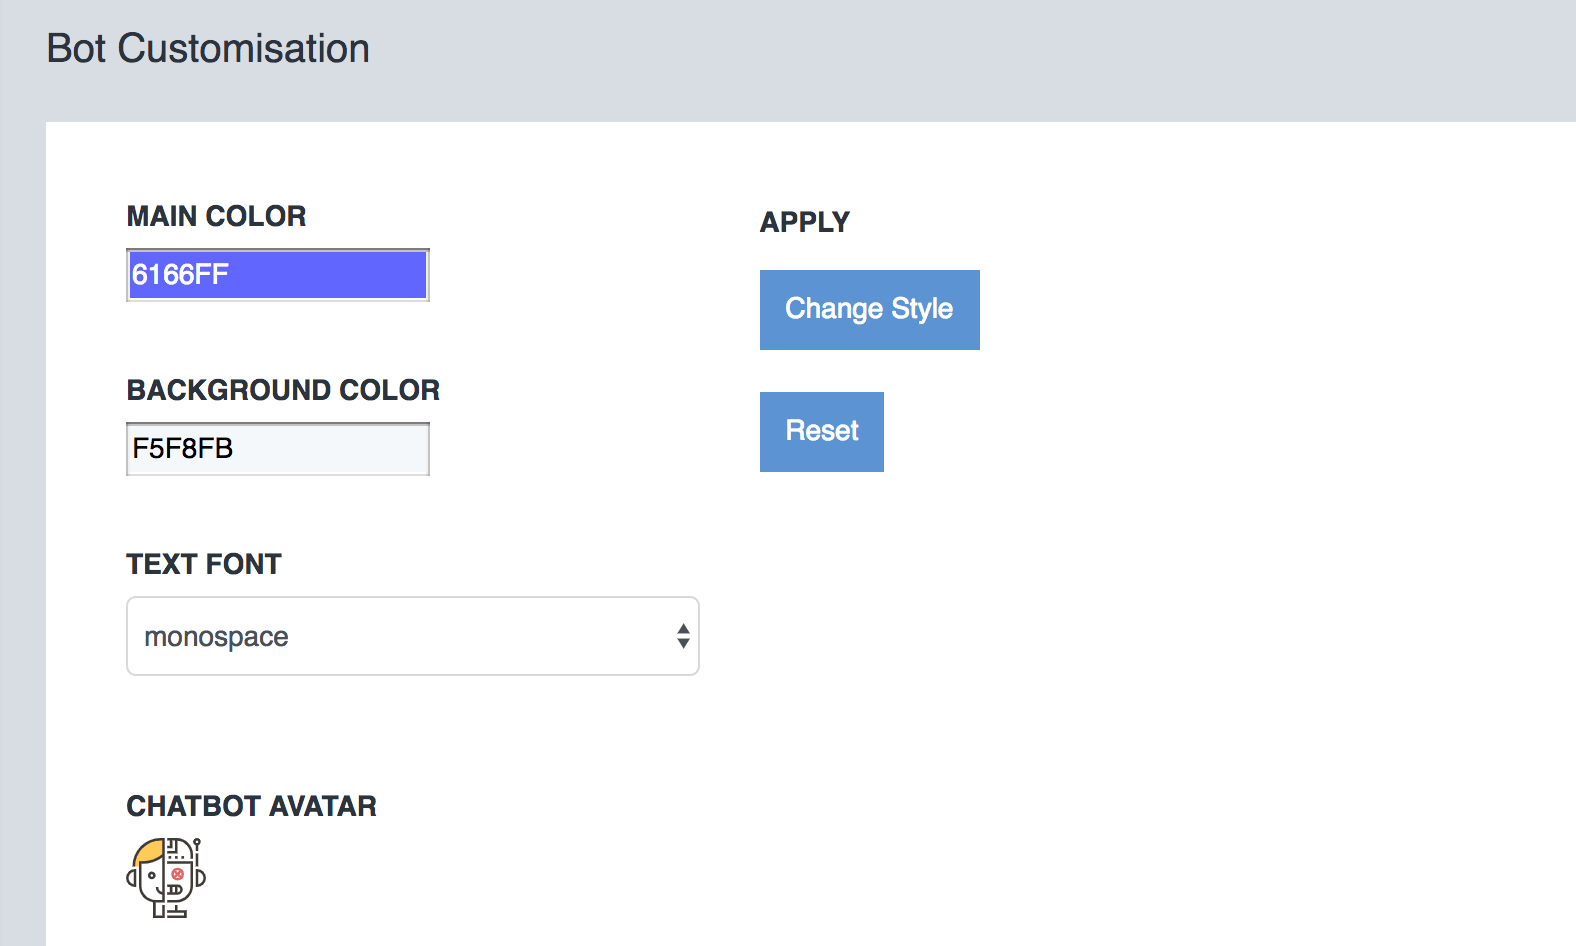
You can change and try different styles until you find the one that best suits your site. If you don't want to build a chatbot for your website, you can skip this step.
You will want your chatbot to answer questions that adapt to the theme or service of your site, so it is a good idea to configure or train the chatbot with your own answers.
To upload questions and answers go to Database> Responses, where you can configure text responses or components for your users.
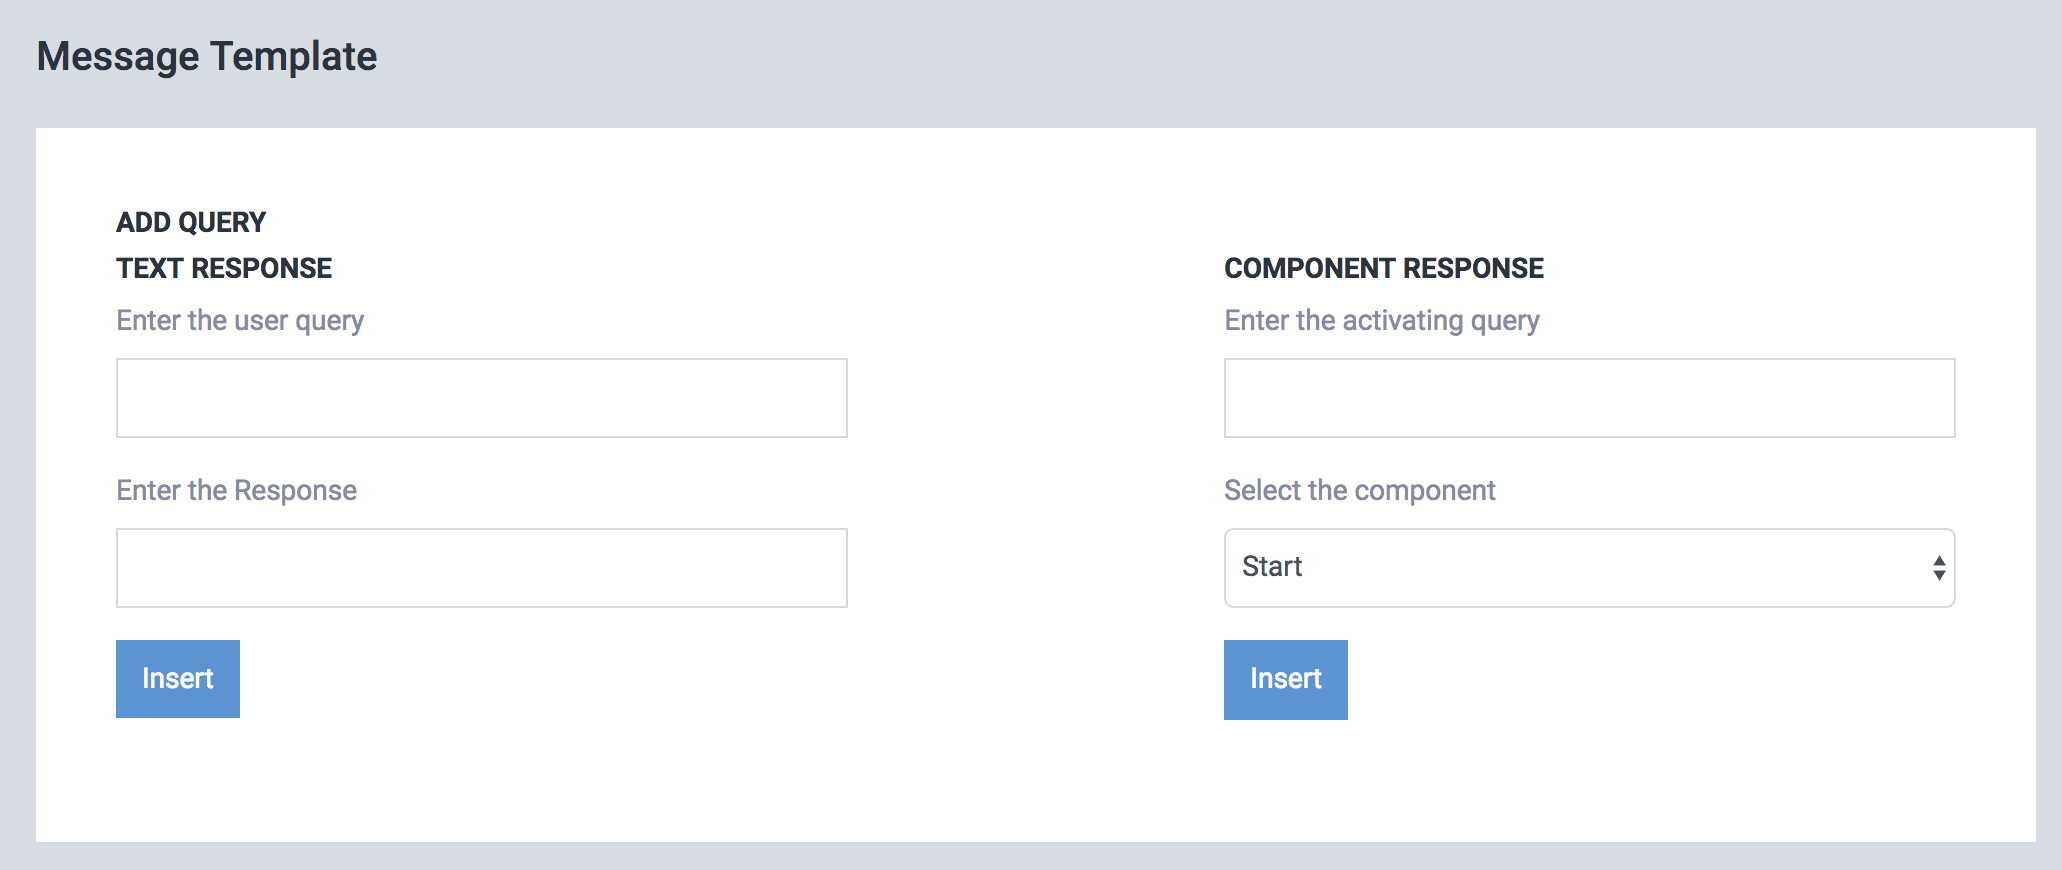
You can also upload templates in the CSV import section so that you do not have to configure each question and answer individually.
The next step is to create scripts. Scripts will allow you to direct the conversation and display rich media such as videos, images, sounds, voice, reservations etc. You have some the following options in components for building a script.
Here you can read the conversational scripts tutorial on how to build your own scripts.
You can assign your scripts as the "initial component", or as a response to specific queries.

For further details on how to add scheduling to your bot read this guide.
For live chat installation read Add live chat to ChatCompose.
By default, the system sends a short message and waits for a question from the user ("inputuser").
If you want to configure the chatbot to capture leads or data from potential customers, you can assign a custom component or a script in case you want to convince your visitors of your product or service.
The next step you will want to do is to test and calibrate the chatbot for your answers.
Navigate to ChatBots > Test Url to interact with your chatbot. You can preview the desgin and anwers of your bot in this section.
You can also test your answers by clicking the icon on the right of your panel.
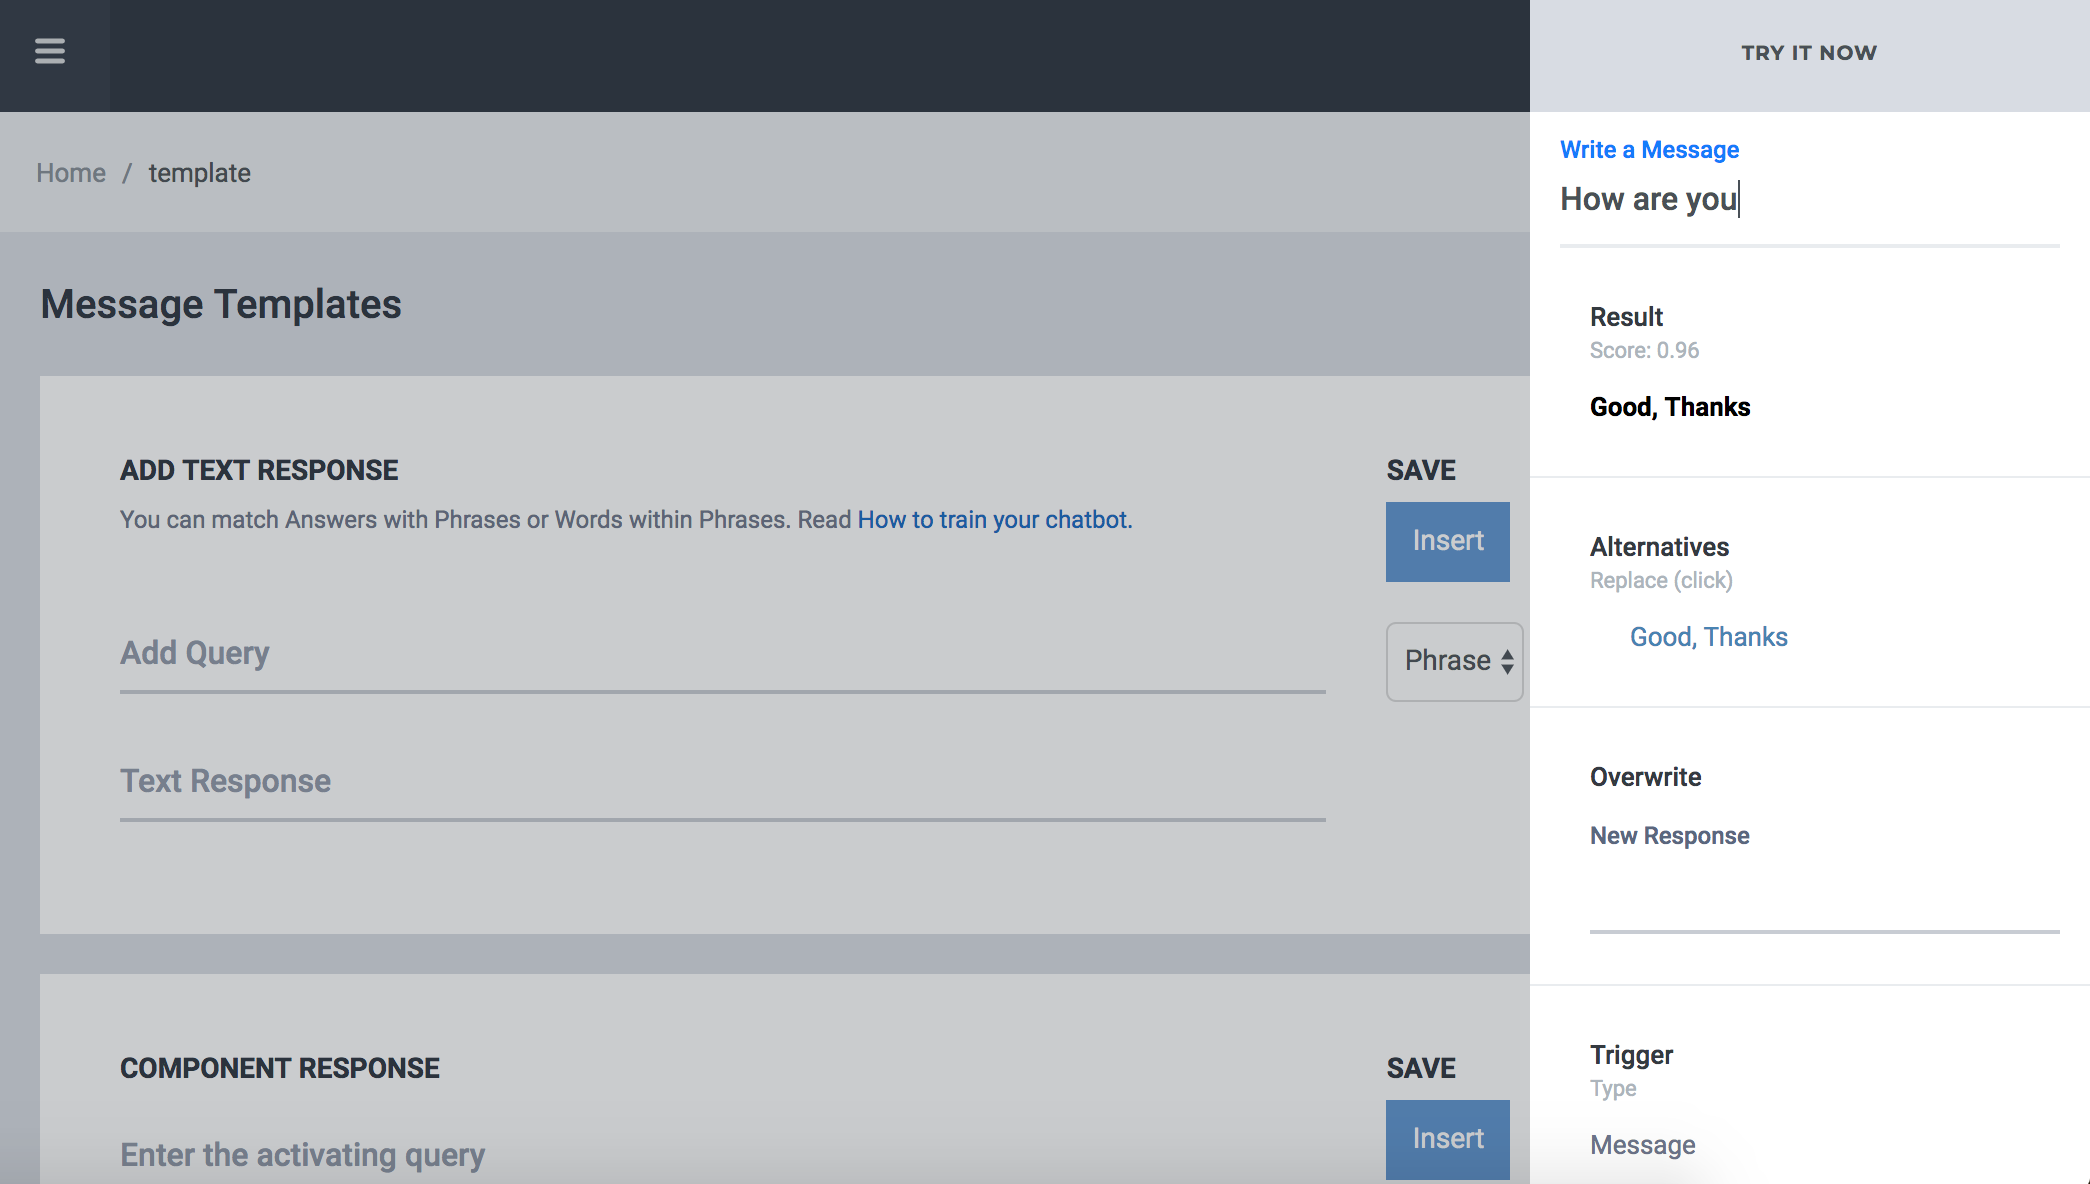
After entering a message, you will be able to see the classification values and other response options you have for that message.
The calibration has two options, Alternatives (clic on the blue link to change to alternative) and Overwrite. This way you can rewrite the answers for the specific queries you have made.
To install the chatbot your site you must insert some lines of code inside your site or CMS like Wordpress, Drupal or Joomla.
You can also install it on other systems depending on the ability you have to modify the template or template of the site.
You can see the code to paste in Install > Web.
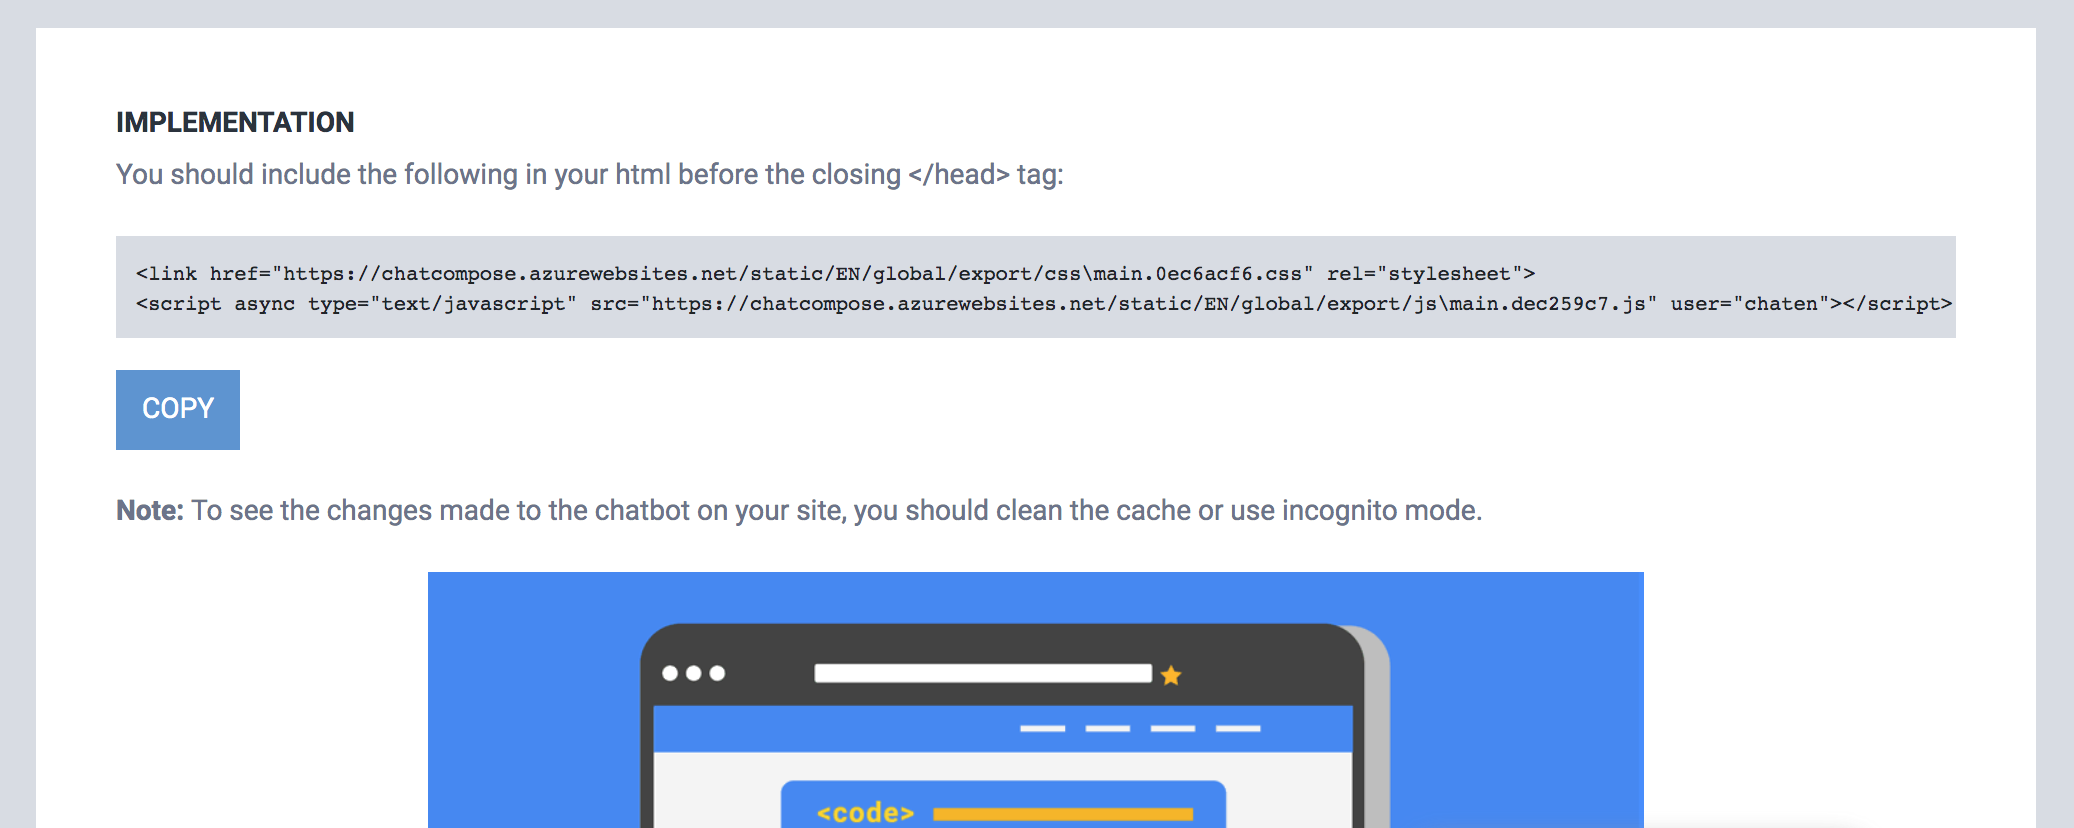
Paste the code between your <head> </ head> tags for a better load.
The easiest way is to download this plugin, and install it in the plugins section of the Wordpress admin panel.