Zalo, launched in 2012, is a chatting platform with more than 100 million users worldwide in 2019. It operates mainly in Vietnam.
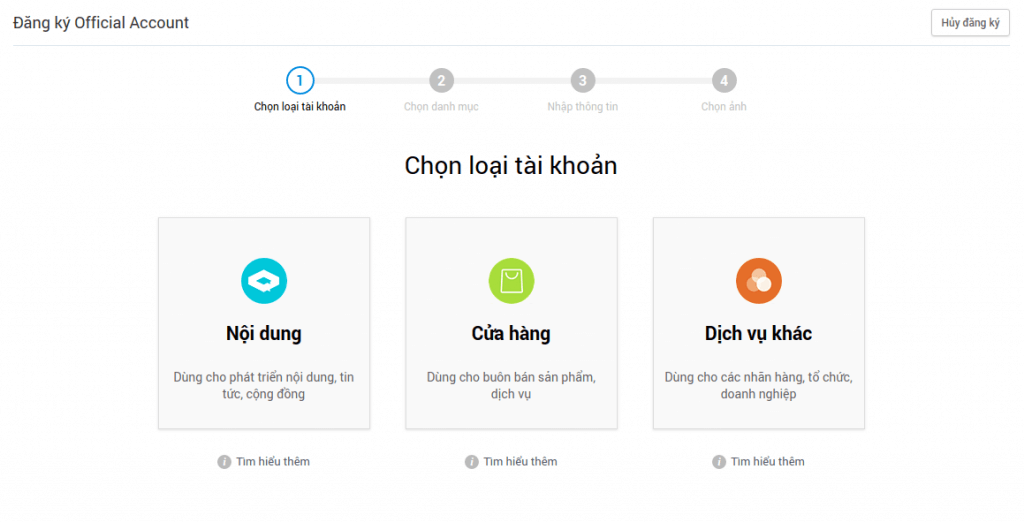
To configure and Officail Account you must be the admin of that OA. If you do not have an OA, register to create an account. Select the store type and continue.
You will also need to register in Zalo Developers. Once registered create an Application.
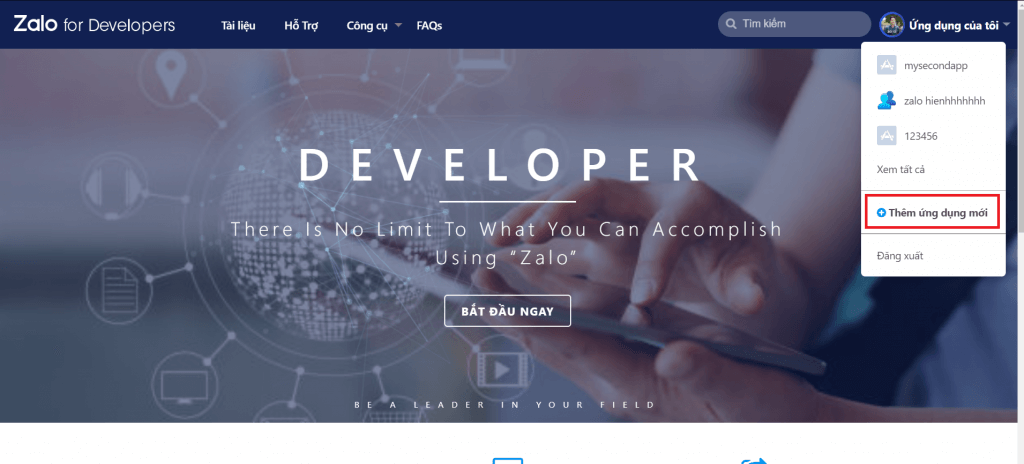
Select the application you just created in the right corner of the page https://developers.zalo.me/.
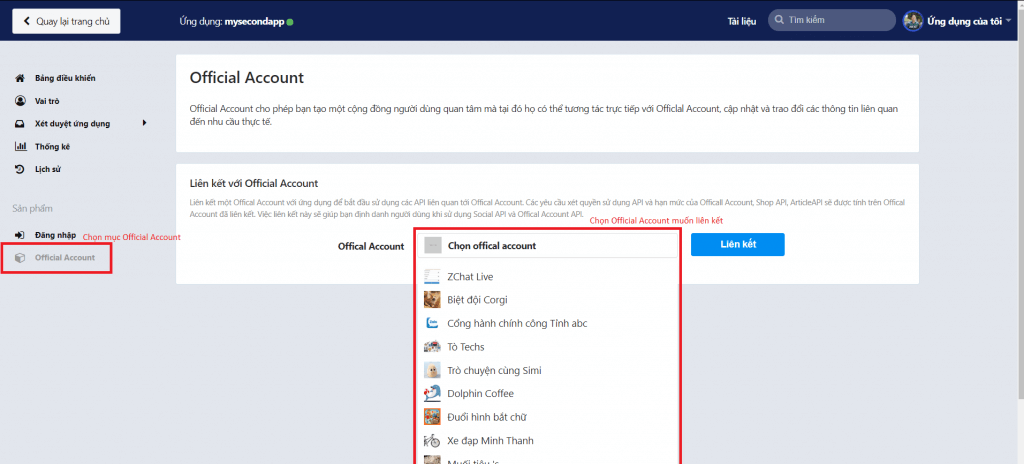
In the menu on the left, select Official Account, then select the account you just created in step 1 and press "Link".
Please login to ChatCompose.
Navigate to Integrations and click on the Zalo section. You will be redirected to the Zalo integration page.
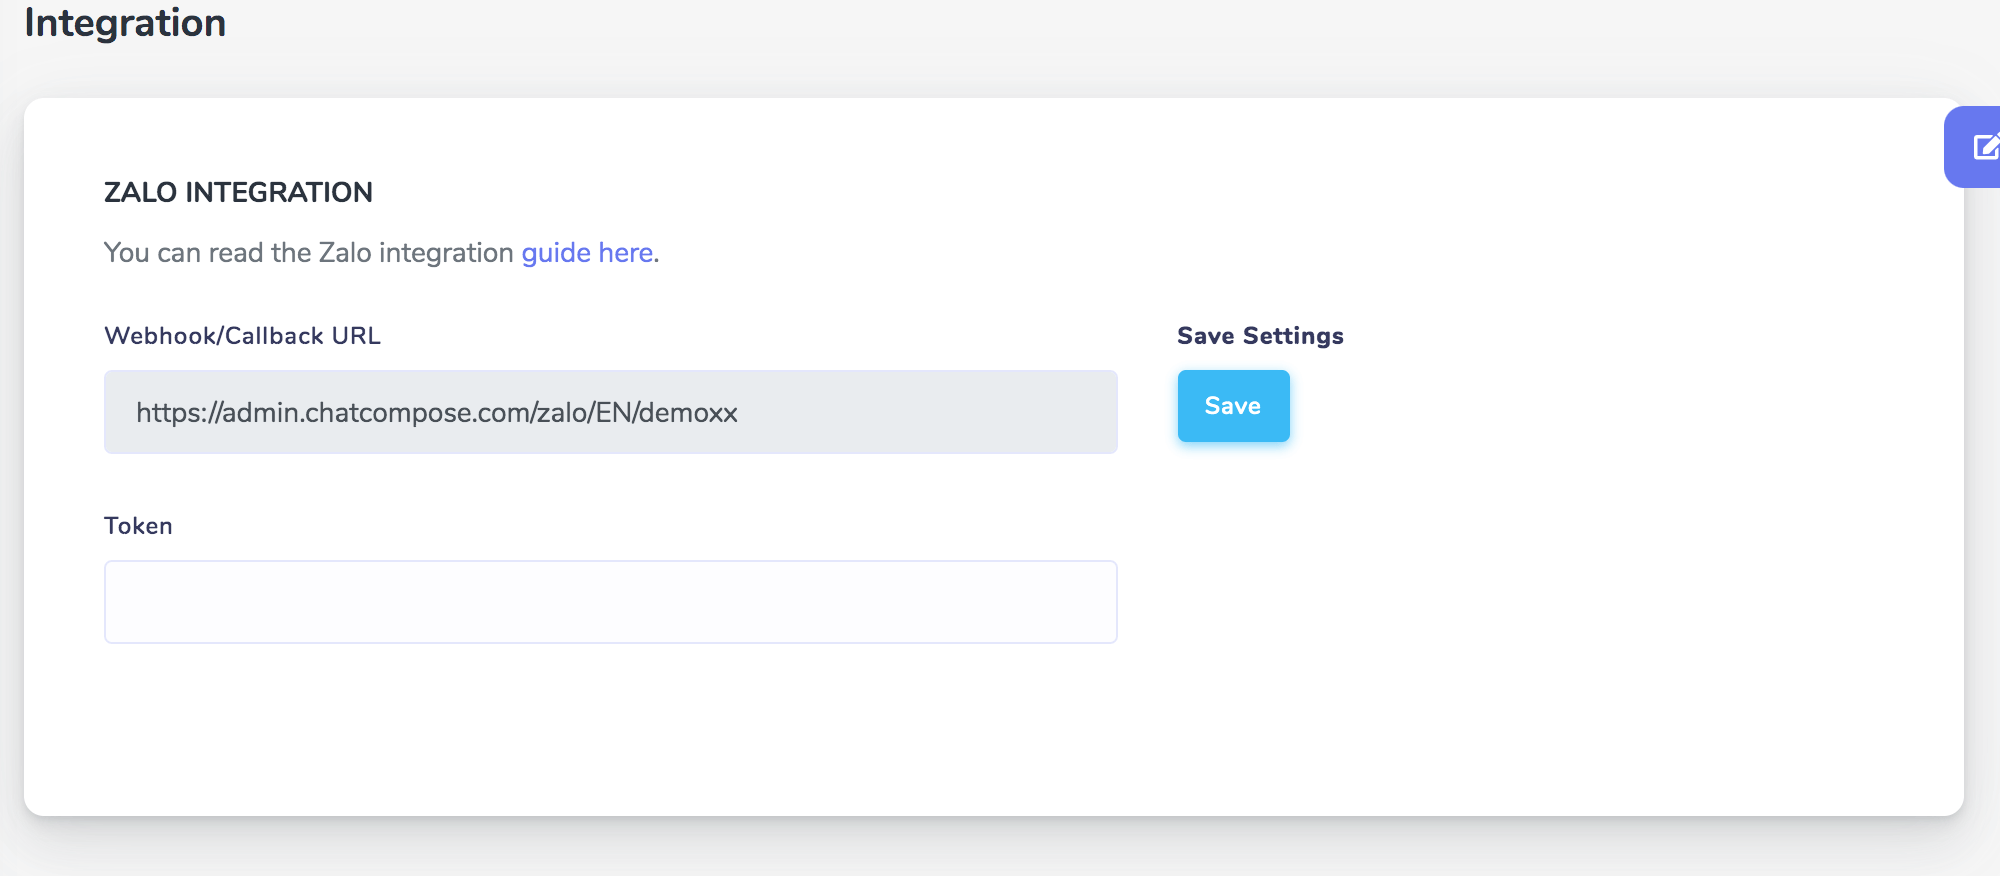
Here you will be able to get the a webhook url. Copy it.
Go back to Zalo Developers.
After linking the Application and Official Account successfully, the Webhook item will be shown as below.
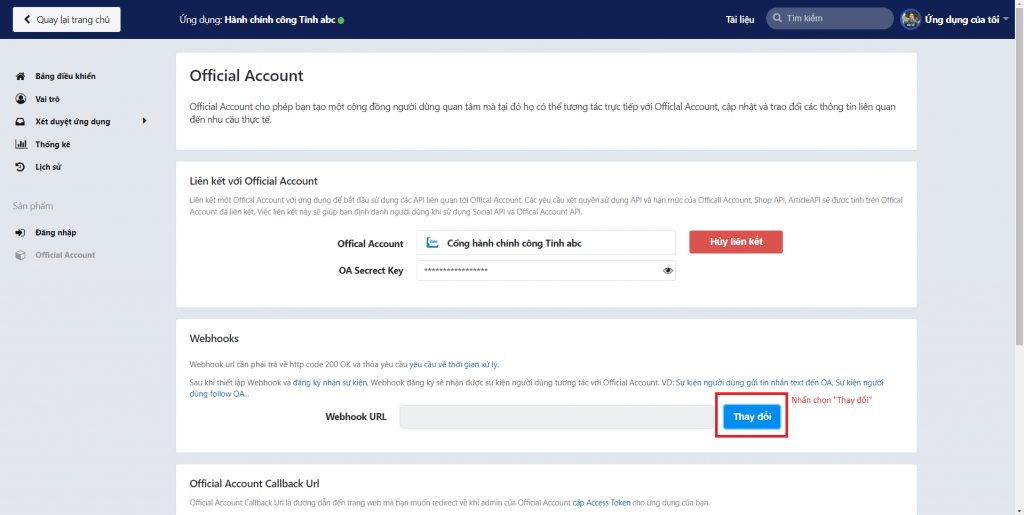
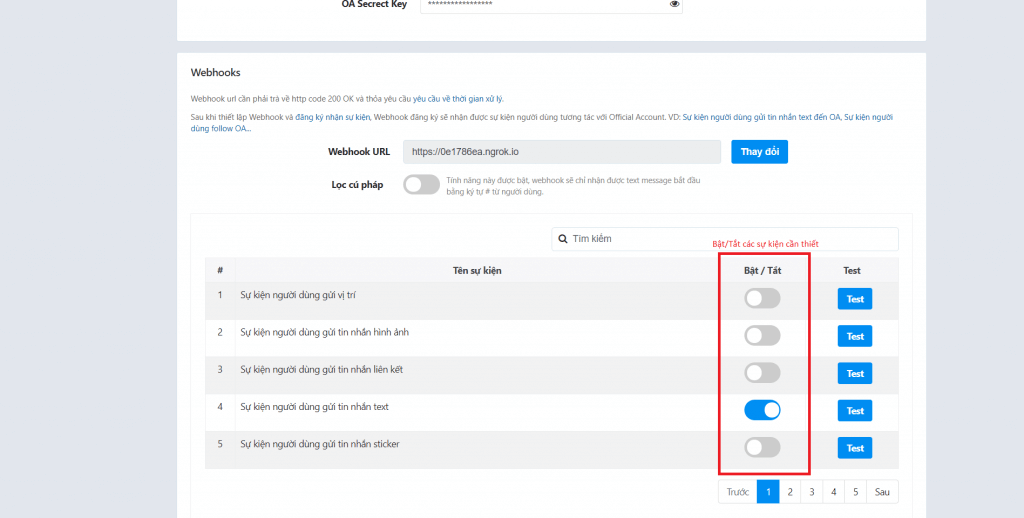
Click "Change", Webhook Url to enter the url.
If you enable the "Syntax filter" feature, your webhook can only receive text messages beginning with "#" from users.
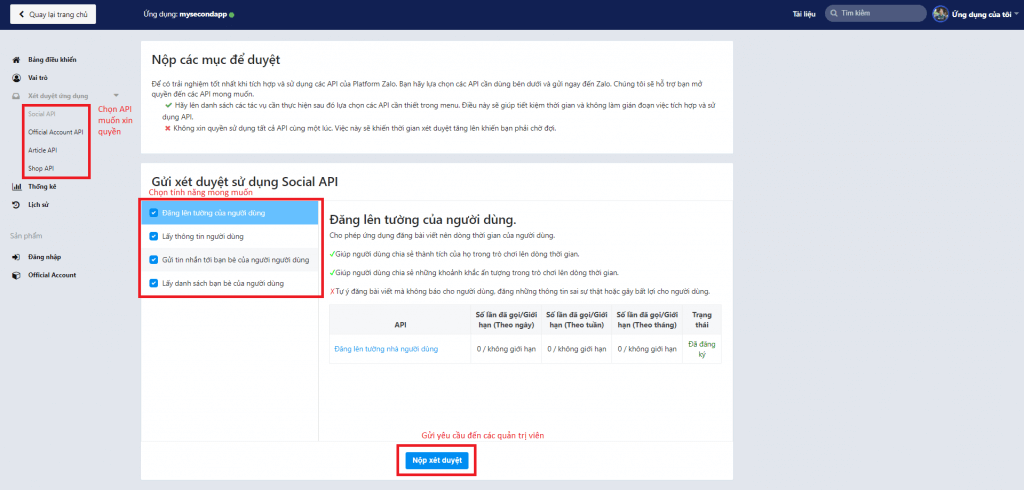
On the left menu, select Application review.
Click on the right to send messages and receive events from users, select "Submit review" to complete. In a few moments Zalo will check your rights.
Official Account Access Token (Expiry date: 1 year): Is an access code issued by the Admin of the Officlal Account to the Application so that the Application has OA representative rights to call APIs to configure the chatbot for the Officlal Account.
To request the access token please go to your application main page:
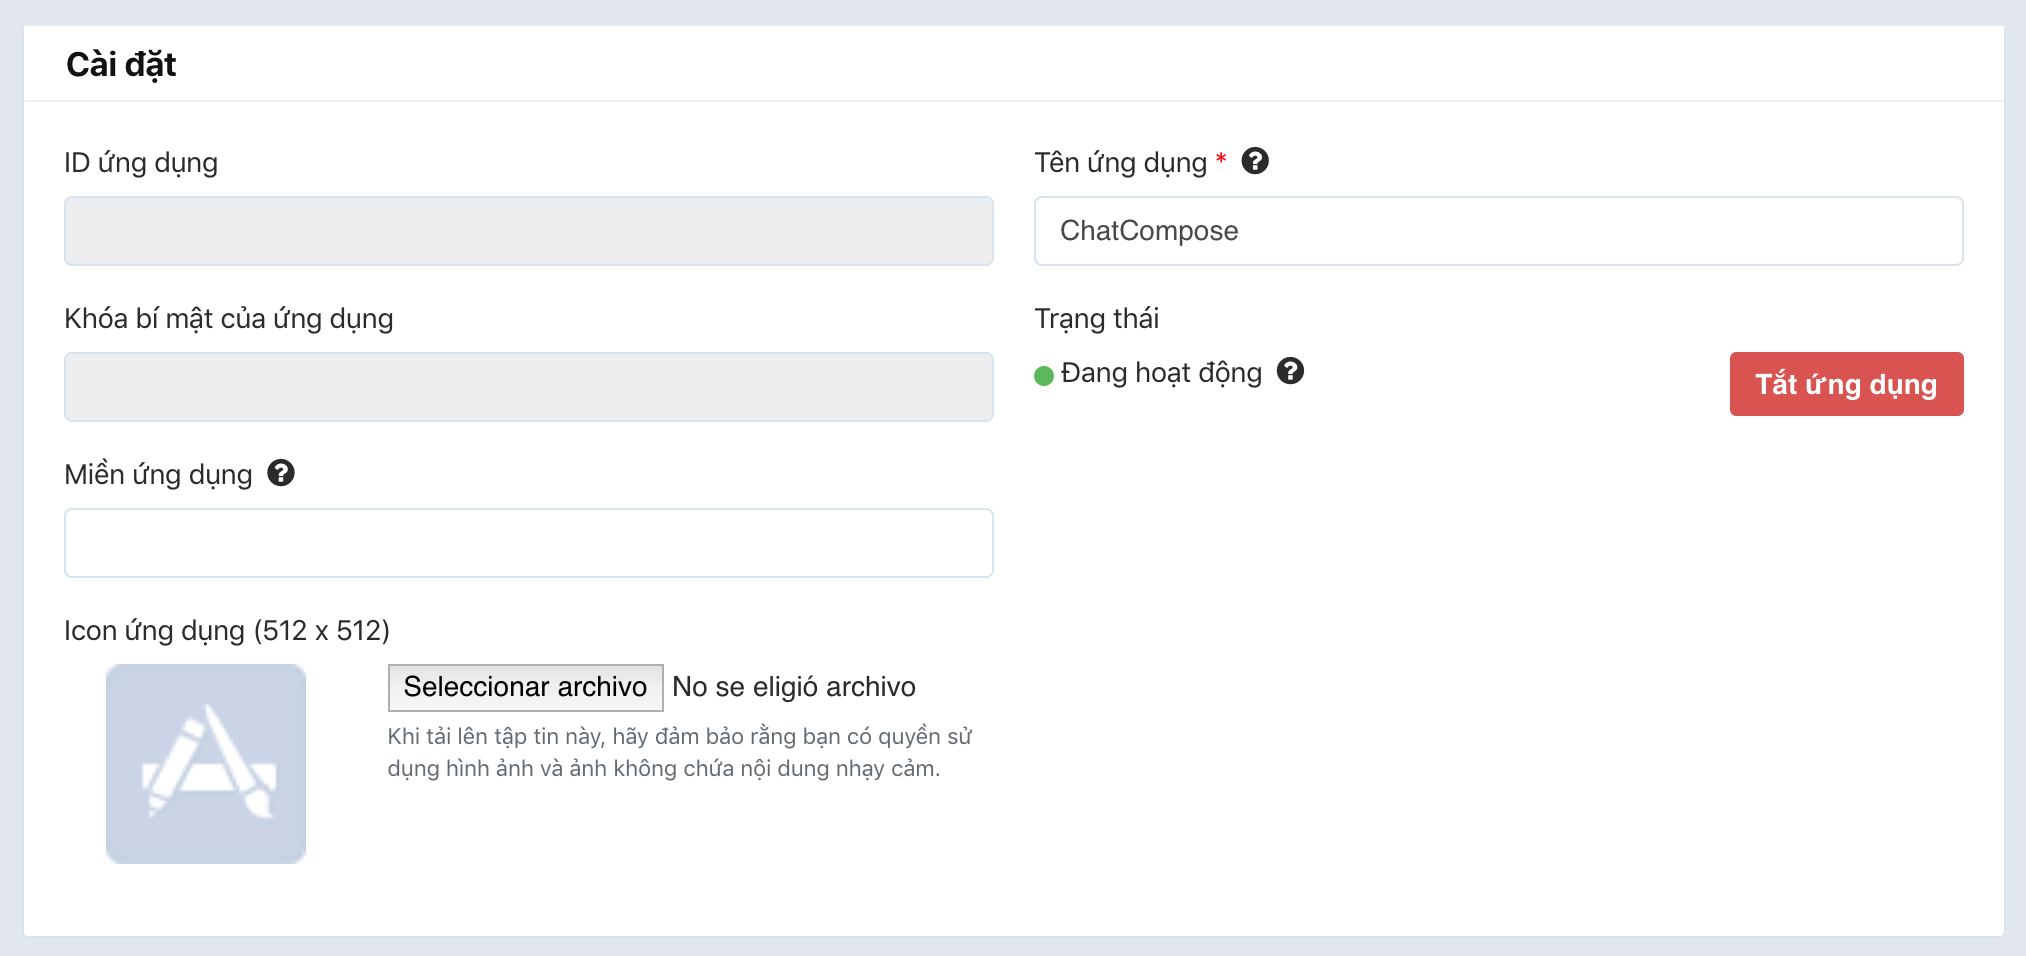
Turn on your application (green) and copy the application ID.
In the Official Account section, navigate to Official Account Callback Url and enter the webhook url from ChatCompose.

When you are done, please visit the link below to apply for that Official Account access code:
https://oauth.zaloapp.com/v3/oa/permission?app_id=<APP_ID>&redirect_uri=<CALLBACKURL>
You can get the APP_ID from the main page of your application in Zalo for Developers.
The you can get the CALLBACKURL from ChatCompose
The server will respond something like: token is ATOKENSTRING
Copy and save the token you just created.
Navigate to Integrations and click on the Zalo section.
Paste the token in the box and press Save.
After saving the token in ChatCompose your chatbot will be ready.
Add the chatbot to your Zalo application and start sending a few messages to check it is working correctly.
HTML components cannot be shown. Transfers are only allowed for phone numbers.