WhatsApp is the most popular instant messaging application in many countries. The WhatsApp Business API, was created as a very effective digital marketing and customer communication tool.
As a business, you need to be where your customers are, and such a popular messaging app is definitely a good idea. Here we will show you how bots work in this app and how to schedule appointments with a chatbot for WhatsApp.
Creating a WhatsApp bot is as simple as creating one for any other integration channel. You can create fully custom scripts in Scripts> Create Scripts and reply to the same messages your bot replies on the web.
Also, you can enrich the responses by adding the components you need, images, links, forms, messages, reservations, etc.
A whatsapp chatbot will load a script, just like with your web chatbot with some minor differences. What are these differences? Options and reservations will be loaded differently in your WhatsApp chatbot. There will be no clickable items, but numbered options (for the user to respond with a number).
In the example below, the user is presented with three options: Make a reservation, Quick responses, and Open a support ticket. Within the communication flow, things remain exactly the same for both a web bot and WhatsApp.
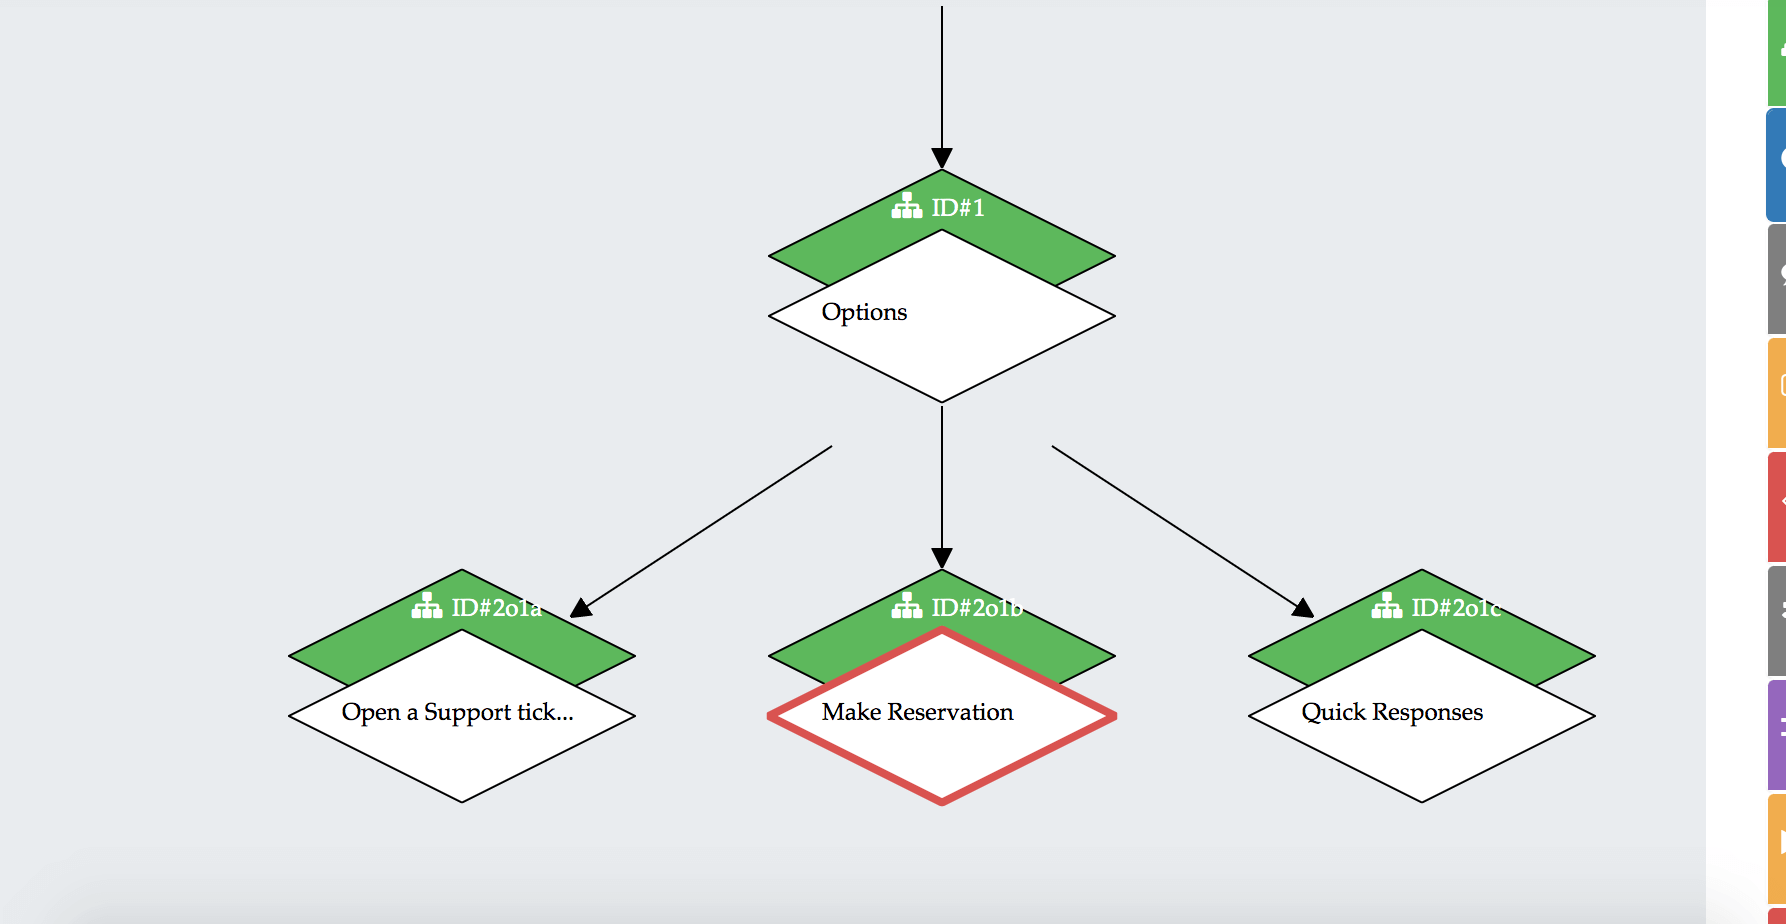
But when the bot is integrated into WhatsApp, the options appear differently.
Please select an option:
1. Make a reservation
2. Quick responses
3. Open support ticket
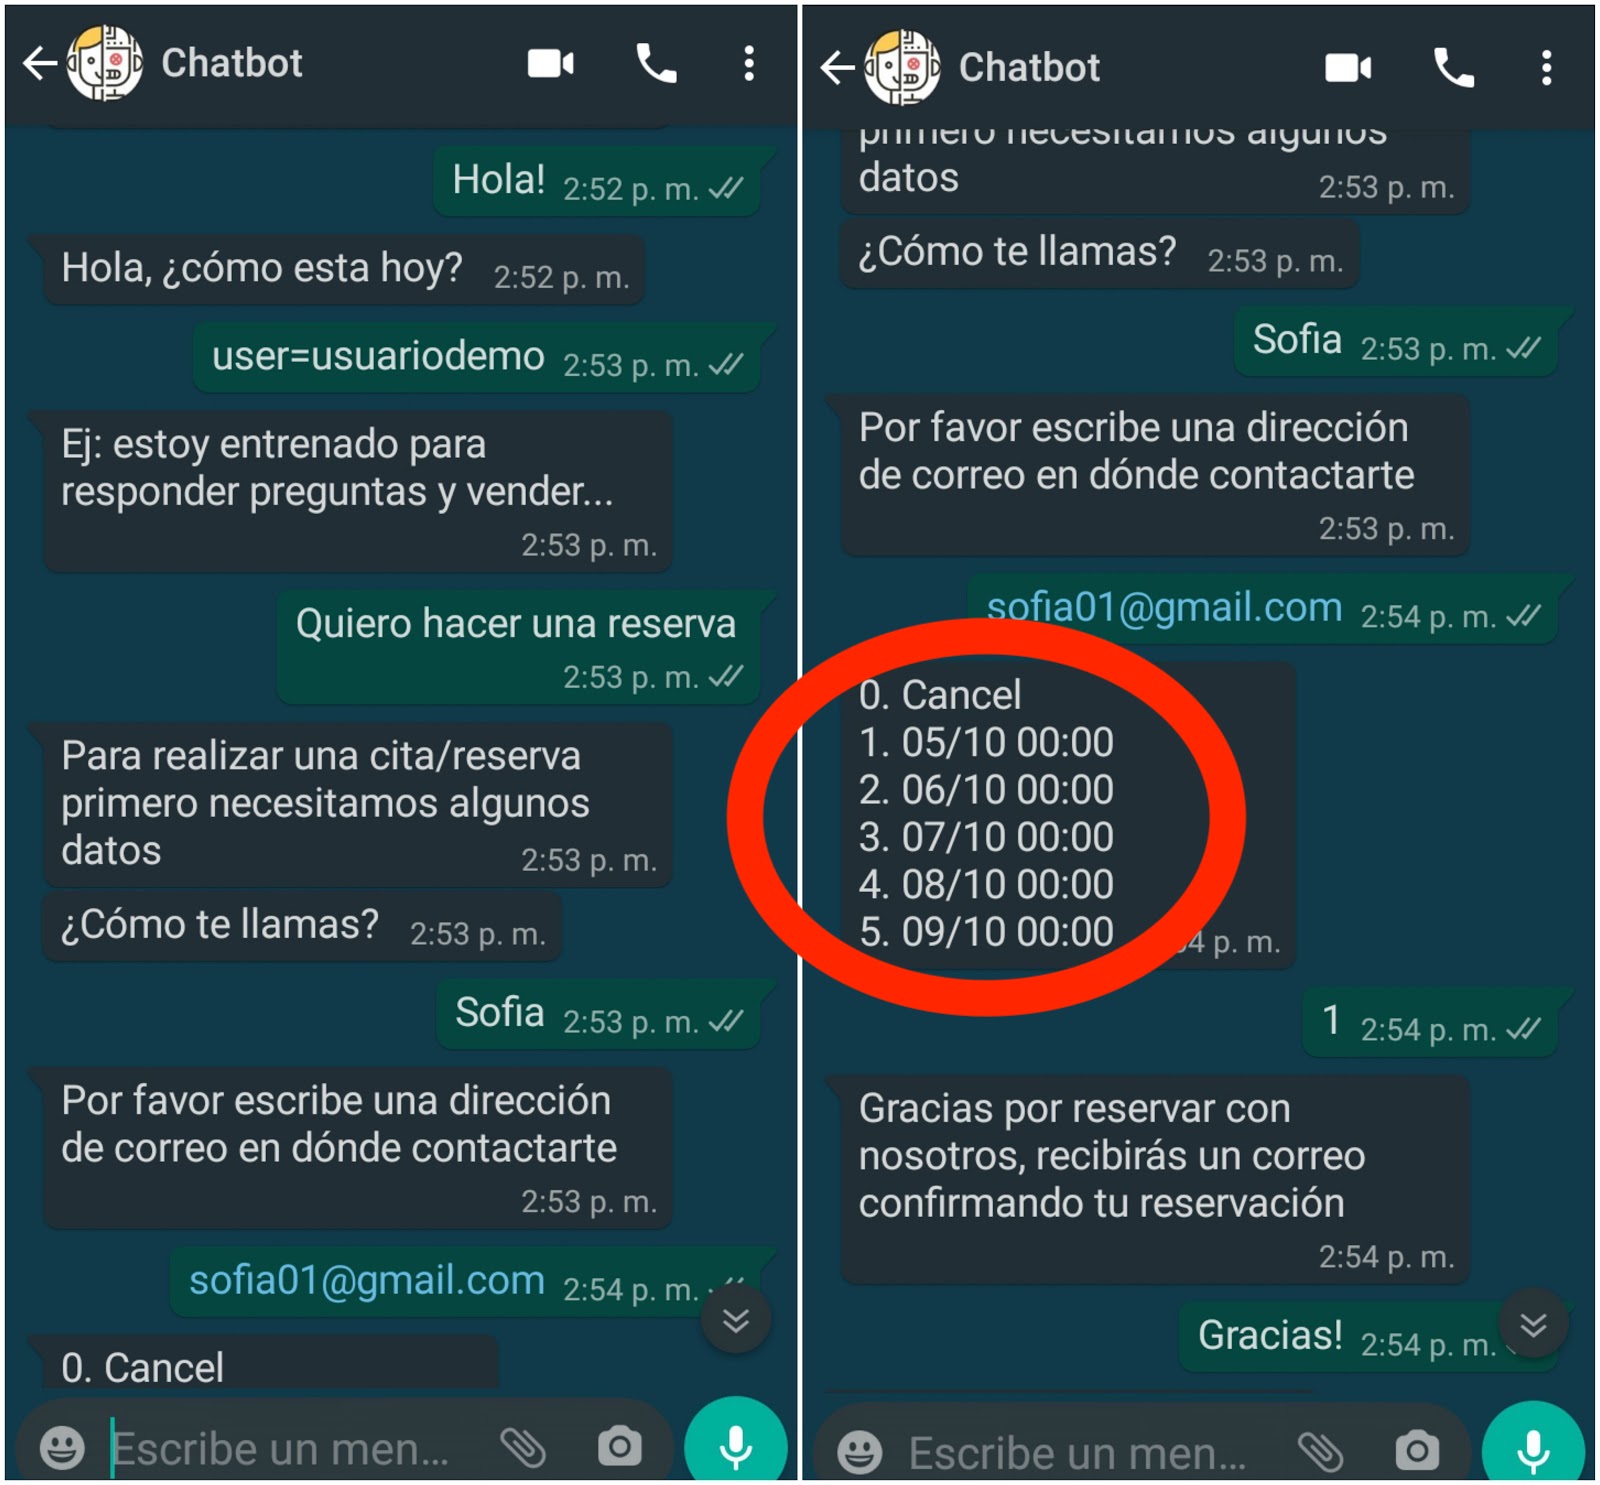
As you can see, the options work with numbers, if the user enters another character that is not a number, the chatbot will issue a warning and request a number in response. The same happens with reservations, the bot will show a calendar with numbered reservation options and the user can select an option and confirm their reservation.
Finally, it must be clarified that since WhatsApp is not based on the browser, HTML elements are not allowed. All other components work on WhatsApp just like they work on the web.
In ChatCompose you can create a reservation calendar that you can then integrate into the script that will be shown to users when they come into contact through WhatsApp.
To get started, you just have to navigate to the Reservations / Appointments section. There you will see a calendar of events where you can select your available hours for appointments, or otherwise the availability of your service.
Next you must assign availability, that is, what hours you are available to your customers. For a schedule to appear as available you just have to click on the time;
By default, appointments are scheduled for half an hour at a time, but if you want to create longer appointments you just have to drag the click for the desired time.
And to delete, you just have to click on the event.
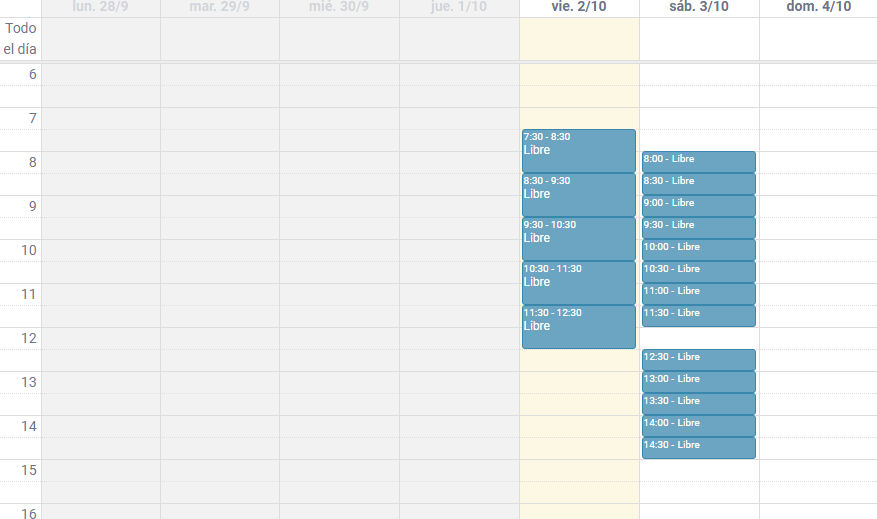
You can configure to see the daily, weekly or monthly appointment calendar:

Once you have configured your schedule, press the "Save Calendar" button. At this point, your calendar is ready, but how do you integrate it into your conversations?
ChatCompose works with components and "Reserve" is one of them.
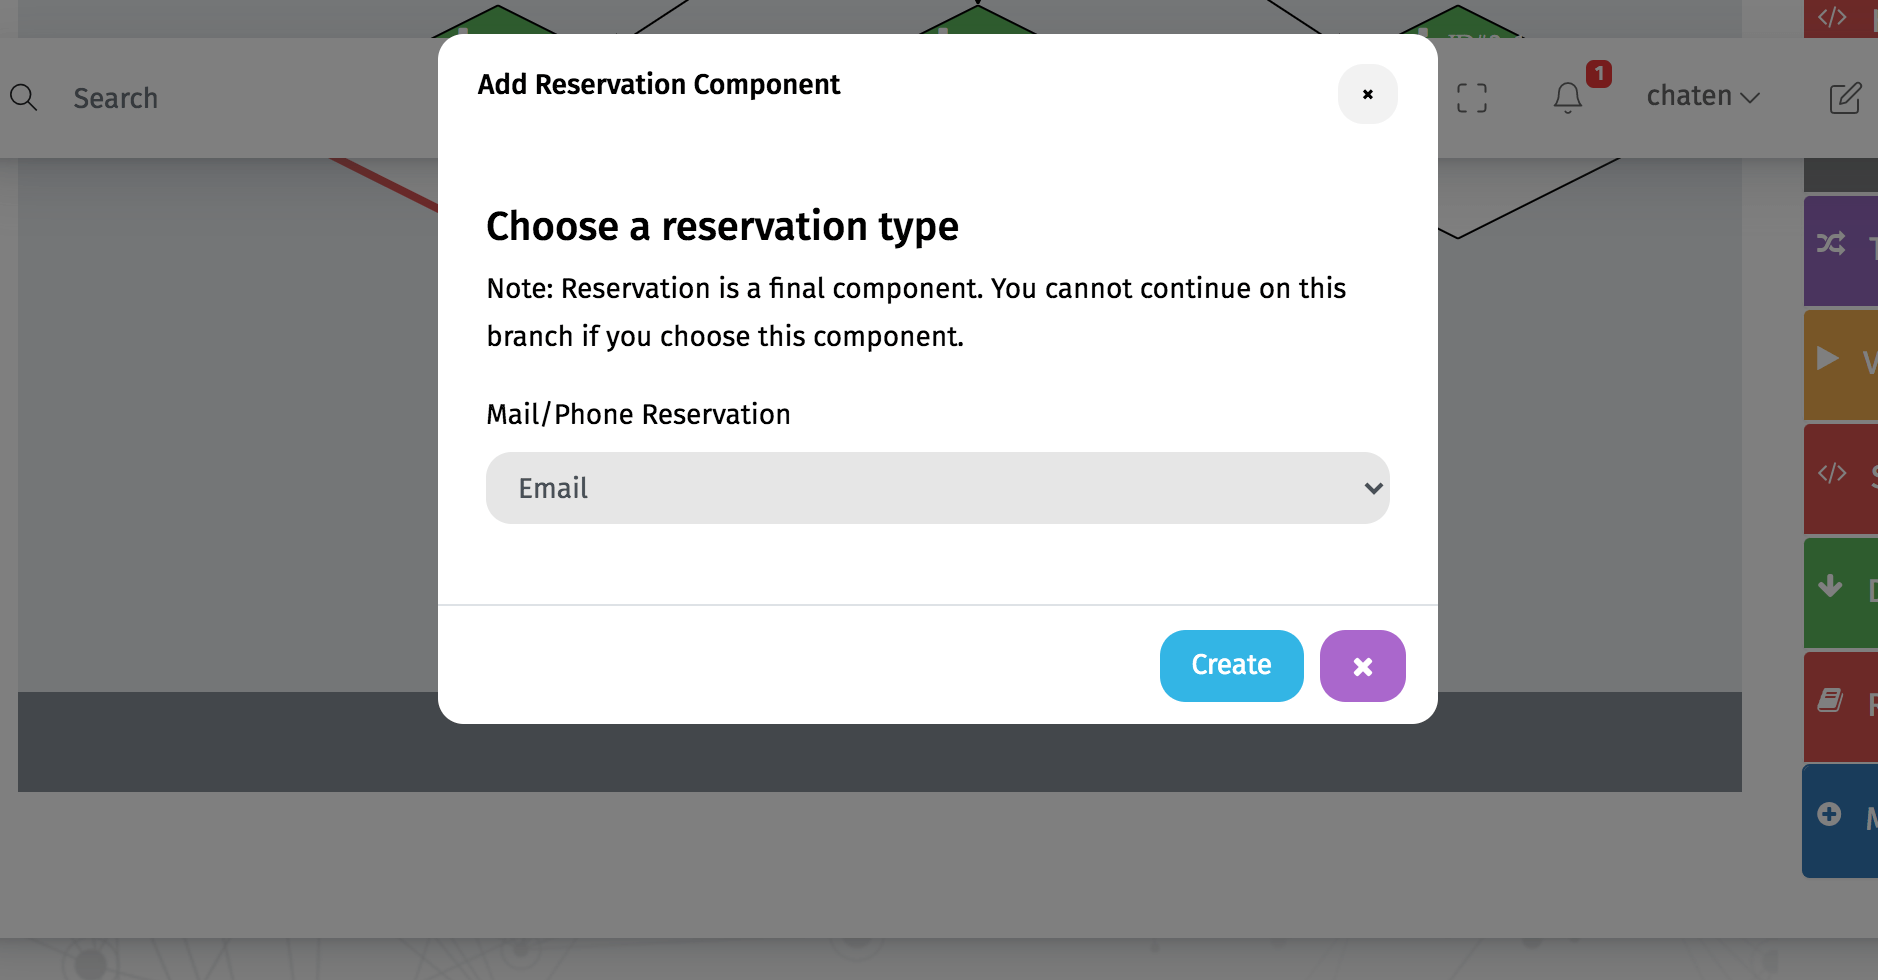
To enable the reservation system within your bot, you must use the "Reserve" component, to make reservations if the user provides the email and "Reservephone" in case you want your users to make reservations with their phone number.
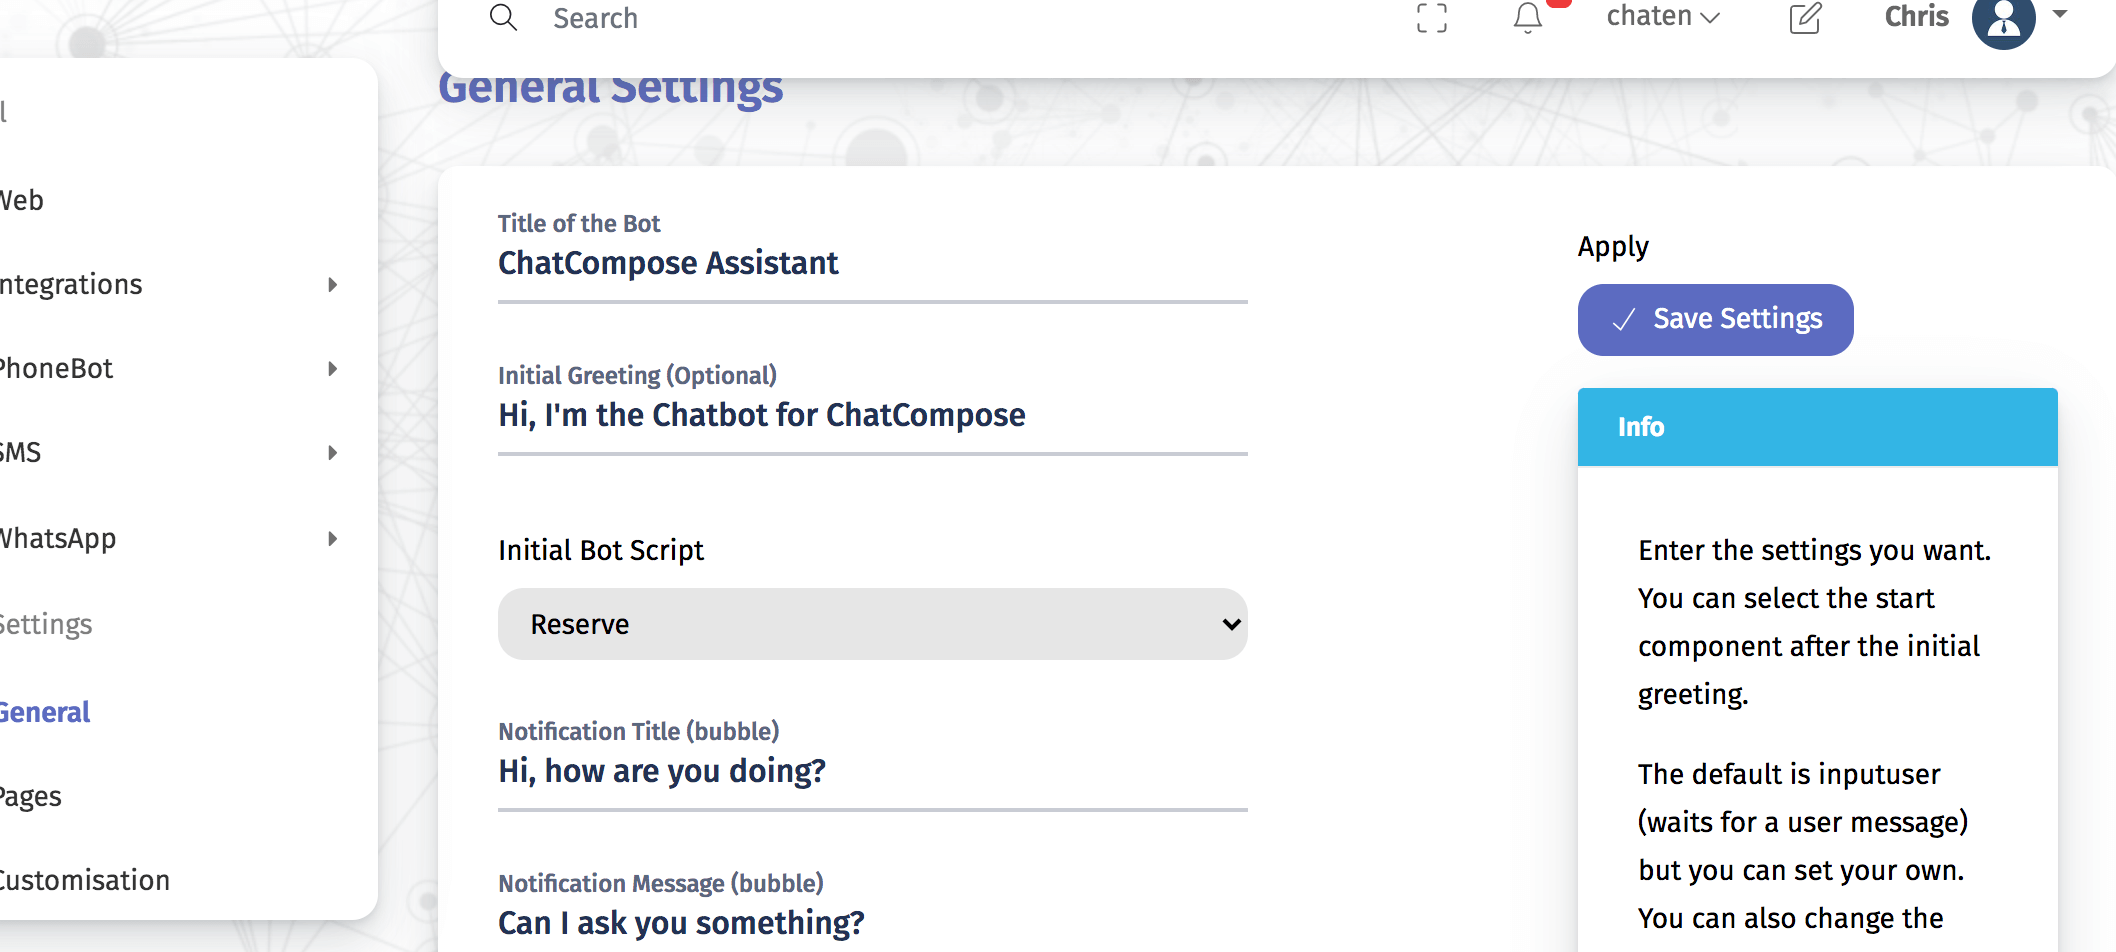
If you want the bot to directly handle the appointments, you can assign the "Reserve" component as the Initial Component. To do this, navigate to Settings> General Settings and enter the Initial Component list, select "Reserve" or "Reservephone" .
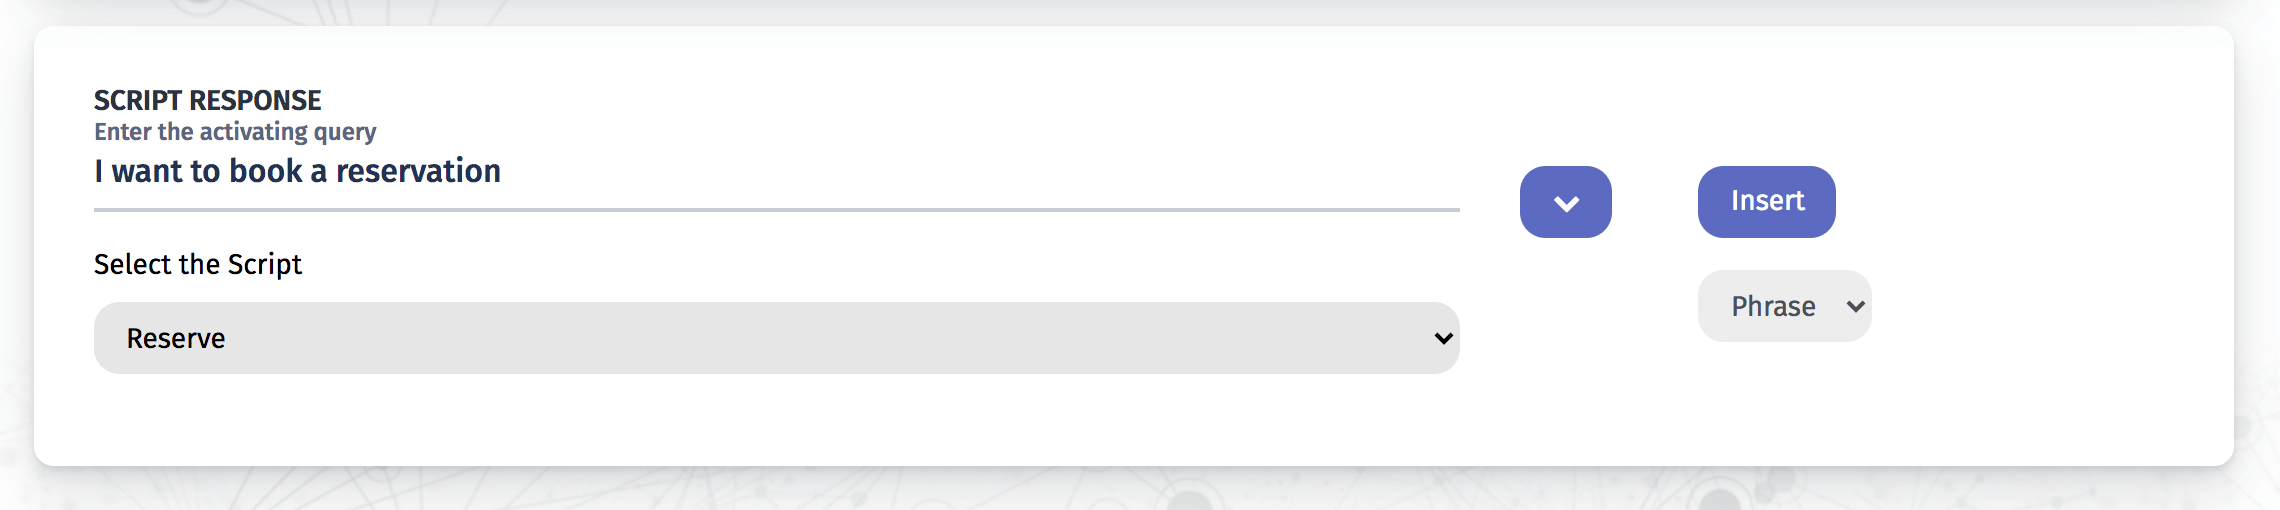
In the Database section, you can assign the "Reserve" component in response to a related message or query. Thus, if for example the user writes, “I would like to schedule an appointment”, the bot would respond with available hours. This is done in the Script Response section:
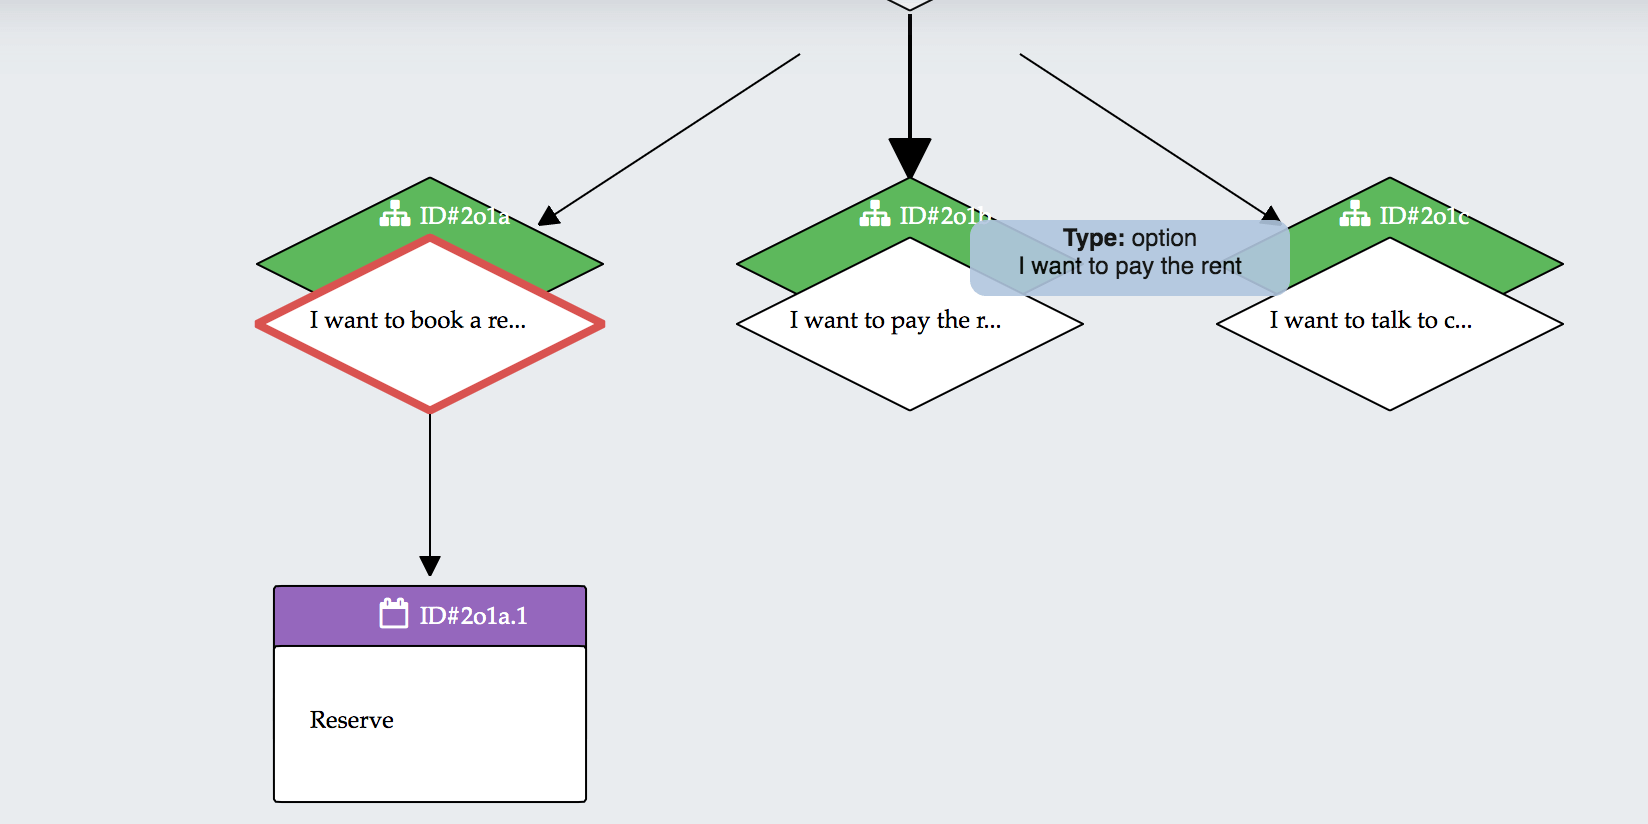
Finally, you can add the reservation component as part of a more elaborate script, in a conversation:
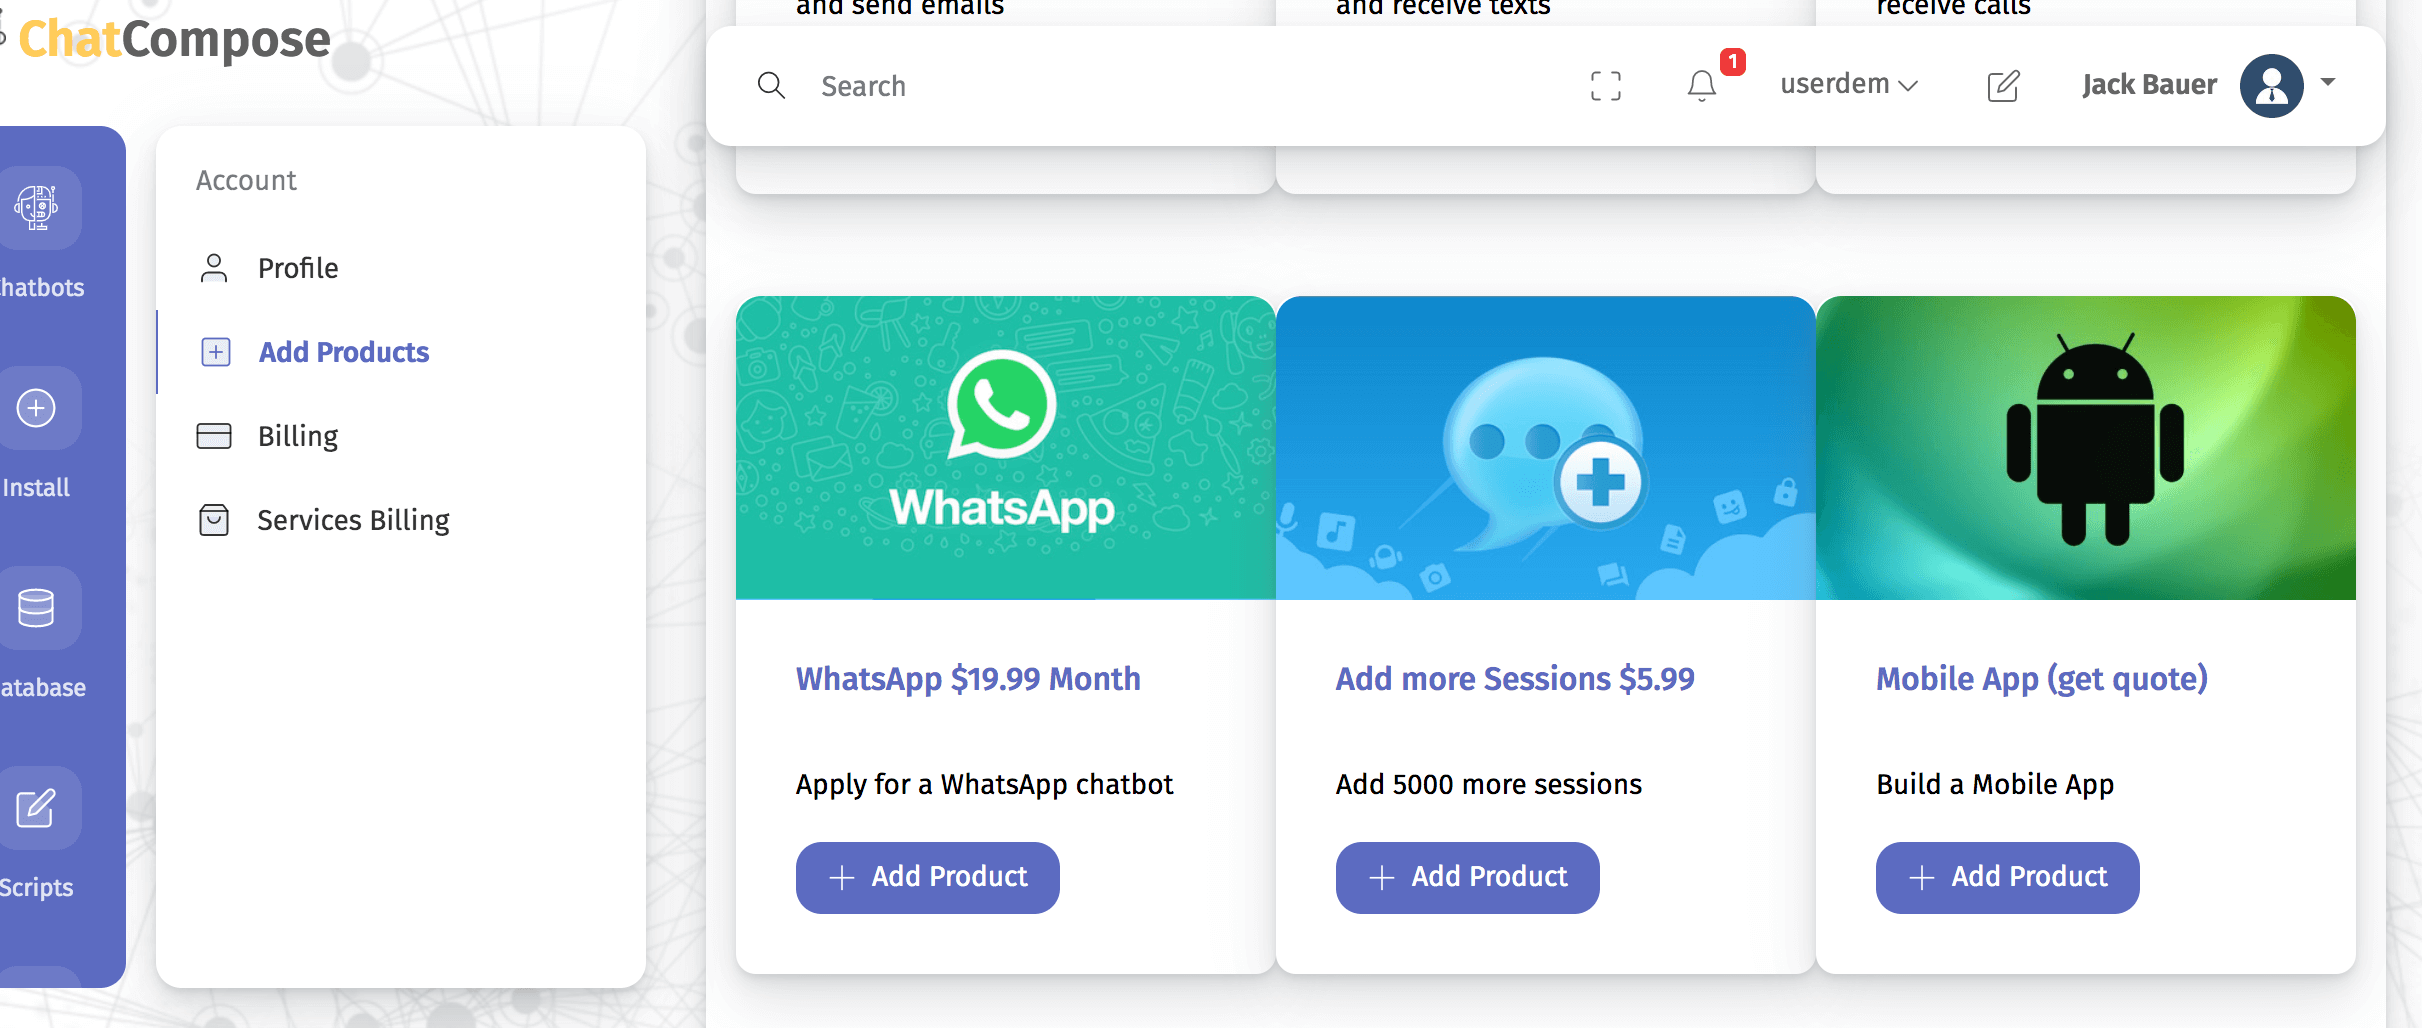
WhatsApp is an integration available on Purchase, so you need to go to Add Products and request the integration.
In order to get your chatbot approved, it is essential that you have a Facebook business account (Facebook Business verification), since WhatsApp is owned by this company and verification is required to approve a number for the use of the chatbot.
Once you get your WhatsApp number approved for chatbot use, you can configure either the "Reserve" component as the initial component, or add it in response to an appointment request in the Database, or add it to a more complete script within the diagram flow.
In any case, to establish an initial script for your WhatsApp chatbot, navigate to WhatsApp>Settings.
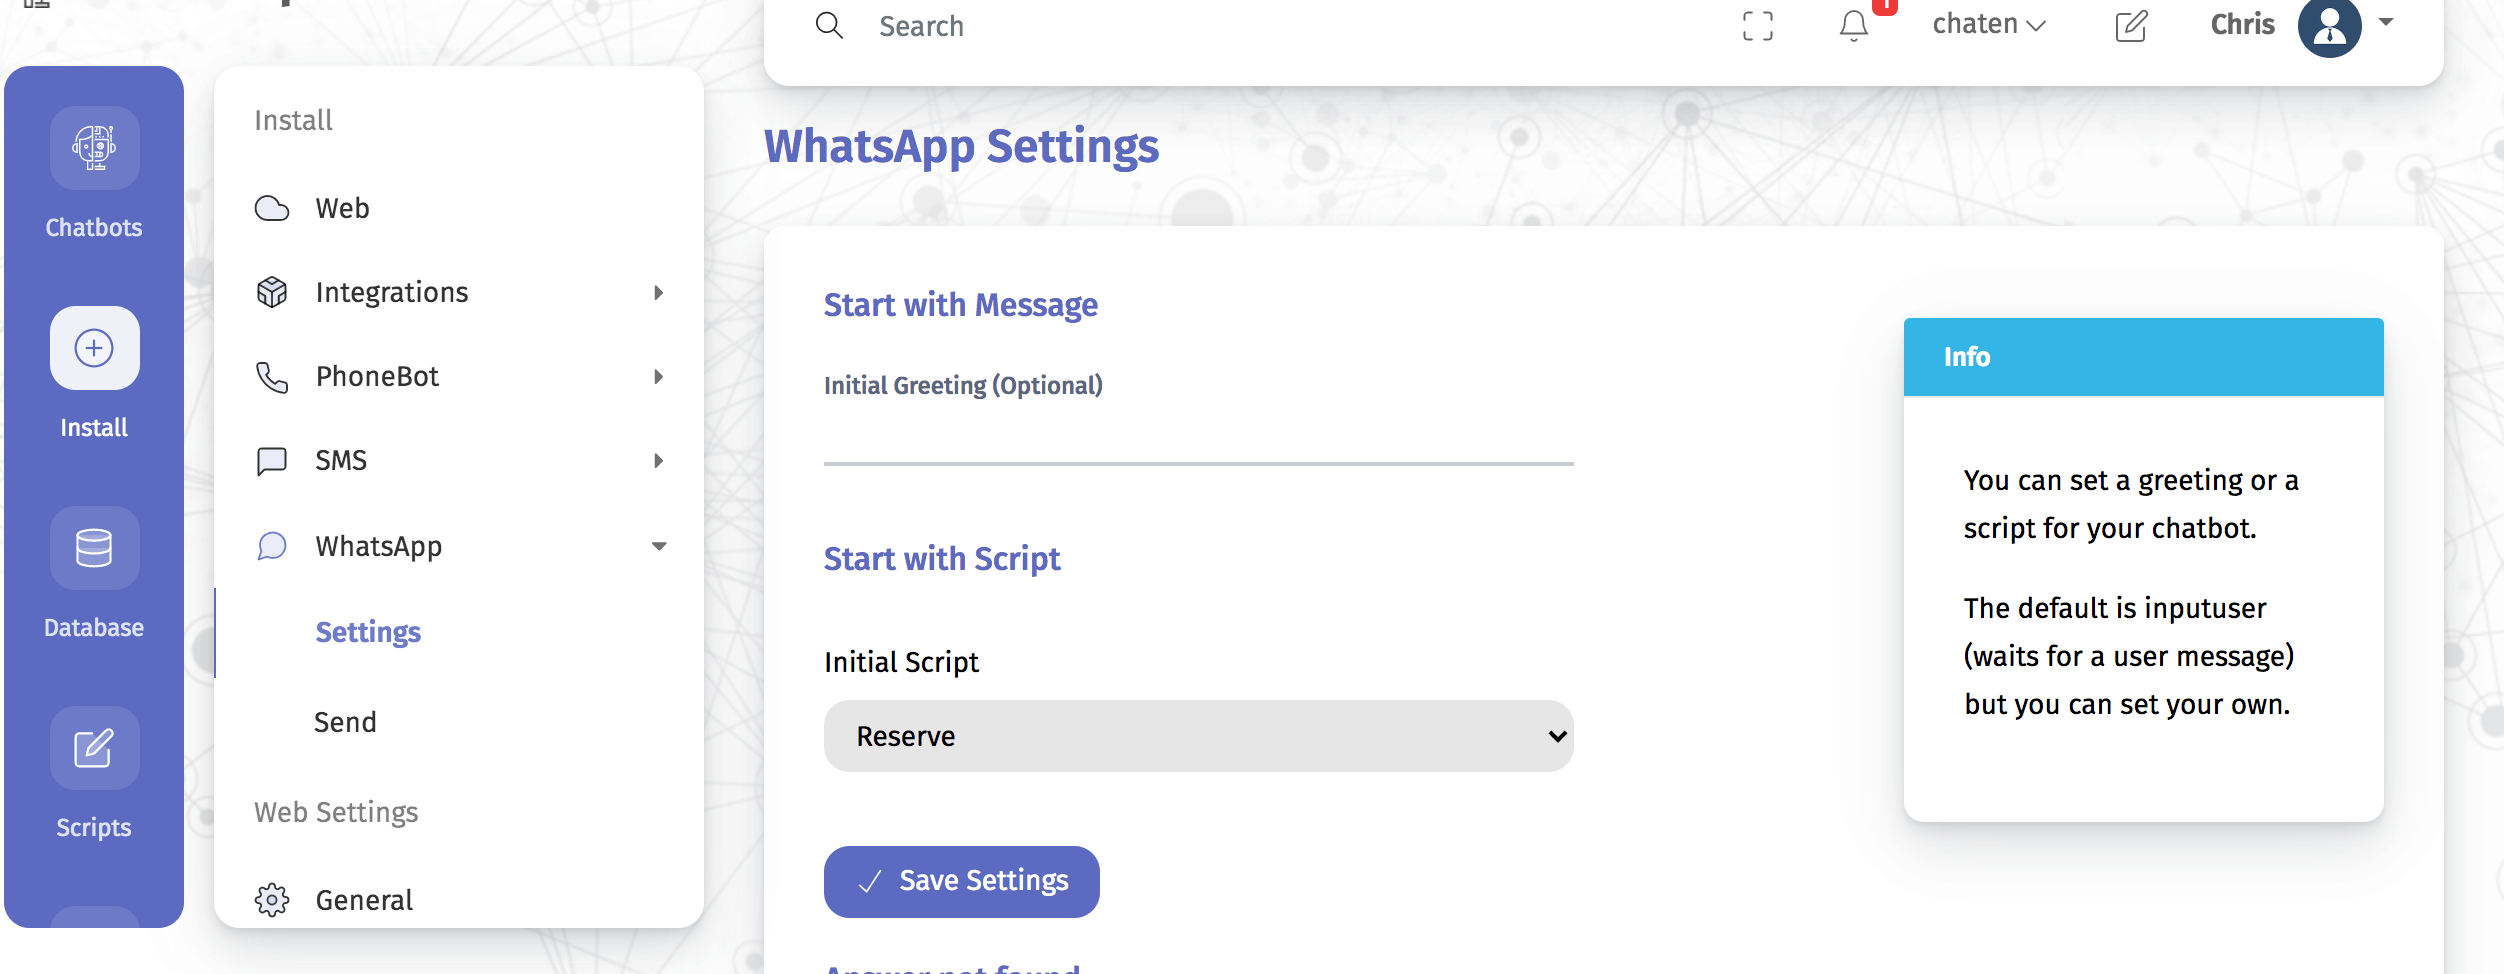
Although bots for web, phone and WhatsApp are created exactly the same, the channels are different and react differently. So it is best to create a separate chatbot for each channel.
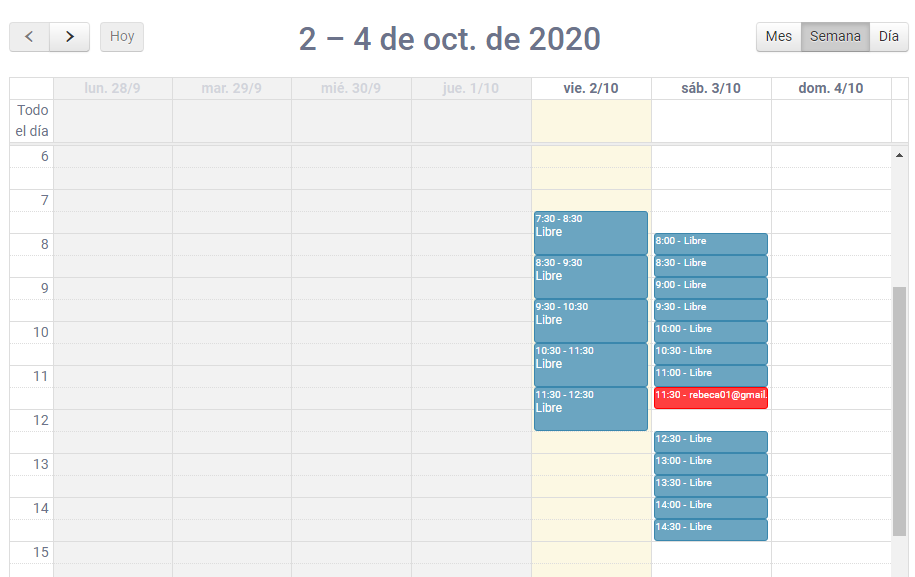
Users will see the days and hours that are available to schedule an appointment. In WhatsApp, they can select the schedule according to their convenience with a numerical selection to make an appointment.
When the user books their appointment, you will receive a notification via email, which includes data such as time, name and email (or phone) of who made the reservation. This reservation will also be reflected in your ChatCompose Reservations panel with the time highlighted in red.
Also, in the Settings section you will find a url to integrate your calendar with other services such as Google Calendar or Outlook Calendar.