IVR is the acronym for Interactive Voice Response, related to telephone technology that allows interactive communication between a human and a computer, which will give different options or perform different actions by recognizing certain voice commands, or when the person enters DTMF tones via the phone dial pad.
Basically, an IVR allows customers to interact by telephone with companies to manage certain operations without the need for a human in the communication. They can be simple tasks, such as determining which department a client wants to speak to (press or say one to speak to billing ...) or tasks such as changing personal data, checking balances, tracking orders , etc.
Among the advantages of using an IVR as the first line to receive calls in a company or in a Contact Center would be the reduction of waiting times in customer service, since the IVR is always available, and can expand of customer service to 24/7. It will also reduce the need to perform repetitive tasks manually bt telephone agents, so they can focus on more complex tasks.
A multilanguage IVR will help companies provide services on a global scene in mutiple languages. To effectively compete in a globalized economy, companies need new ways to communicate with potential or existing customers in their language of choice.
To build an IVR you will need a ChatCompose account, and a virtual phone number. You will also need to read the guide on how to build an IVR.
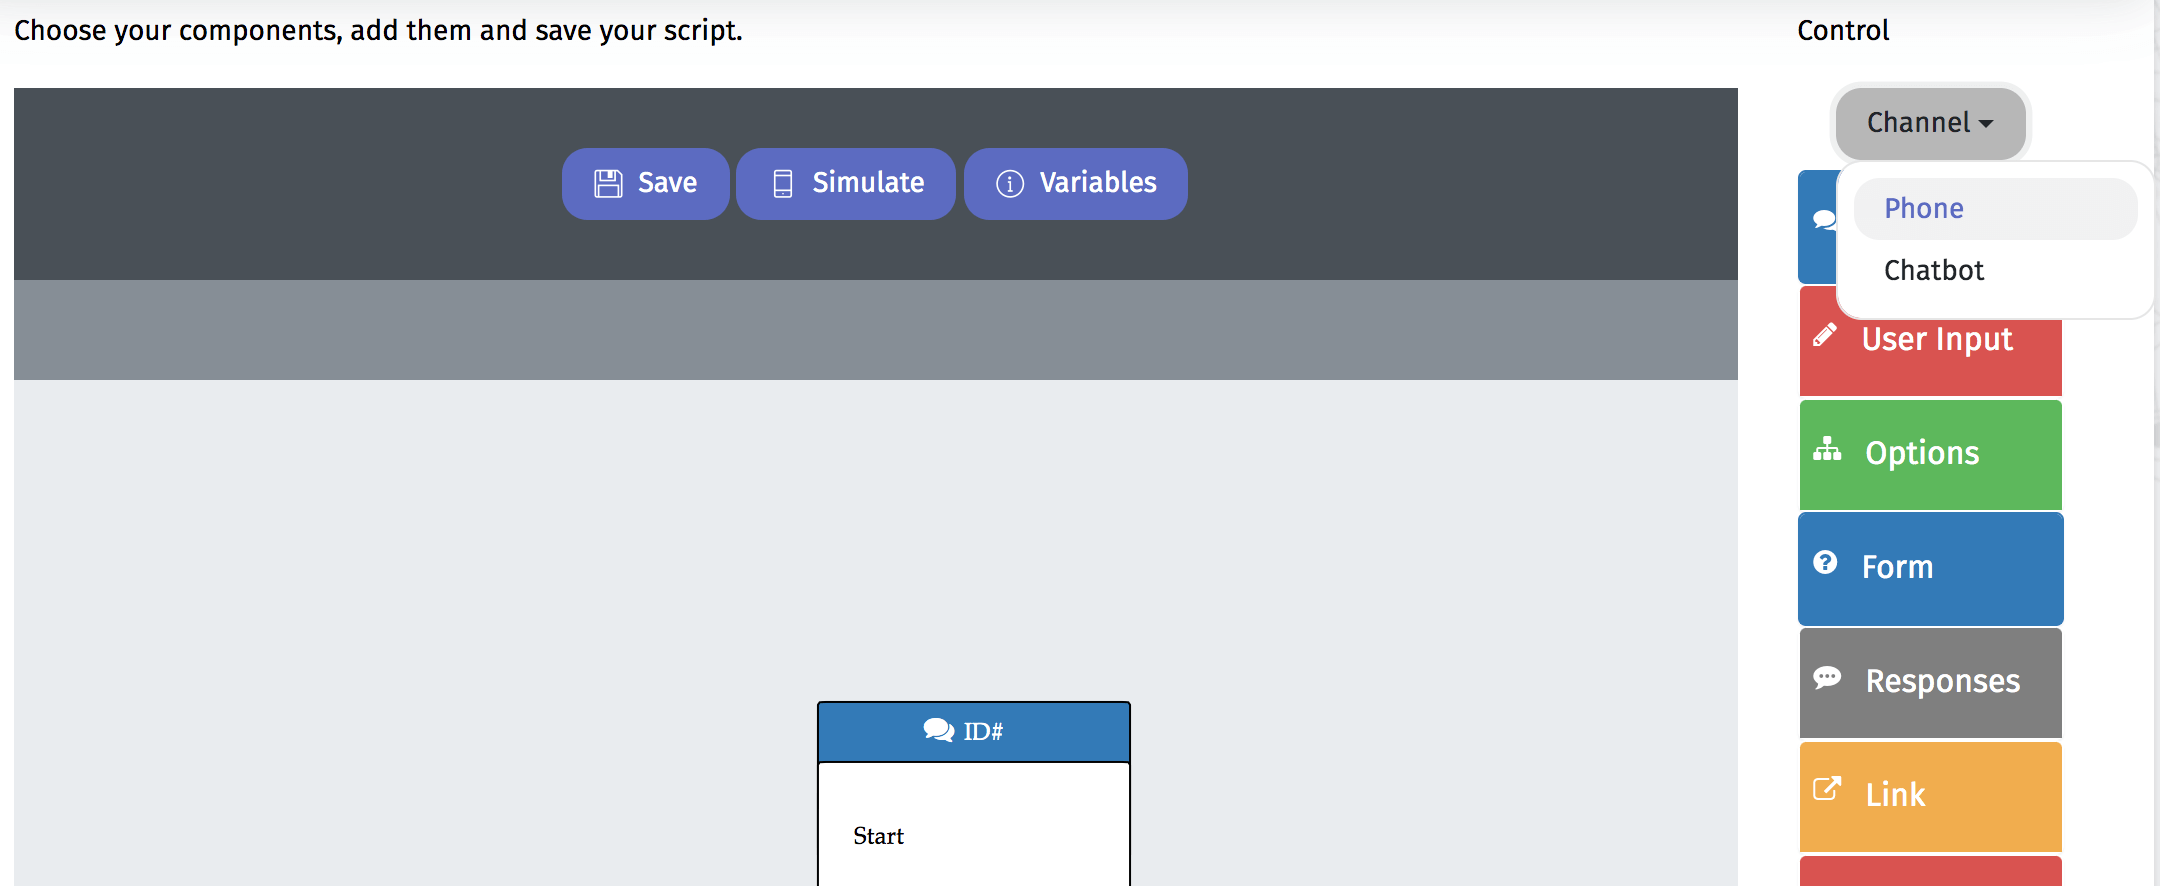
Once in the Script creation interface, switch to Phone.
You can speak on your IVR by using text to speech or recorded messages. Inside an option component, you can enter text, upload a recording in the language of your choice (click on upload), or enter the url of a recording.
The recording should say something like "For (new language), press (option number)". For example, "Para español, presione 2".
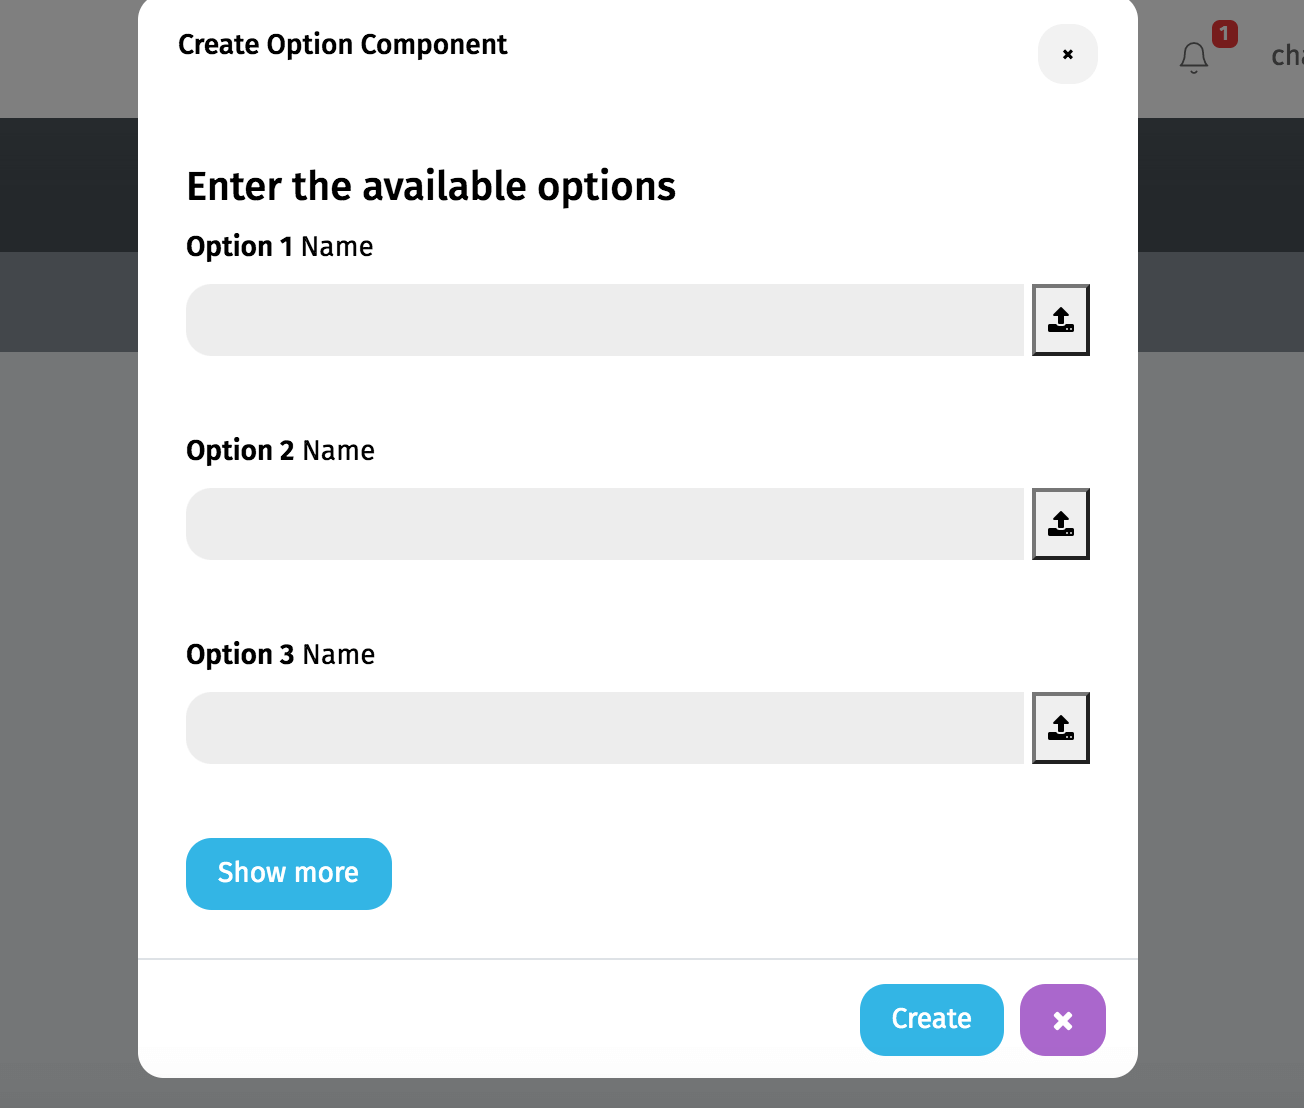
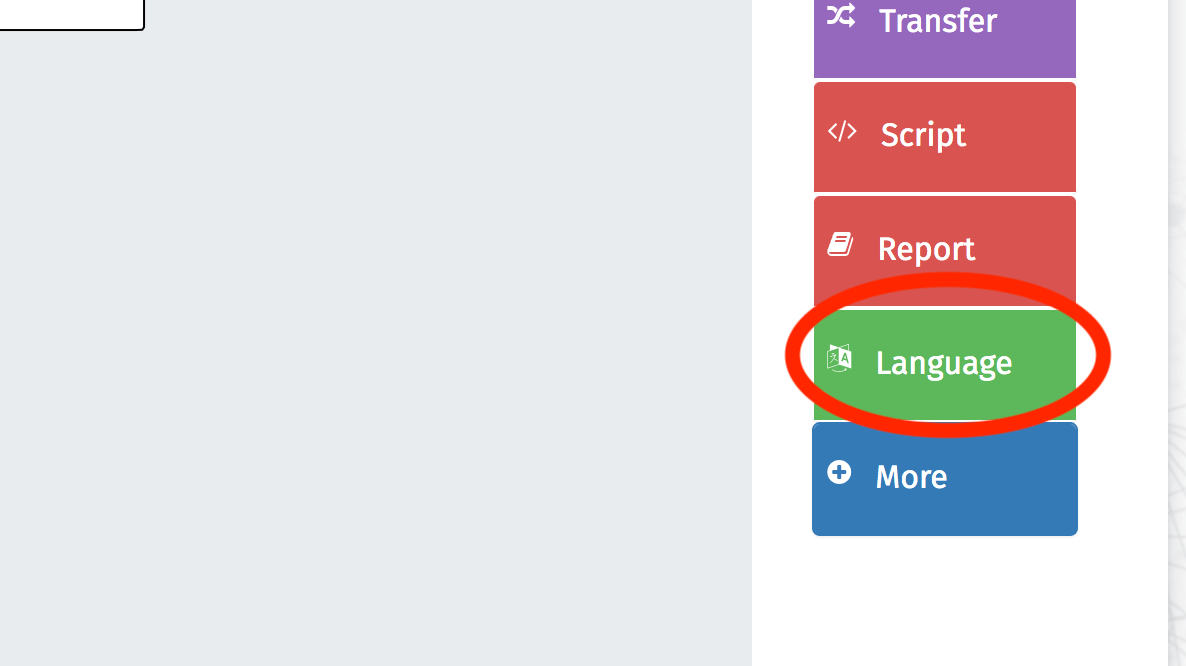
After you have entered your options, click on the option with the recording and follow it with a Language Component.
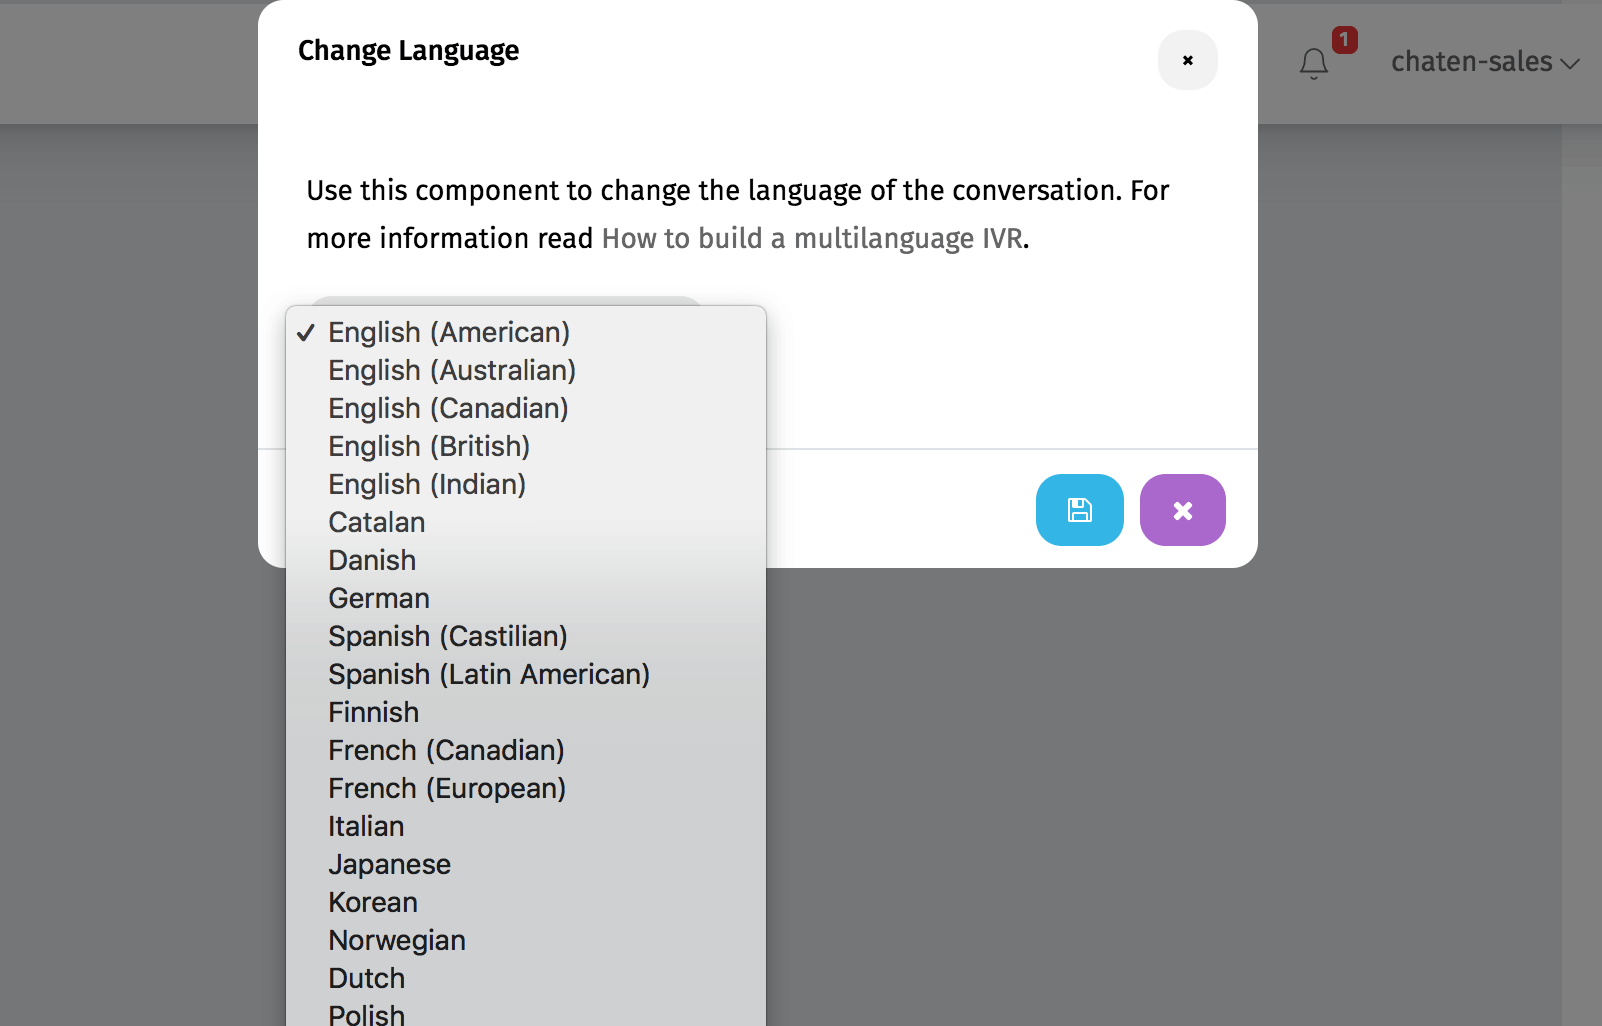
Select the language on the list to continue and press save. It should look something like this.
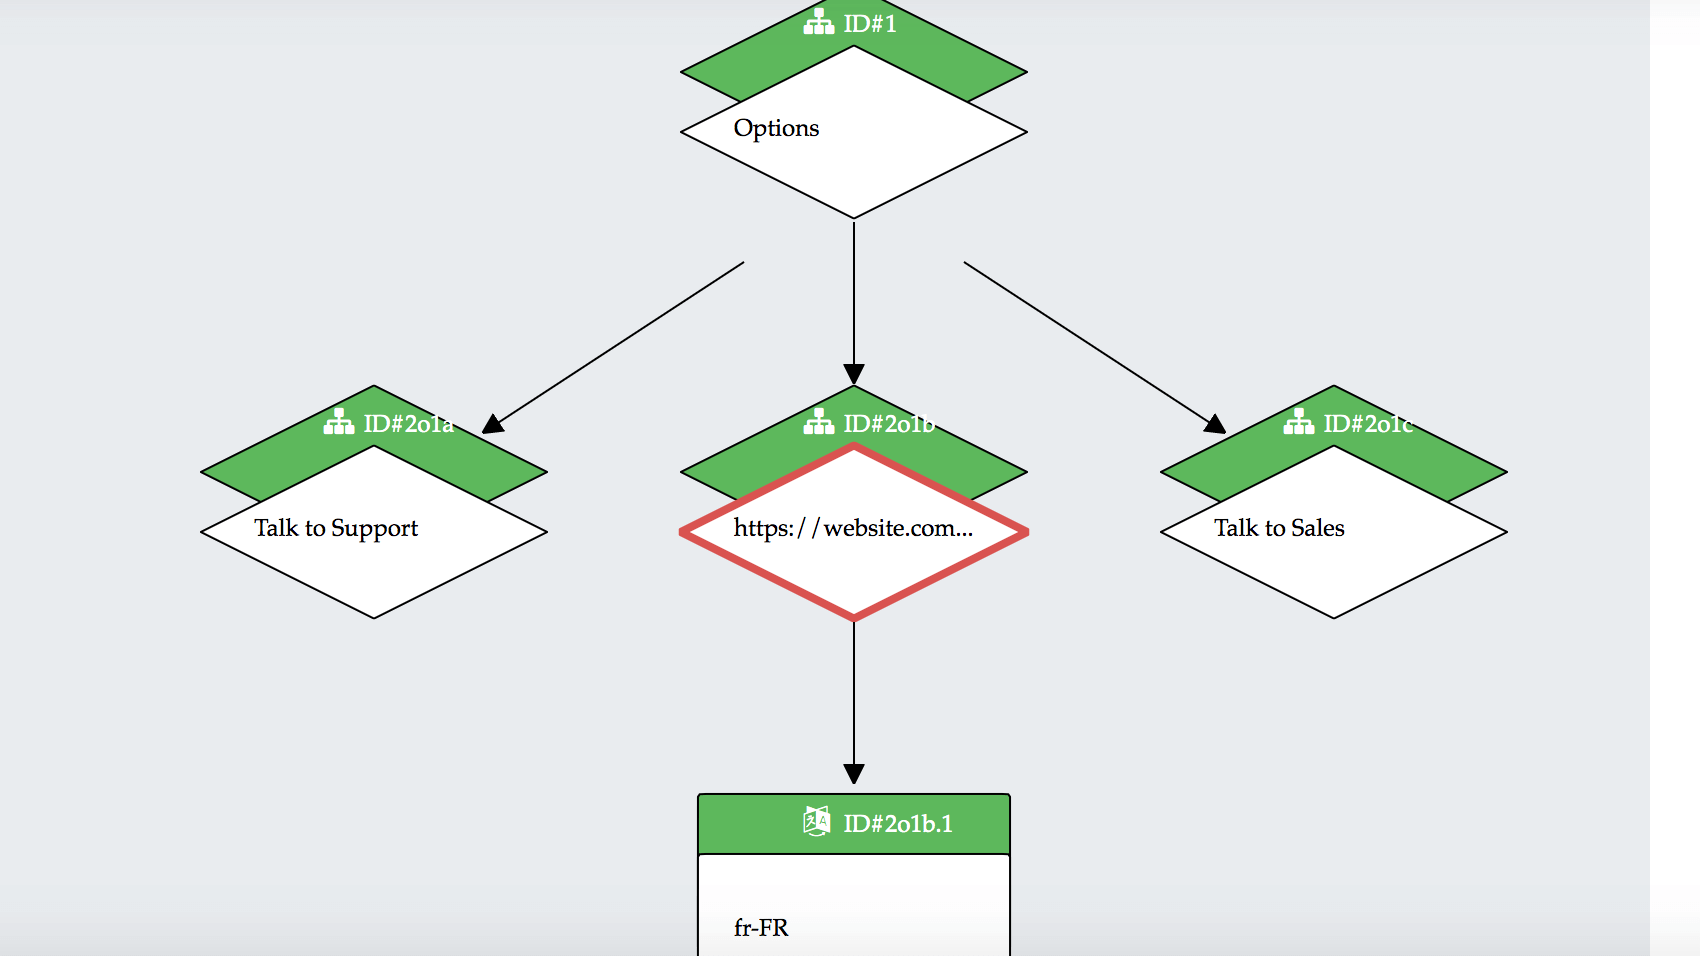
From this component on, your IVR will speak in that language, so you can enter messages, options, forms etc. in your new language.
Note: You will not be able to use the Response Component to look for answers in your database, since the responses will be in the old language. To use Responses in a different language, open a support ticket for further instructions.