The virtual world now belongs to ChatBots, these little robots have managed to demonstrate that they are incredibly efficient to deal with customer management, lead generation, support and more.
Today, hundreds of thousands of small, medium and large companies are already adopting this mechanism to lower staff costs and increase sales or optimize their operations.
ChatBots have become the holy grail of marketing and it is time for you to have yours. In this class we want to show you how you can configure a ChatBot on the ChatCompose platform. We will also show you how to customize and assign use cases.
To configure your chatbot you just have to login. Once inside the interface, in the left sidebar you will find a special section for the Configuration. Navigate to Settings> General.
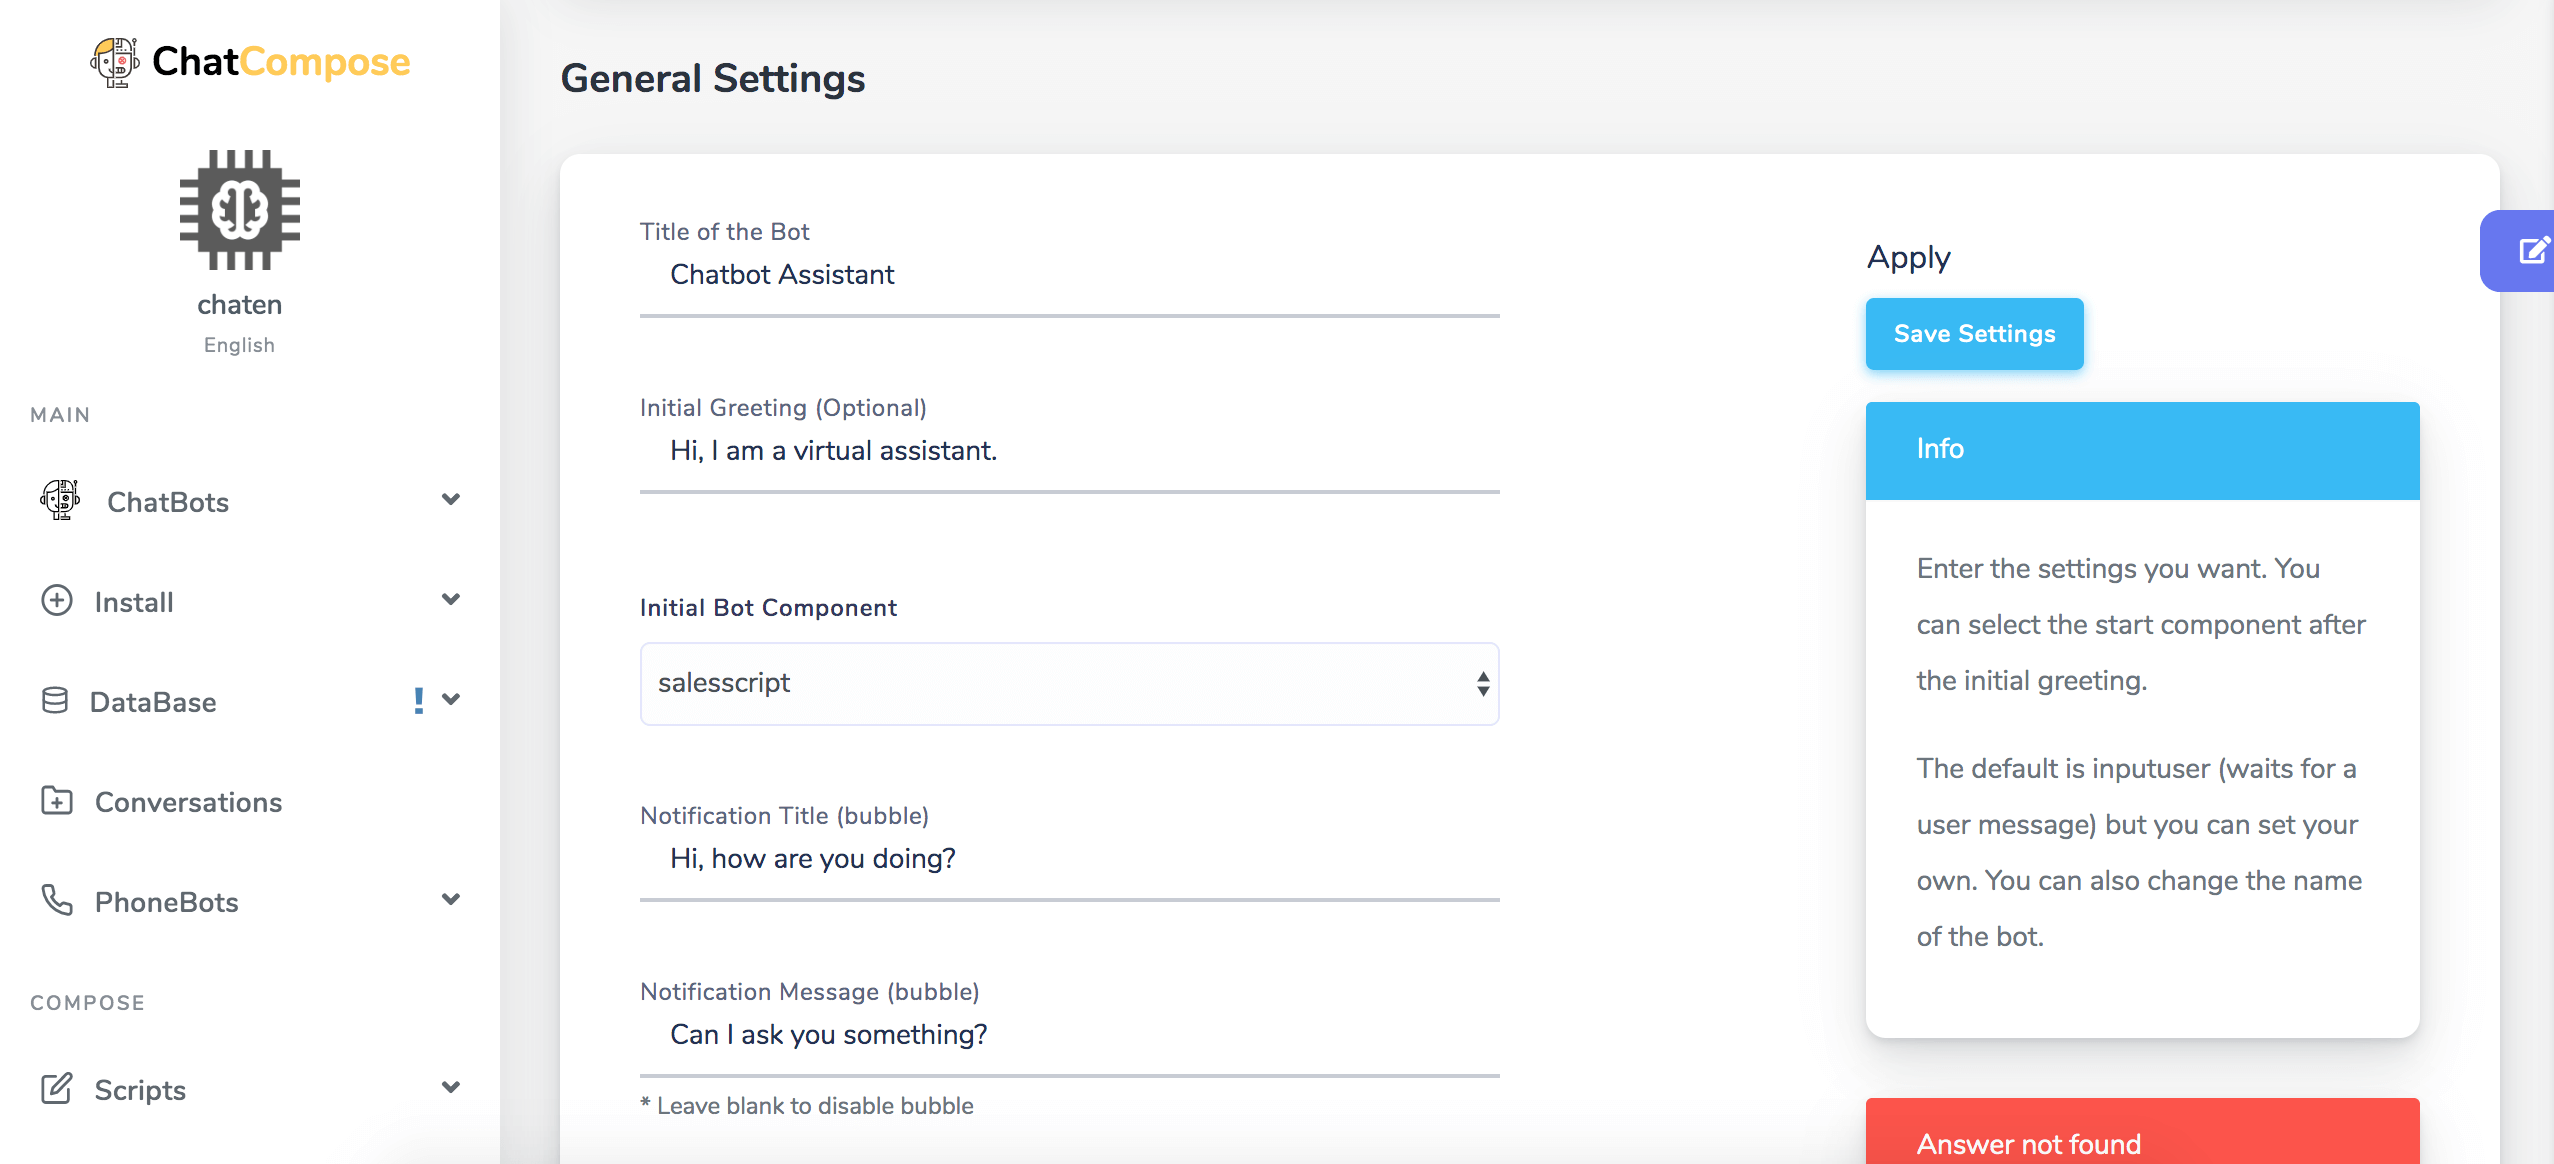
In General Settings you will find a series of parameters that you can set to configure your bot. First, you find the option to add the Bot Title, then the Initial Message (which is optional, because in your script you may have included an initial message).
In Initial Component you select from the drop-down list the script that you want to be loaded in the conversation (of those that you have created and saved). In Notification title (Bubble) you enter the message that you want to be displayed to invite an interaction with the bot. Finally you can set the Duration of the Notification, how long you want the bubble measured in seconds to be visible, and you can check the Speech Recognition box, if you want your chatbot to use the microphone to receive the message from users.
This is how the General Configuration parameters appear on the platform and you can edit them at ease.
Once you have edited each parameter, just click on the Save Settings button. But there are many other elements that you might be wanting to edit and have control and fortunately, ChatCompose allows you to configure and customize your bot much more.
To customize the appearance of your bot, this time in the Settings you have to navigate to Settings>Customisation.
There you can define the main color of your chatbot, as well as the background color, the type of text font and, if you wish, you can add your company logo.

On the other hand, if you have created an avatar especially to give identity to your bot, in this section you can add it.
Personalization is especially valuable for companies and businesses, since they can better integrate the bot with the appearance of the website in terms of color palette, text font, etc.
In that sense, you can create a completely personalized chatbot that corresponds to the appearance of the brand.
There are 3 basic designs for the chatbot. You can see them here:
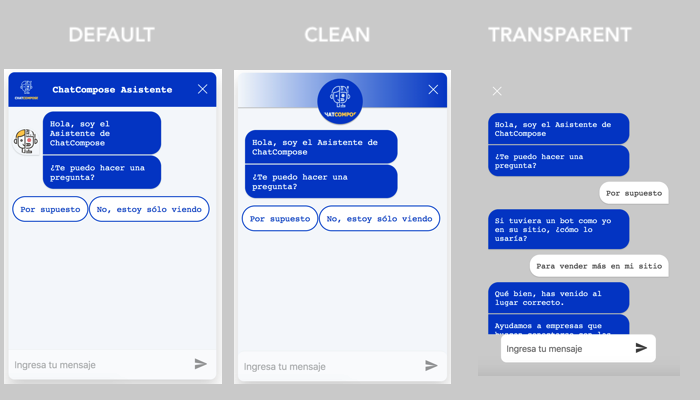
The first one is our default one. I has a title, logo and avatars. The second one is the clean design, it has only the logo on top and no avatars.
The third one is the transparent one, this one will show the conversation bubbles over the background of your page, it has a transparent chat bot with no avatars or logo.
In the case of our example, we can see how the bot looks like by clicking on the chat icon in the lower right. We see how the bot corresponds to the font, the background color, main color and other assigned parameters.
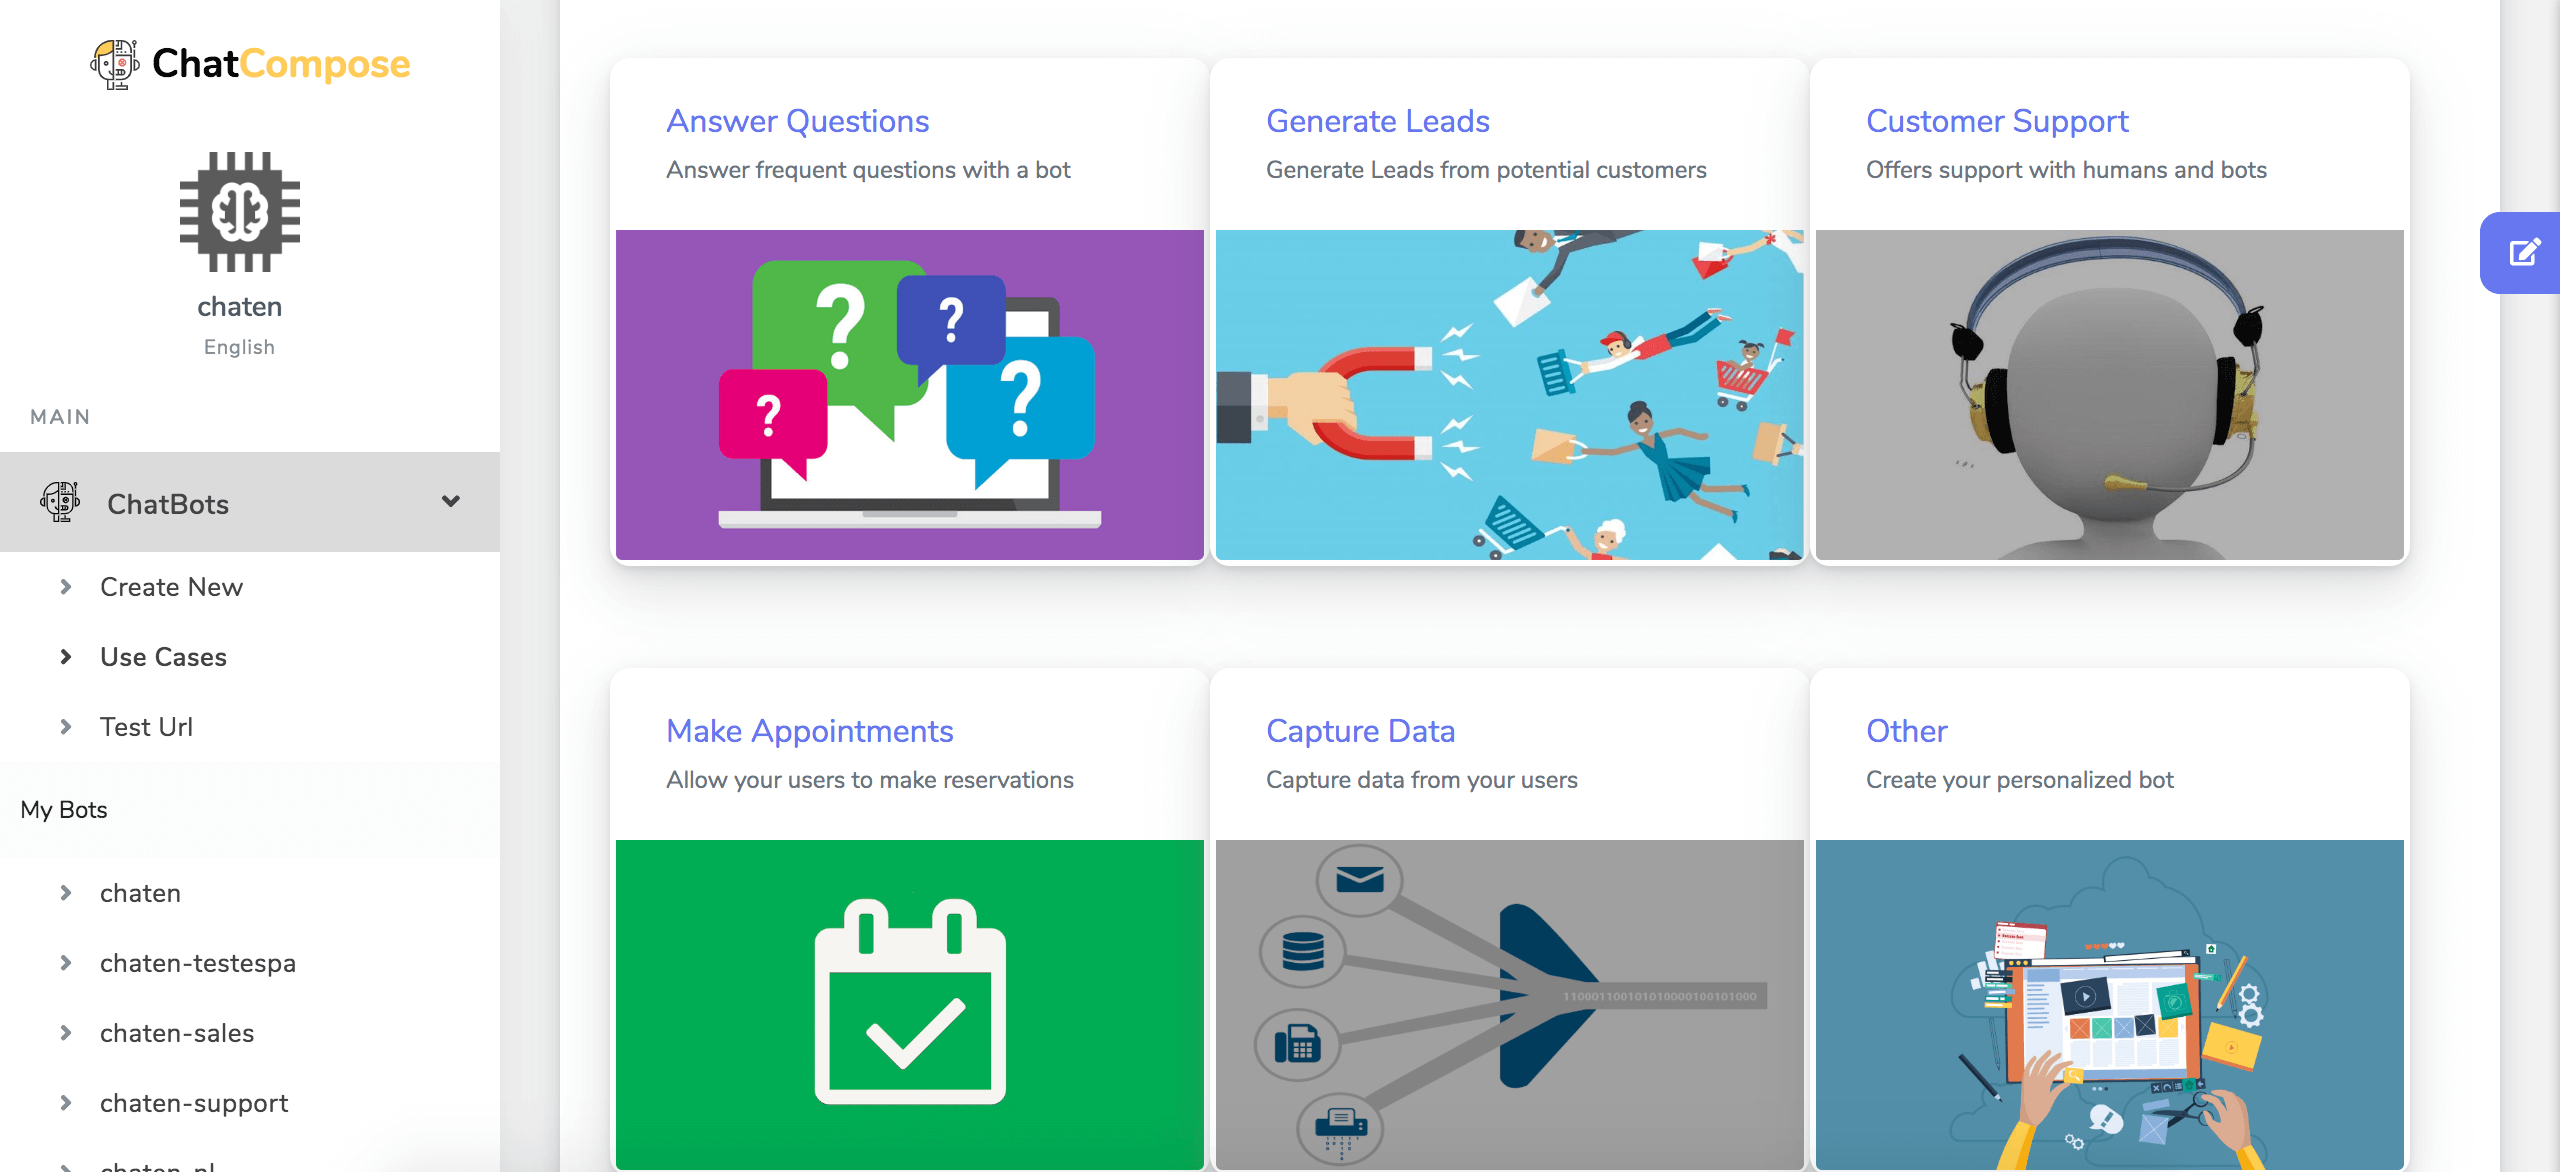
Another substantial part of the ChatBot Configuration is the Assign a Use Case. In ChatCompose you can do it easily and quickly, you just have to navigate to ChatBots> Use Cases.
Then you can assign a use case. Let's review what are the use cases available in ChatCompose:
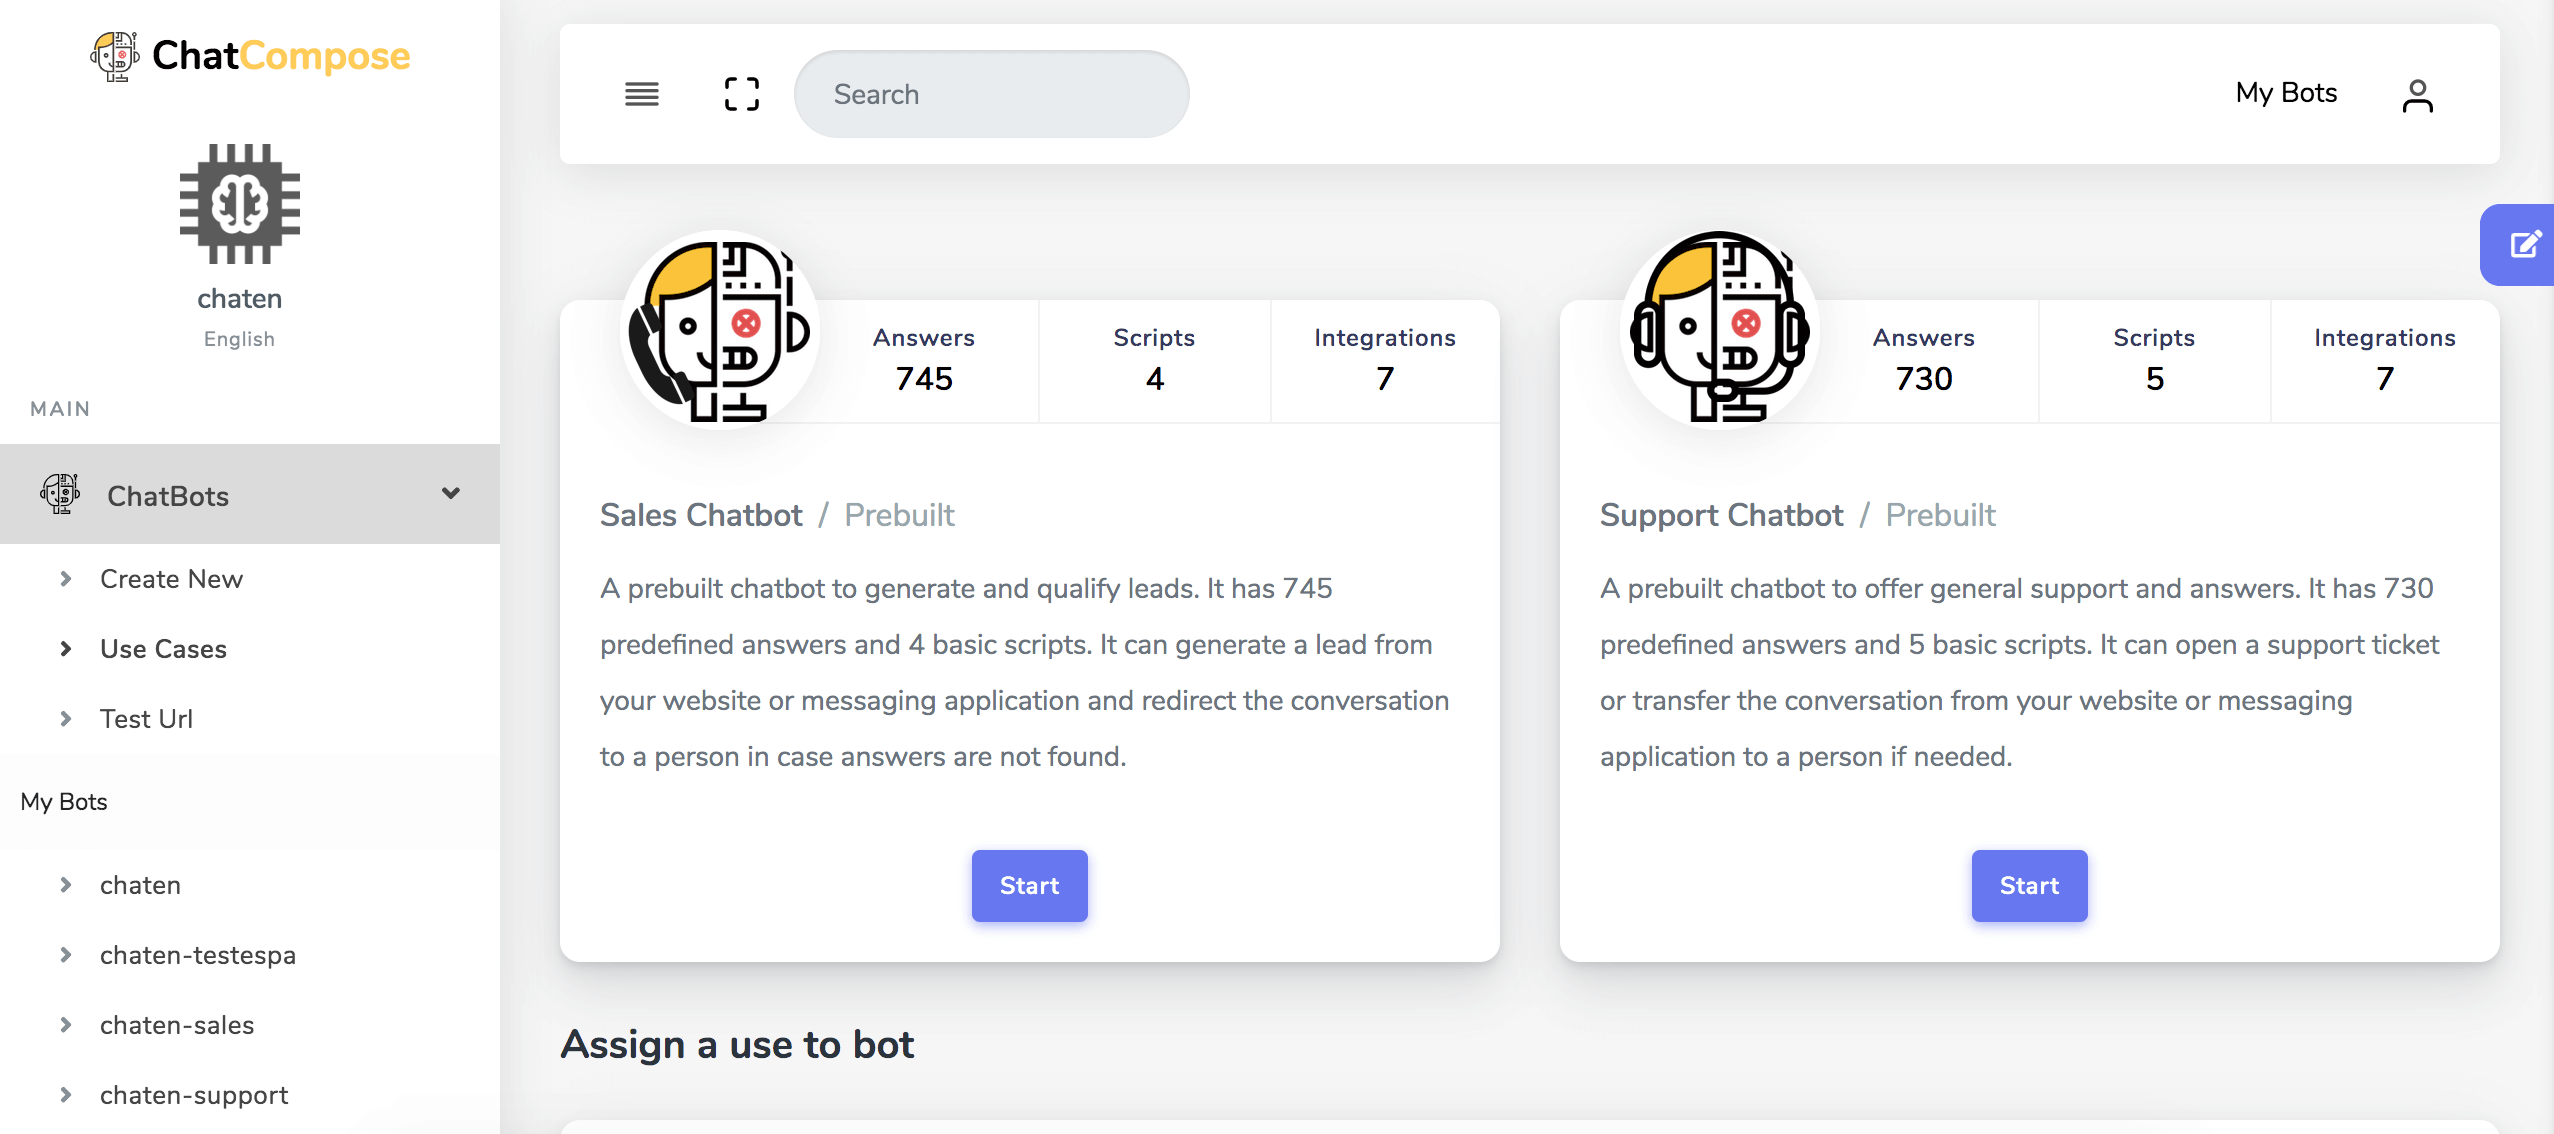
Prebuilt Sales chatbot: You can load a prebuilt chatbot with answers and scripts by filling a form and pressing create. It will delete and rebuild your current configuration, answers and scripts, so have it in mind before trying this option.
Prebuilt Support Chatbot: Same as before it will use a prebuilt chatbot but for support.
A little bit lower in the section you can find specific tasks:
Answer questions: to answer frequently asked questions to users.
Leads generation: to automate and simplify the capture of potential customers.
Offer customer support: your bot can handle this task alone or with the help of a human agent.
Make reservations: allow your users to make their reservations through the bot.
Capture data: automate data capture processes to be part of your database.
Others: If the bot you need does not apply to any of the available cases, you can create a fully customized chatbot.
Offer Callback: this use case works in case you want to generate a script with the sole purpose of offering a return call.
Simple survey: create simple opinion polls to know your customers' preferences.
Query API / DDBB: respond to your customers with database data and external APIs.
You can choose the use case that best suits your needs. Let's see some examples:
Suppose you need a chatbot to answer questions to your customers. In that context, the use case will be Answer Queries. You select that option and you are immediately redirected to the Response Template section. This is where you will train your bot with the answers it should give to your customers. You have two options available as answers: text and component.
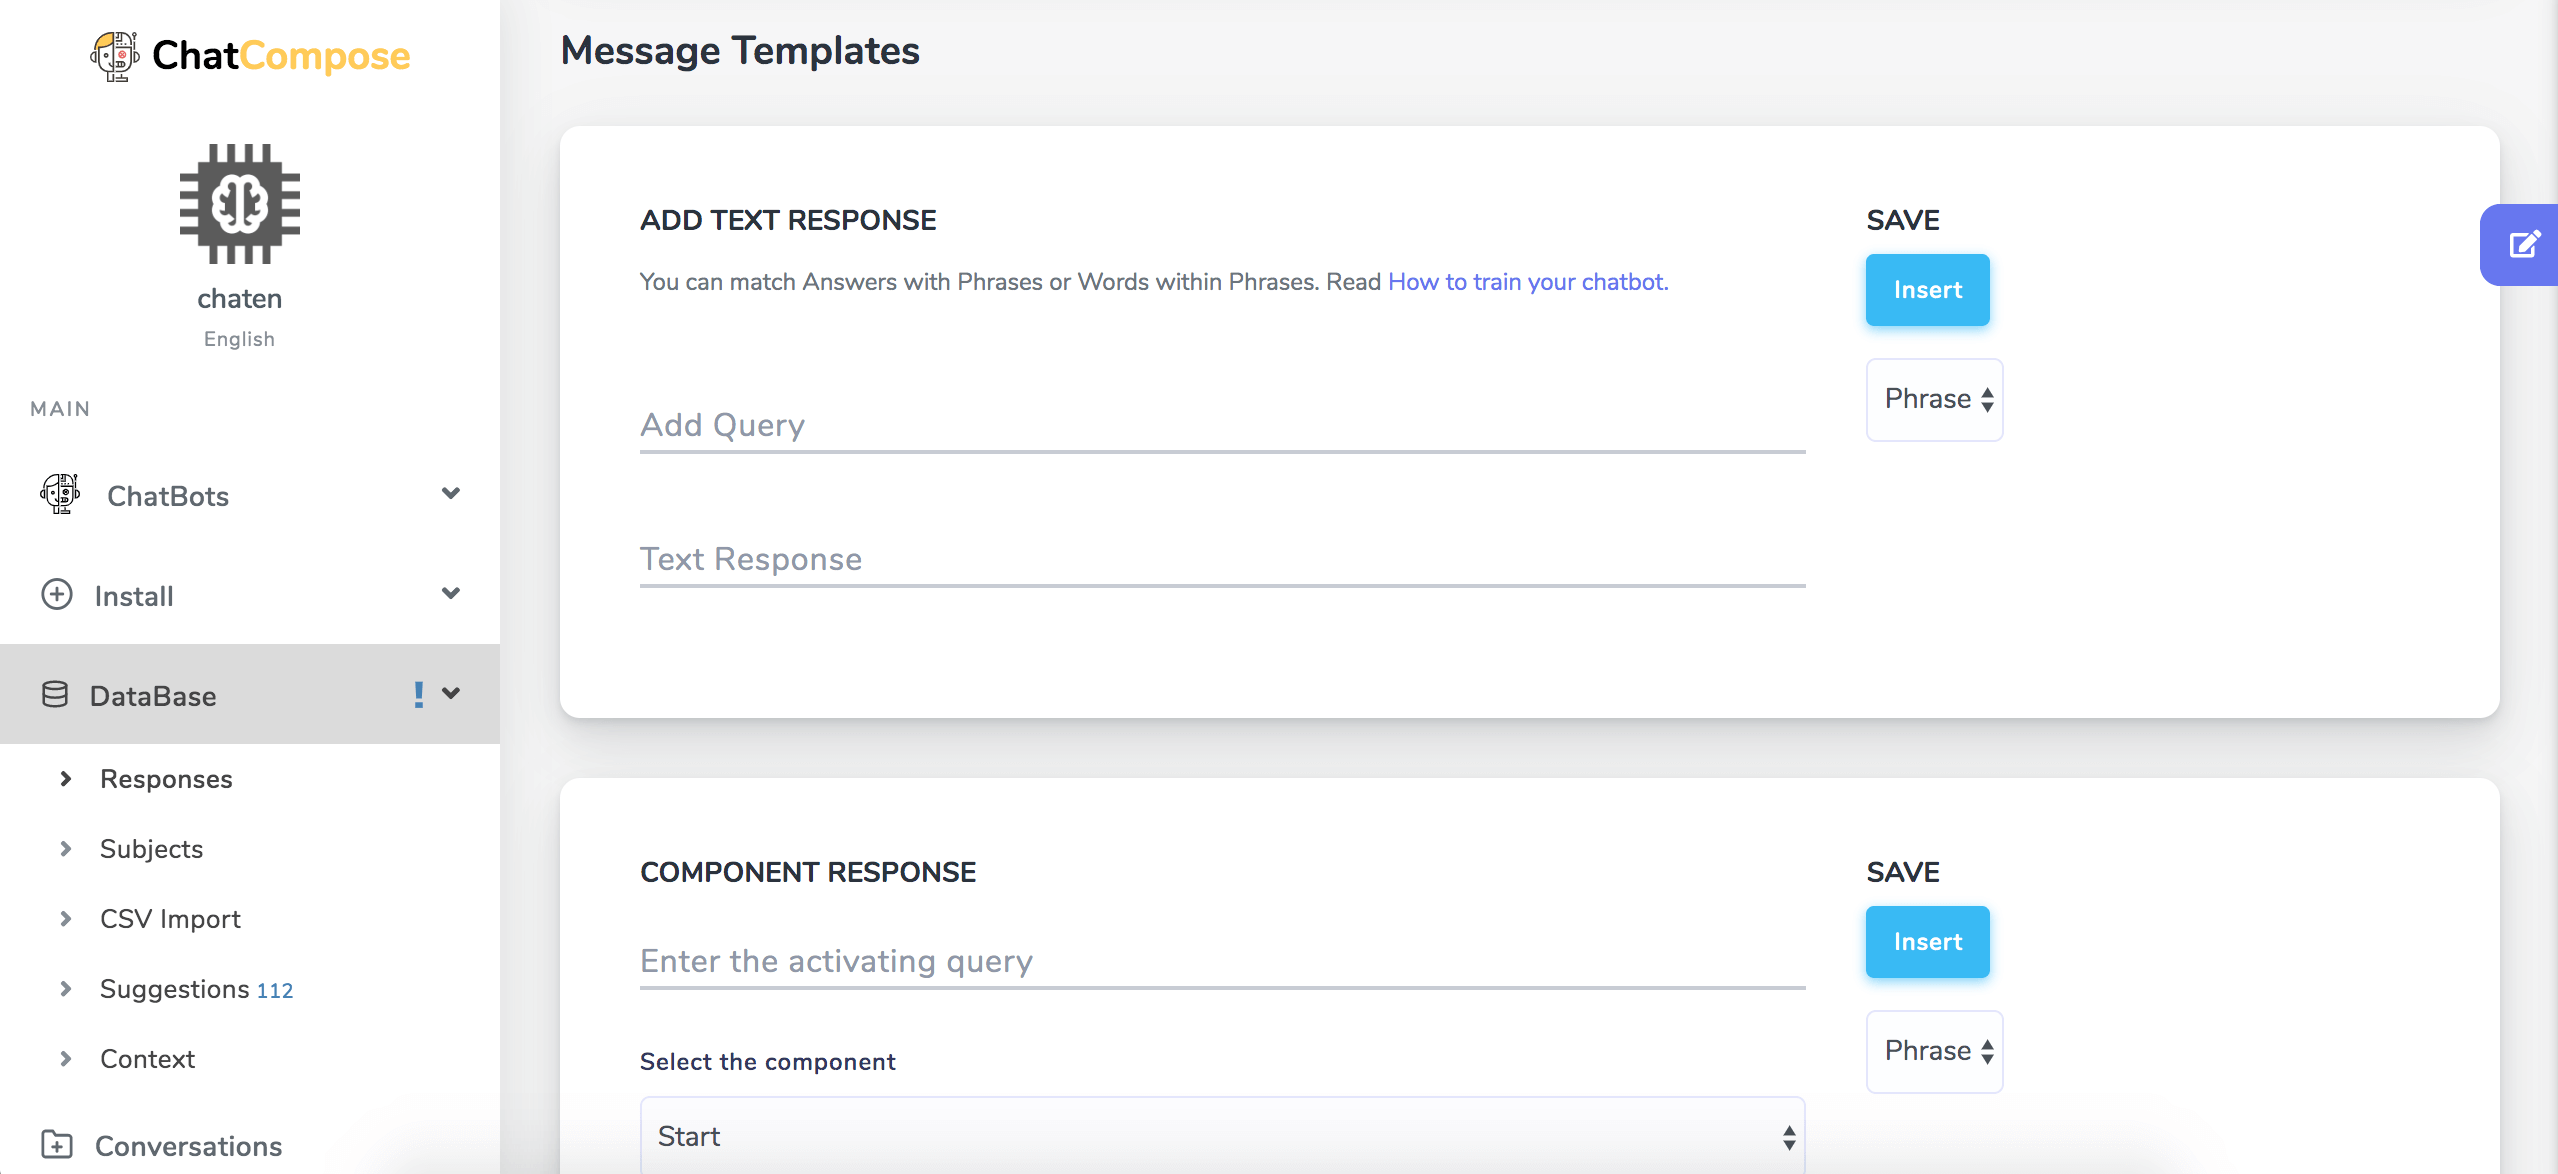
With the text response, you first enter the message to respond, which could be: ‘What is the name of the company’. Then enter the answer that would be the name of your company or website. By clicking on the "Insert" button you can save your answer.
Now your bot is trained to answer that exact question or a variant of it. You can select a specific phrase or word that works as an activator to give the answer.
To respond with components and scripts, you must have created the scripts you want to insert. The components allow you to give answers with interactive content to your users.
You can add video, photos, links, HTML codes and more as a response.
Once you have trained your bot with all the questions and answers you need, you can navigate to ChatBot> Test Url to test each of your answers.
On the other hand, suppose that what you want is to offer your customers the opportunity to make their reservations automatically.
In that context, the use case would be Make Reservations. When you click on this use case, you will immediately be redirected to the Scripts Design Interface, in the ChatCompose script editor.
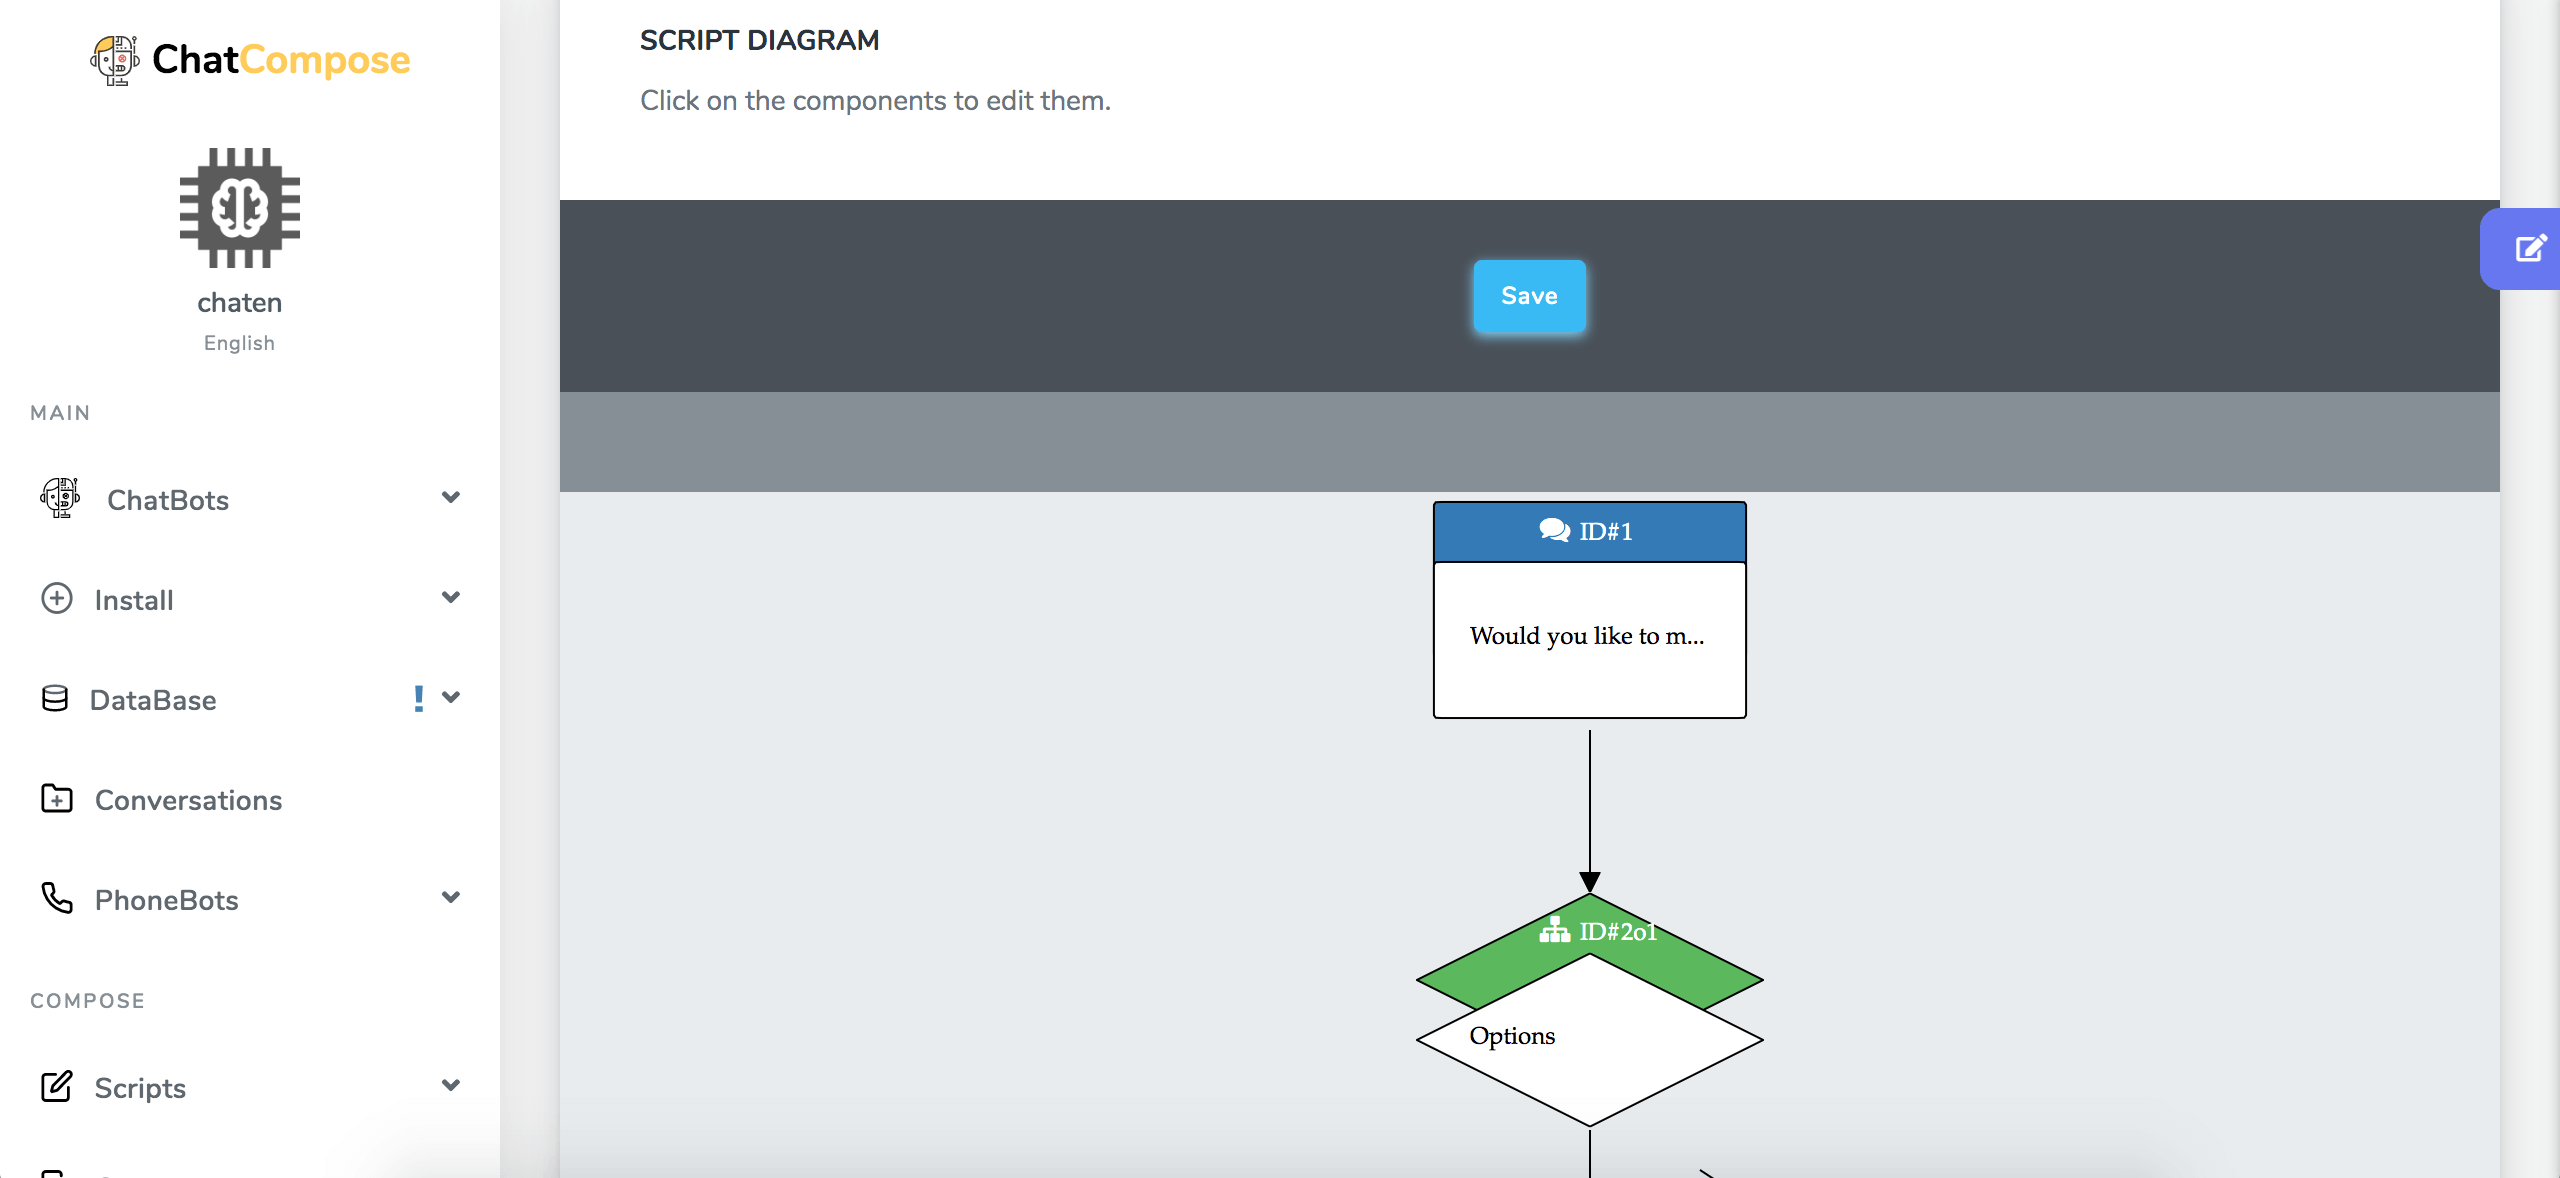
The platform will offer you a standard script template that you will have to edit to make reservations. The script is fully customizable, each box you see in the diagram represents a component, be it message, option, form, etc.
Organize the conversation flow through which you want to direct the customer to make a reservation by adding the necessary components (in Class 3 you will learn how to use the script creation interface in detail).
Once you have designed the script as you want, you just have to click on the Save button, located at the top, give your script a name and press the continue button.
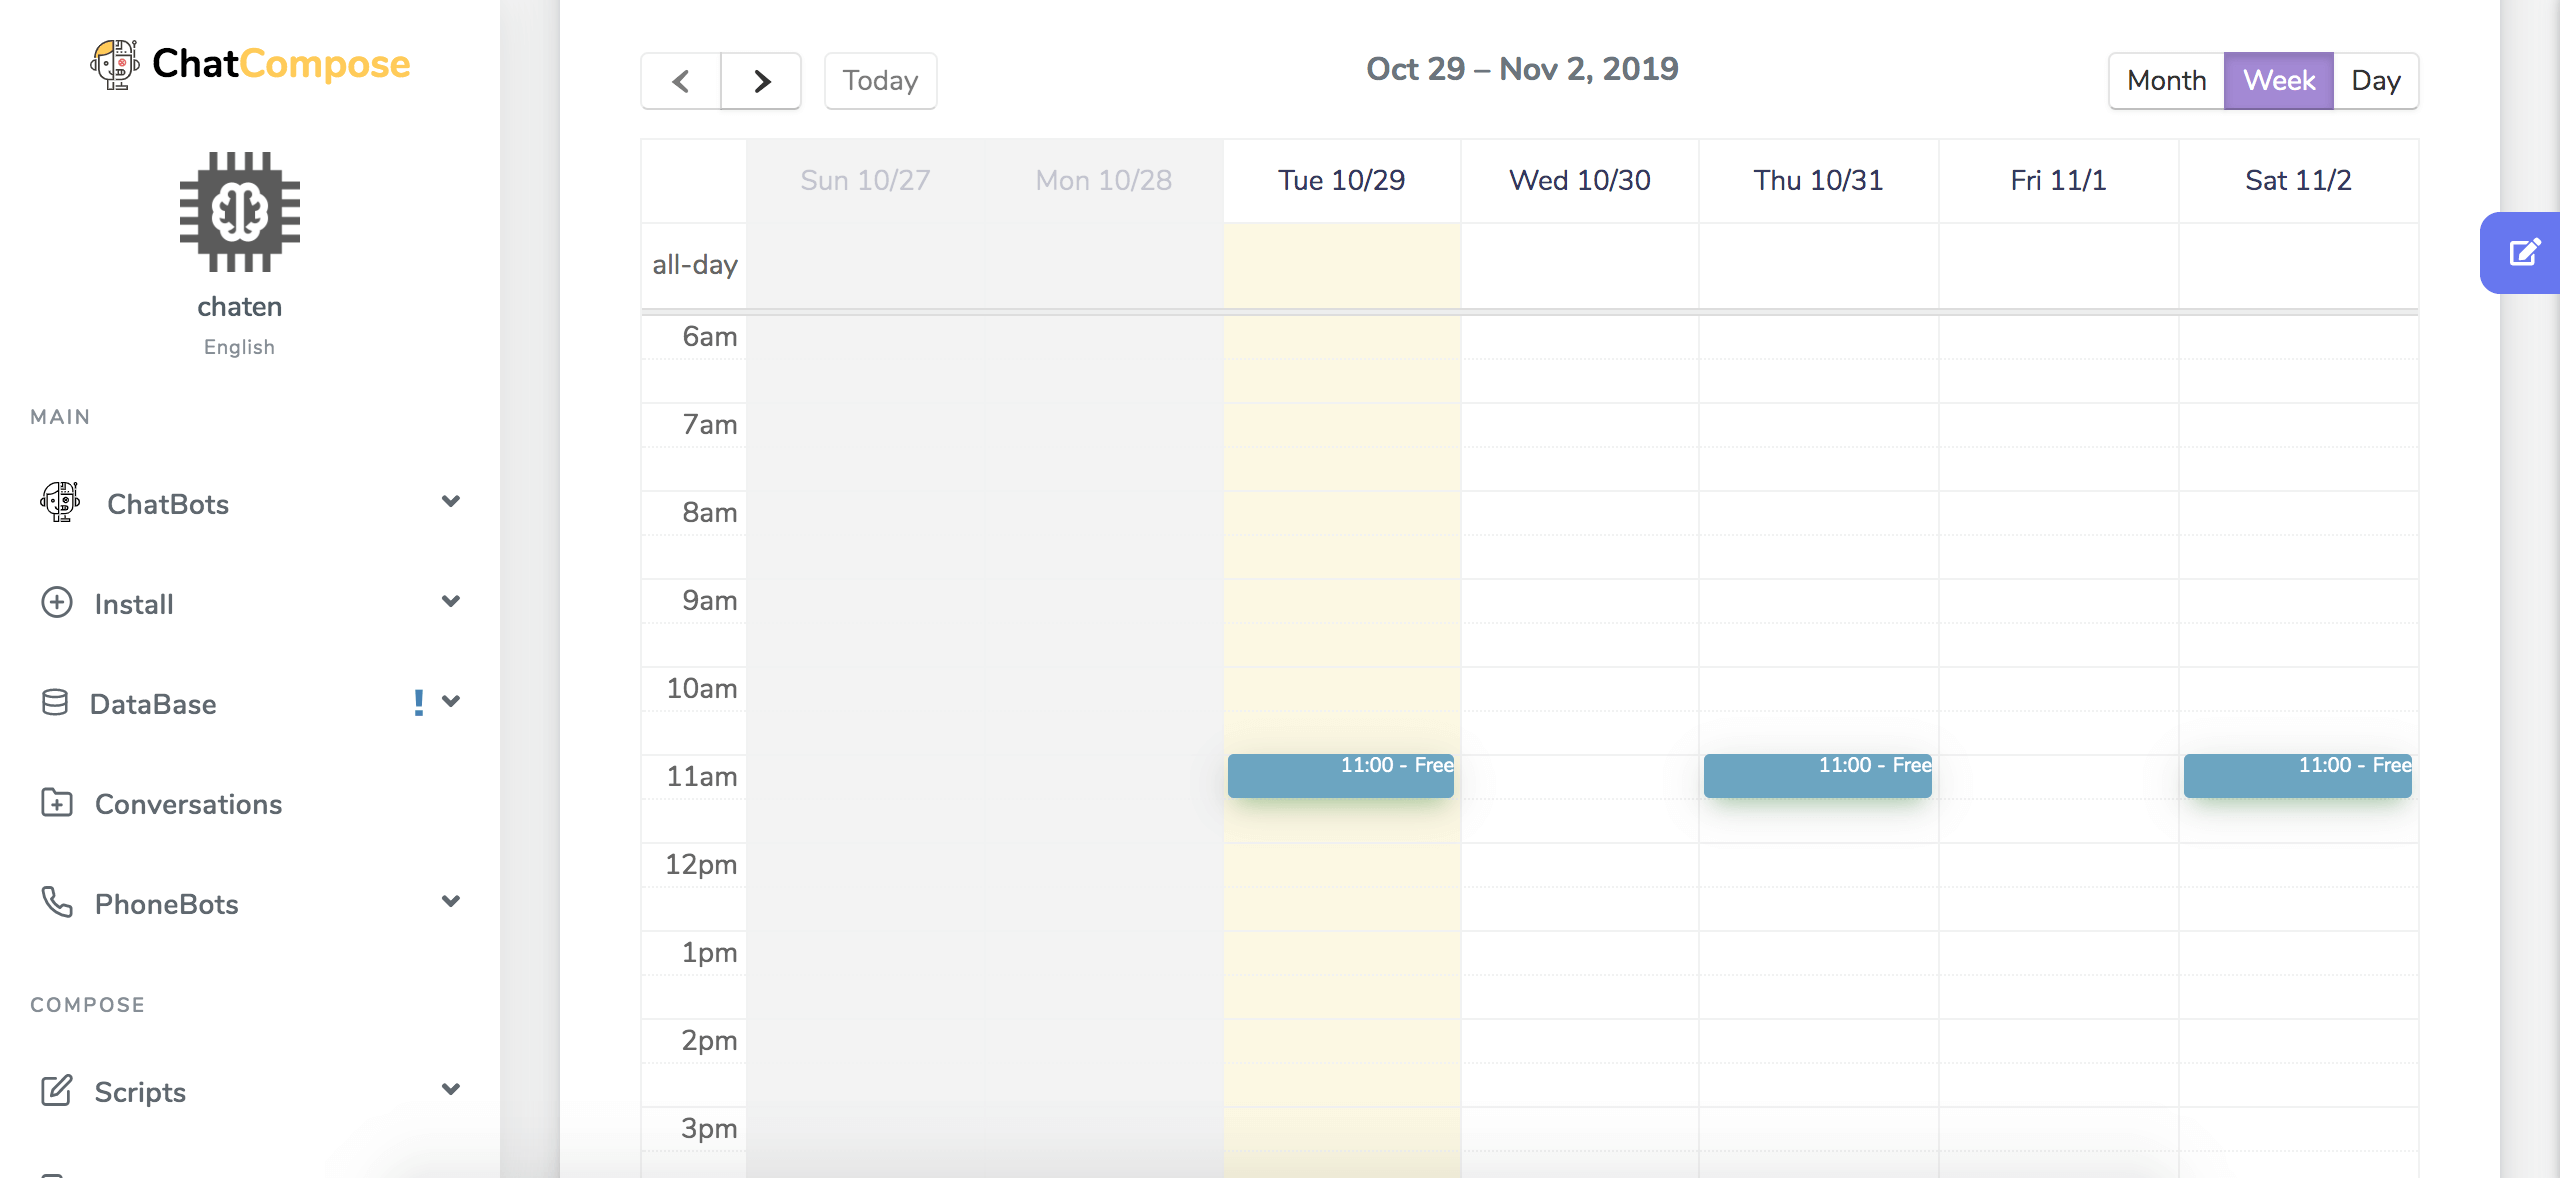
Once this is done, go to the Reservations / Appointments section in the left sidebar, there you can set your availability schedule.
By default, appointments are assigned half an hour at a time, but if you wish you can create longer appointments, simply drag the click for the desired time.
You can test the result after you finish editing your bot in Chatbots> Test Url.
The chatbot will ask the user some basic questions (name, email) and then offer him or her dates in a calendar to make reservations.
Installing or integrating the chatbot you have created is simple. Just go to the Install section in the left sidebar and a menu of options will be displayed:
On the Web you have three options: Web Installation, where you are provided with a couple of lines of installation code, WordPress Installation to install through a plugin, and Joomla Installation with the help of an extension for Joomla.
If you want to do it with the code, you must follow these steps. Select and copy the pair of lines of code very carefully.
You must paste it in the code of your website, before the closing of the "body" or "head" tag.
If you don't want to use the plugin, you can do it directly within your WordPress template, step that can be easier for many.
You must go to your WordPress page and in the left bar look for the “Appearance” option a sub menu will be displayed that will take you to the “Editor” option, you will click on that option. It will open the editor page.
You will move to the right side, where a column with the name of "Theme files" will allow you to reach the "header.php" file. When you find it, click it.
When the page opens you will go to the end of it where you will find something like this:
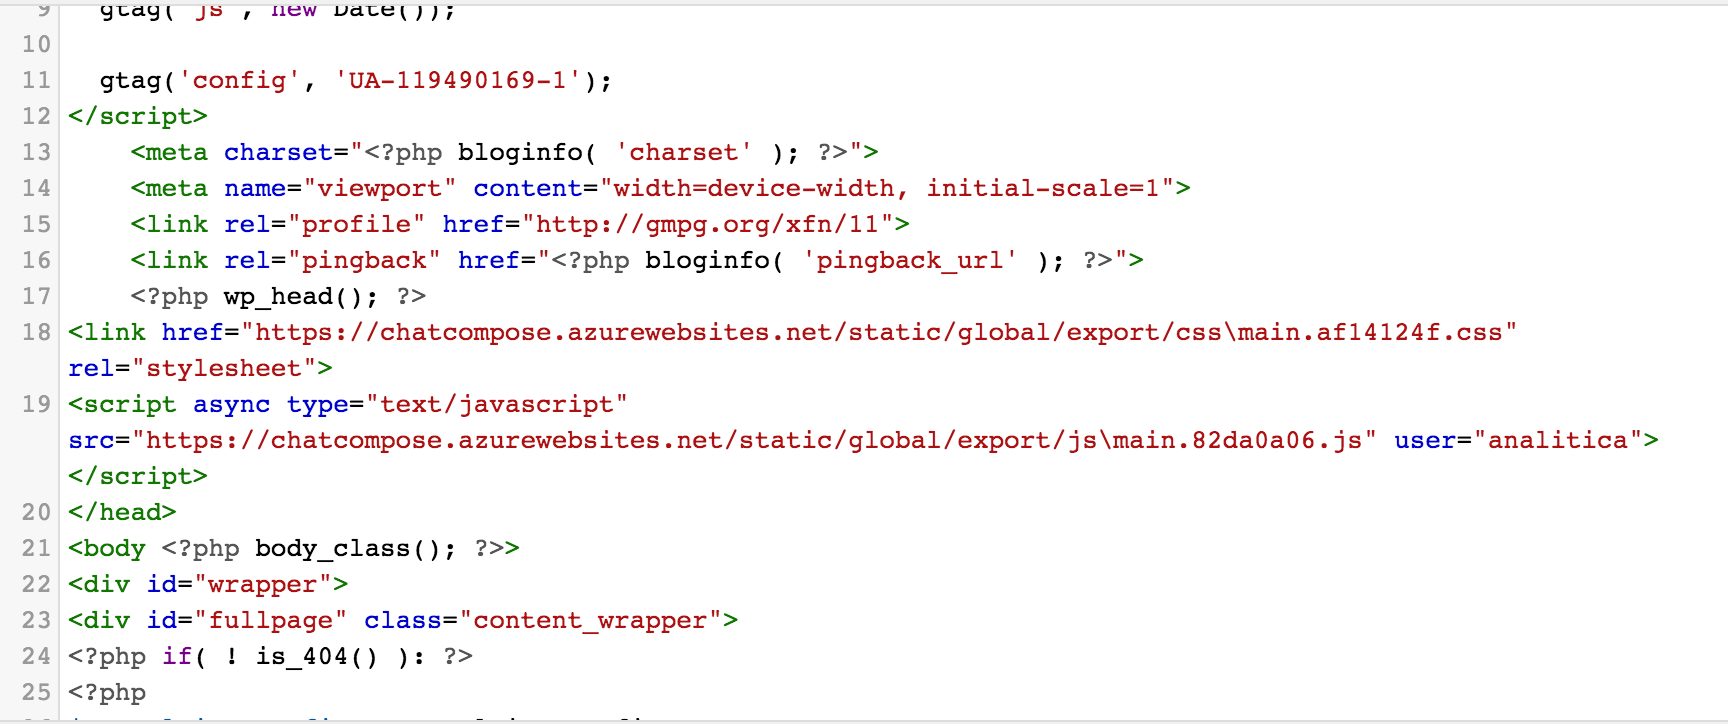
Copy and paste your code there.
After confirming your changes, you click on the "Update File" button.
The chatbot should be now visible on your wordpress site.
The integrations available in ChatCompose are:
You can select the one you like and you will have a step-by-step integration guide to install in ChatCompose. For example, if you want to integrate your chatbot with another platform, even if it is CRM, you will have to perform API queries to your bot.
The API accepts the following as POST parameters ('Content-Type' == 'application / json'):
           {
              "user":"youruser",
              "lang":"EN",
              "sessionid":"unique session id", // (optional)
              "message":"the message to be answered"
            }
The API will return a JSON object with the fields:
1. response (bot response and 0-1 confidence)
2. meta (NLP metadata)
3. alt (alternative answers)
You can also integrate with an API with voice response with the following POST parameters.
            {
              "user":"youruser",
              "lang":"EN",
              "fileurl":"https://www.....", // optional
              "message":"a Base64 string"
            }
The integration with APIs can be the most complex to understand if you are not very familiar with computers and programming languages. However, integrations with messaging apps are much simpler, because you just have to know how to locate or generate the TOKEN to start the integration and the process is almost automatic.
After following these steps, our ChatBot is now ready, installed and configured to work on your side. We also recommend you to review the rest of our tutorials so you can learn the rest of the tricks that will allow you to better manage your ChatBot.